I couldn’t believe it when I got the email from Varjo: the company wanted me to review the Varjo Aero! I was honored and all in. A bit nervous as well as this is a big responsibility.
Before we proceed, the disclaimer.
The Varjo Aero was sent to me, for free, by Varjo. The company did not impose any rules, catches, or tradeoffs as they offered me this chance. They did not ask me to say anything specific or to do anything specific regarding my testing. The only thing Varjo asked me to do was to review the Aero as I usually do with all the products I cover: from the perspective of a simmer, with a neutral stance, as fair and honestly as possible.
There are no strings attached, no bias, and no skewed views whatsoever. You can expect me to speak my mind on the Varjo Aero exactly as I see it. No more, no less.
As usual.
The company
From the beginning, Varjo always placed itself in the professional market with very interesting solutions.
The company has been more business-to-business centered, working with other companies and the military. As such, the prices of the products have always been quite high and most of the products have been inaccessible to the consumer market and reserved to professionals.
But that has been changing lately. The company now distinguishes its clients between companies/professionals and private/consumers and some of the headsets, such as the Varjo Aero, have been made available to the consumer market as well.
The Varjo Aero
Varjo describes the Aero as “Designed for professional VR. Now available for all”, which illustrates what I mentioned in the previous section. The company is building on its professional experience and products to start launching itself into the consumer market as well.
The Aero comes with dual mini-LED LCDs capable of a 2880x2720 pixel resolution per eye at a 90 MHz refresh rate.
It supports an Interpupillary Distance (IPD) between 57–73mm (2.24–2.87in) and that adjustment is done automatically by the headset, with the help of a motor.
Yes, automatically. The Varjo has eye-tracking capability. The system scans your eyes at 200 Hz and you can set it up so that it checks your pupils each time you put the headset on or you can start the process yourself via the on-screen menu (again, I’ll cover this later).
The headset weighs 487g (without the headstrap). I weighed it using a kitchen scale and I got a total of 740g (1.63 lbs), so it’s not light, but I didn’t feel any major discomfort using it either, possibly thanks to the strap system, which is very nice and highly adjustable.
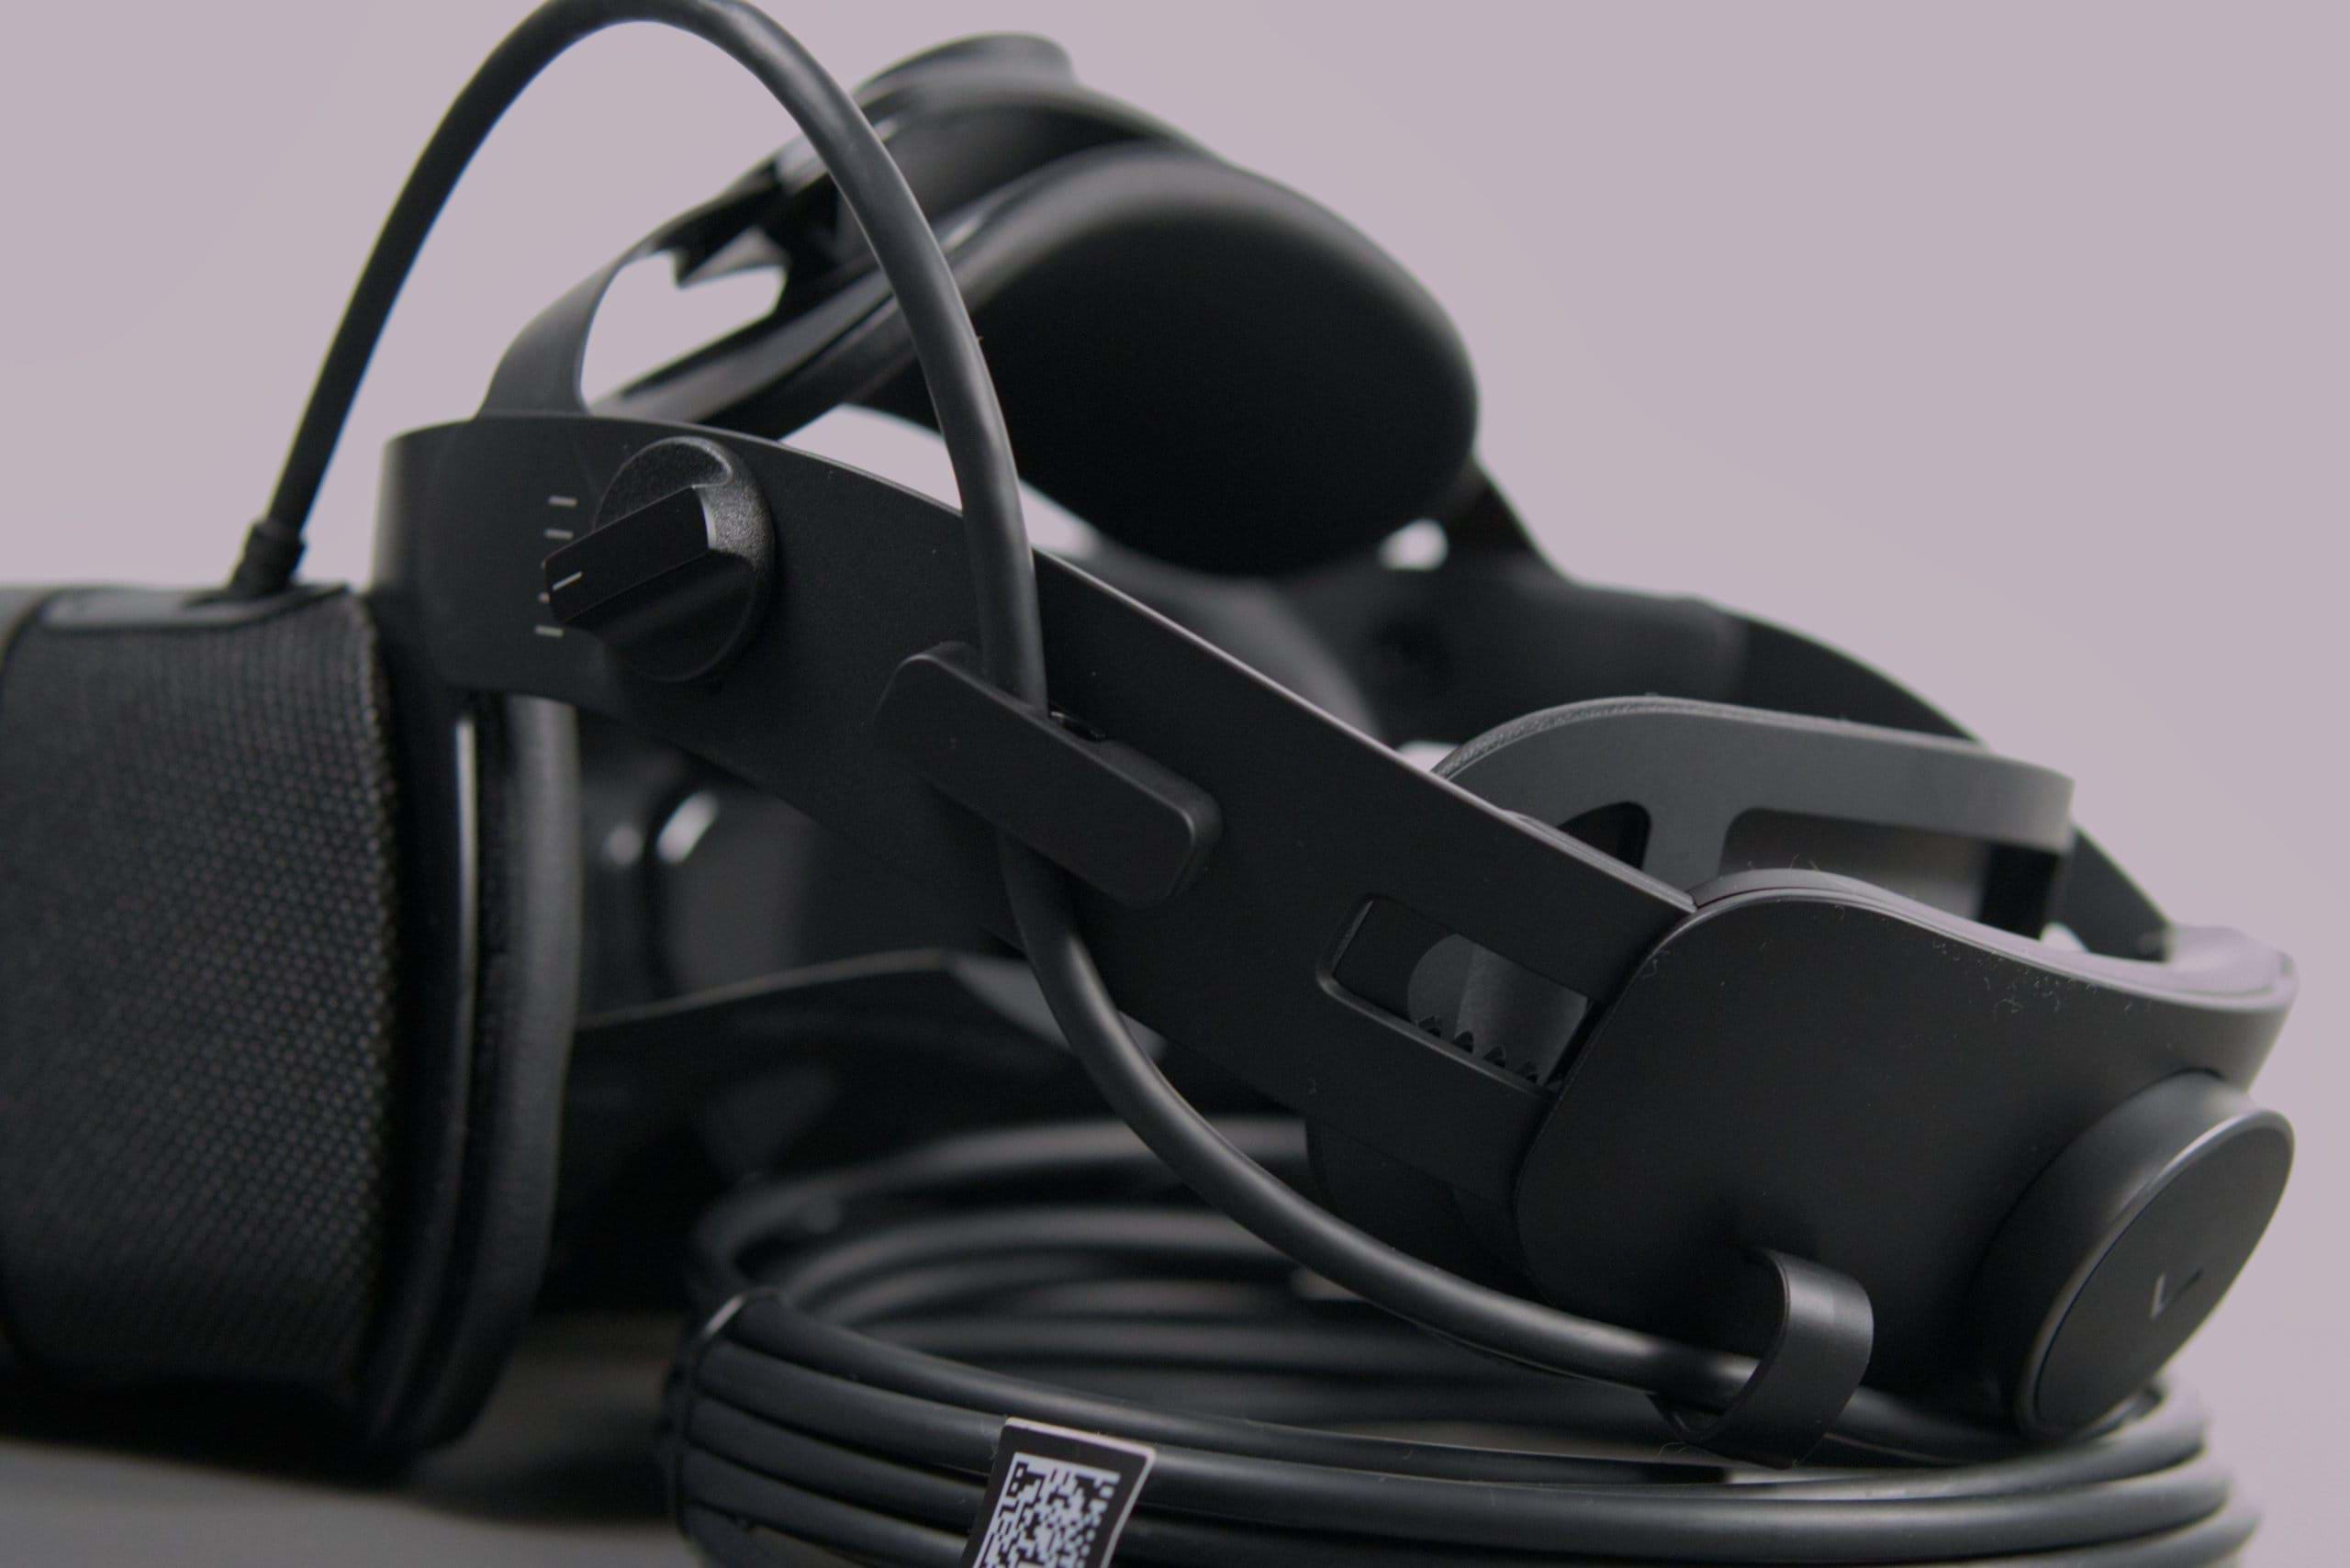
Connection to your PC is done through DisplayPort and USB-A 3.0, so you will need to make sure you have one of each available.
Varjo also added active cooling (meaning: fans) to it to keep the unit’s temperature low. I don’t remember listening to it working but, honestly, I spent most of the time with the earbuds (more on audio later in the article), which, of course, cuts down any external noise.
The headset supports OpenVR and OpenXR, which is quite helpful in some cases (as you’ll find out later in this review).
Base stations required
Here’s something that some people may not be too happy about. The Varjo Aero does not offer inside-out tracking, like the Reverb G2, for example. I got rid of the base stations when I upgraded to the Reverb G2 only to see myself having to purchase new base stations or use the old HTC ones.
Nowadays there are 2 versions of base stations (or lighthouses, whatever you prefer to call them). Steam VR 1.0 and Steam VR 2.0. The HTC Vive ones use Steam VR 1.0 and my contact at Varjo told me they recommend the Steam VR 2.0 ones. This means I would have to get the Valve Index® Base Station, for example.
Fortunately, I have access to the old HTC Vive stations, and, keeping my fingers crossed, I gave them a shot.
They work flawlessly.
Previous owners of the HTC Vive headset, if you still have the bases lying around and you are looking at purchasing a Varjo Aero, you’re in luck, as you will be able to use them with the Varjo Aero.
My settings
Of course, our hardware matters a lot, so, for your reference, here is my current system – at least the bits that I find relevant. Note that none is overclocked or changed. I always use everything “stock”.
- Intel Core i9 10900F @ 2.80Mhz (10 cores, 20 logical processors)
- 32GB of DDR4 RAM @ 3600Mhz
- Nvidia GeForce RTX 3080 by Palit
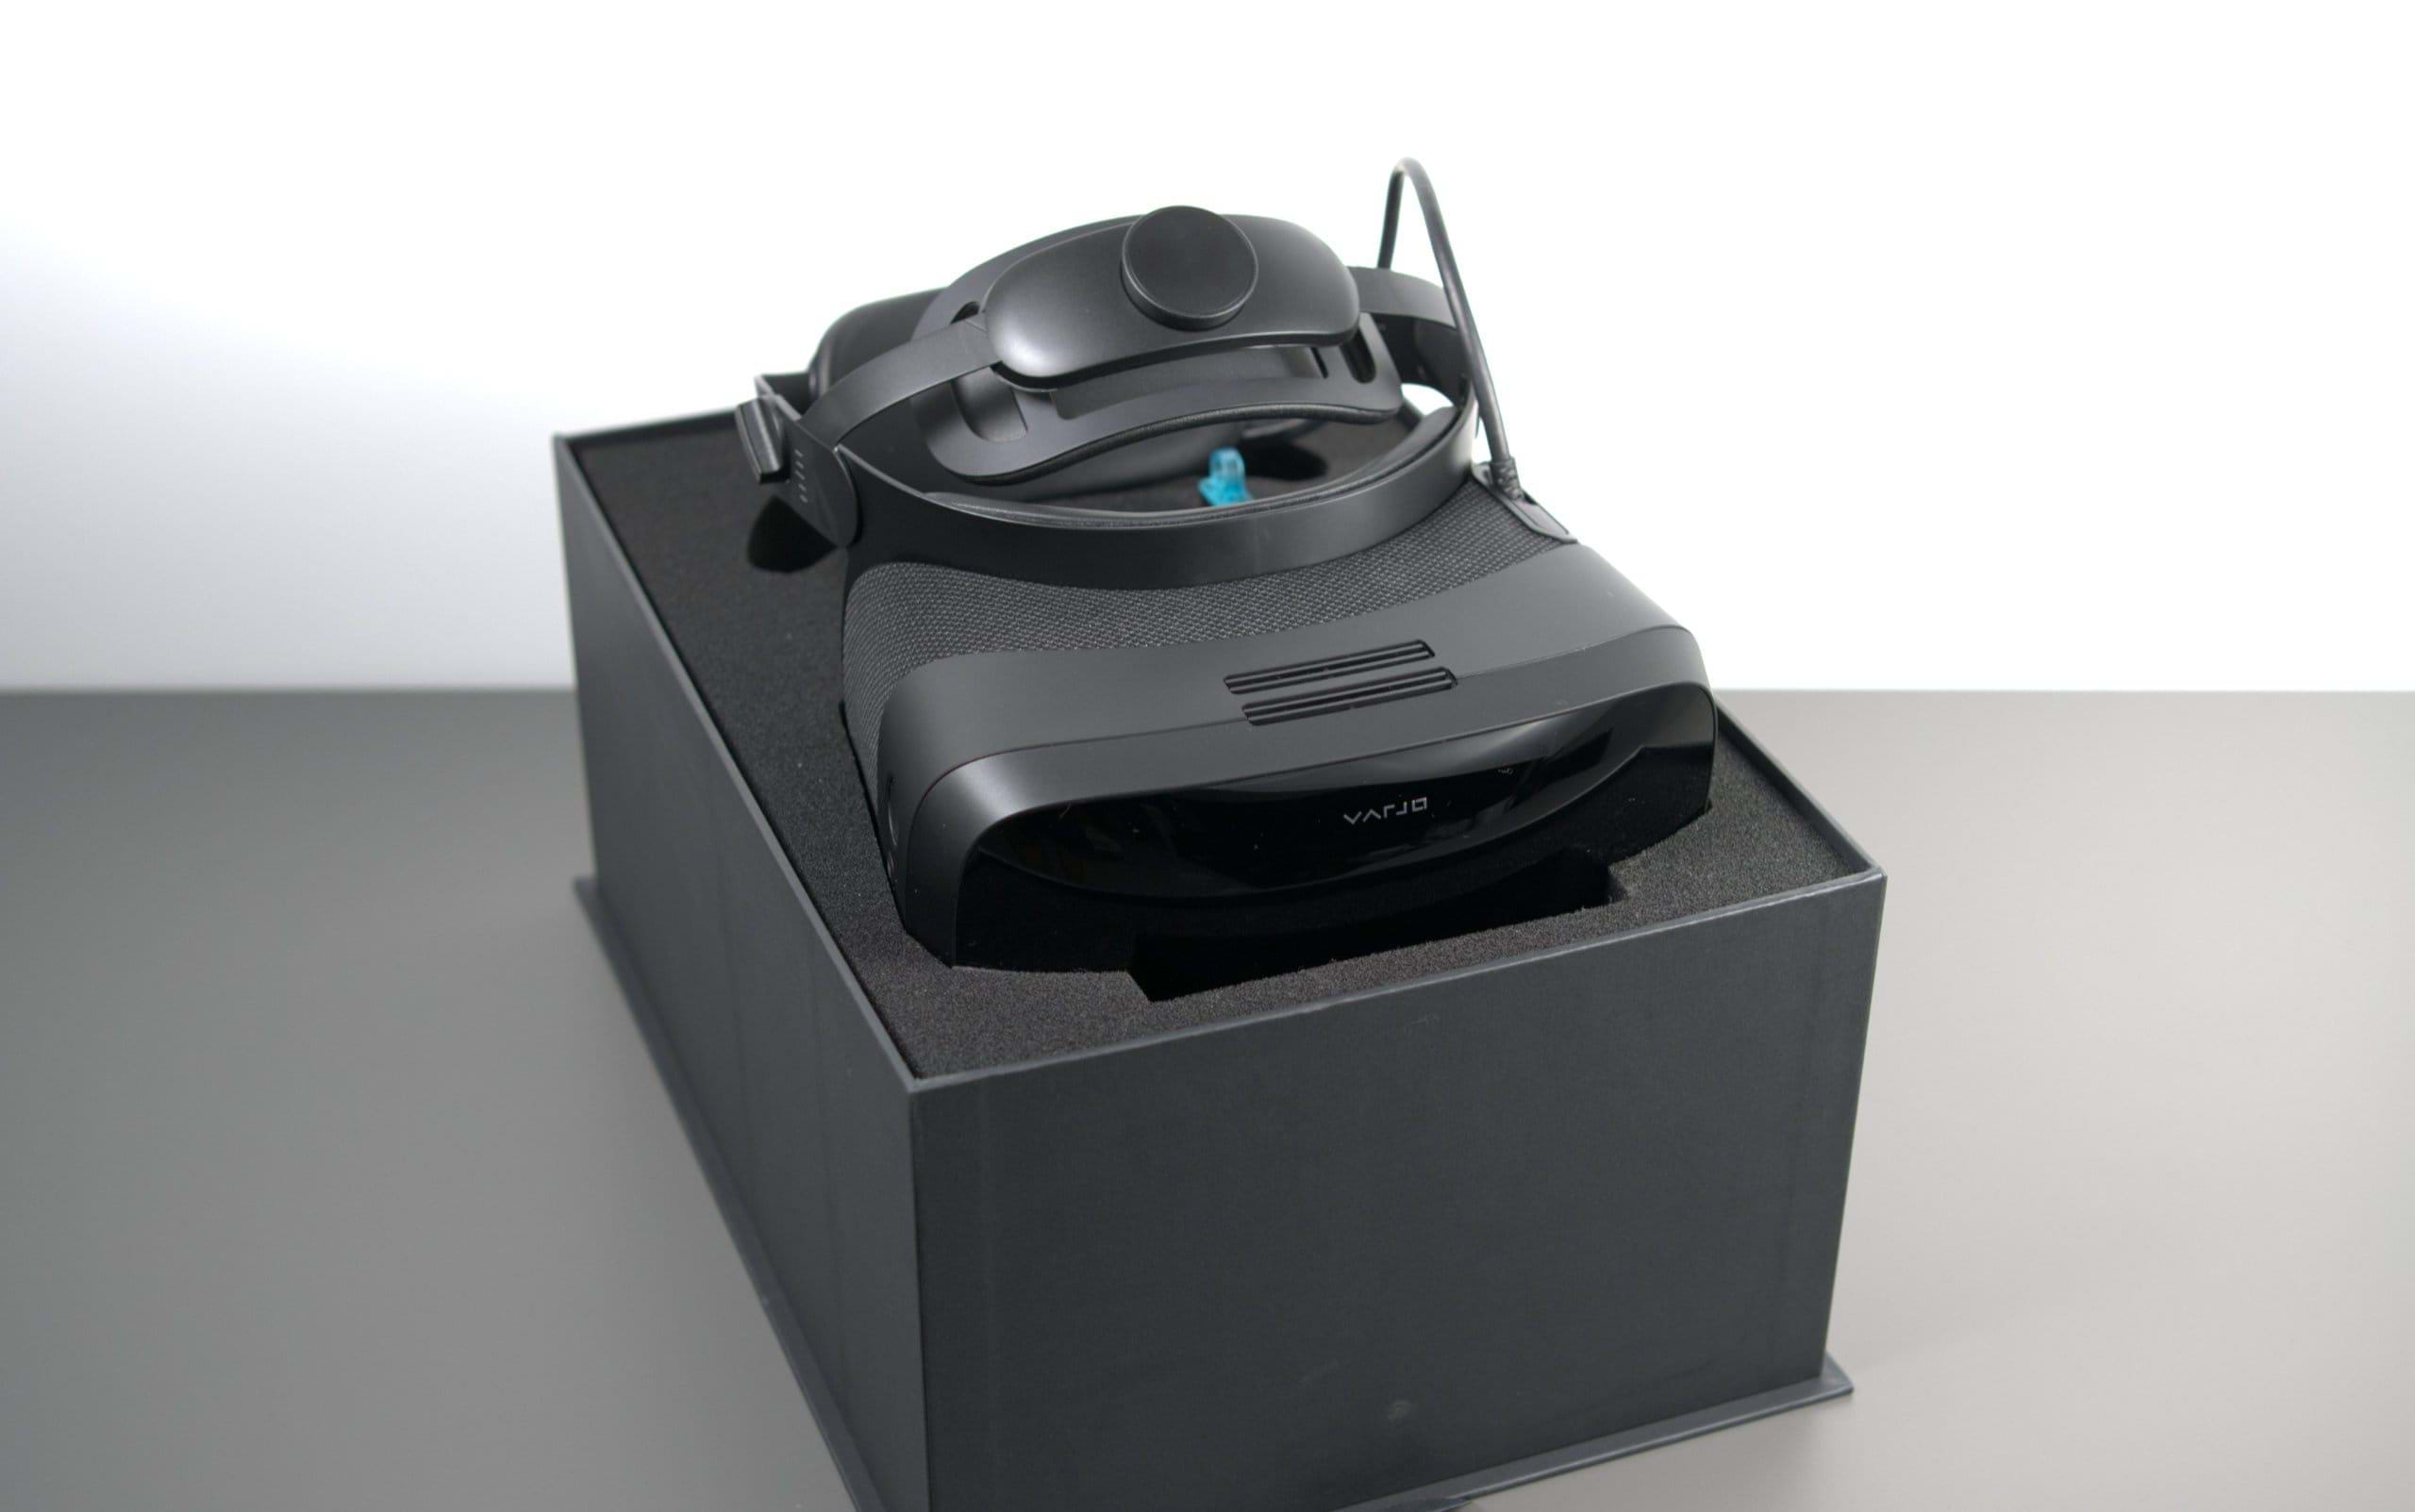
What’s in the box
A rather nice box, if I may add. And yes, I do pay attention to how products are packaged.
The nice, simple cardboard box is very sturdy and it came inside yet another cardboard box. Between both boxes, there was styrofoam.
Inside the main box (the one you can see in the pics) the Varjo Aero was protected by foam. Honestly, I would find it very, very hard for something to happen to the product while in transit. At least by usual means (i.e. not being blown up by explosives or smashed by a hydraulic press).
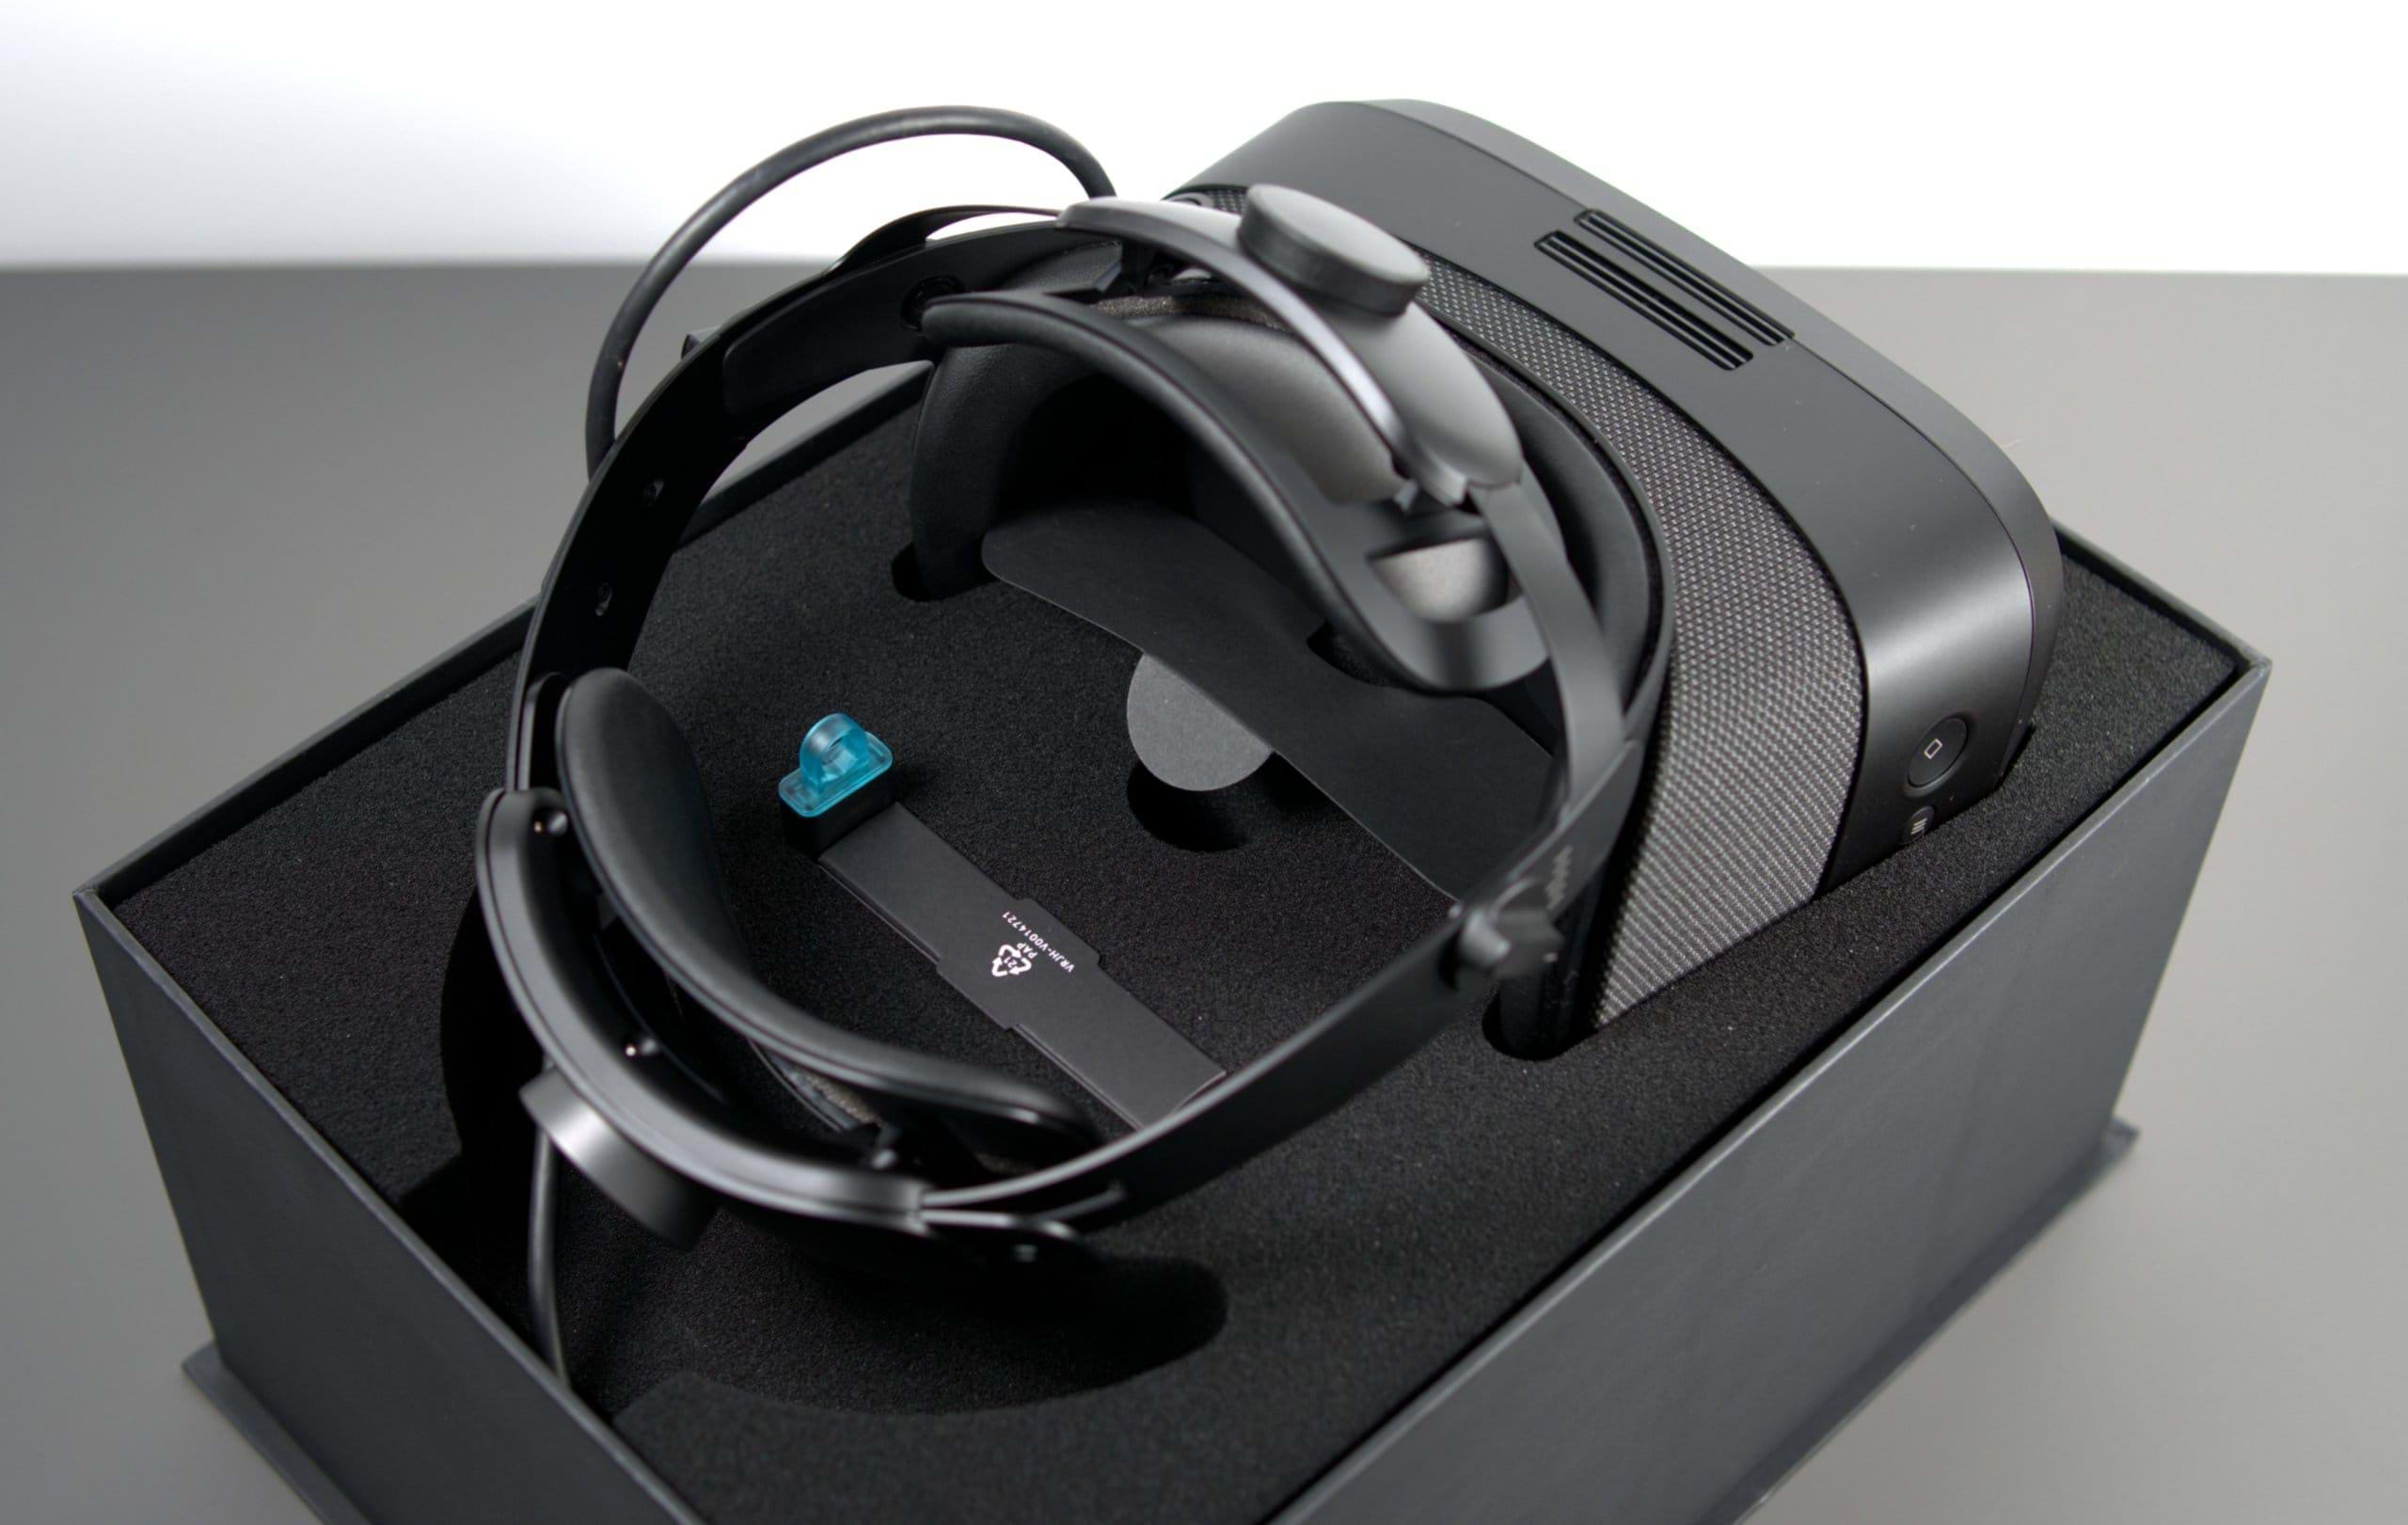
Inside the box you will find the Varjo Aero, of course, with the main cable attached, the power unit, 6 types of plugs, so you can use it in several countries, the user guide, a cloth so that you can clean the headset, earbuds (we’ll get to that) and a USB pen.
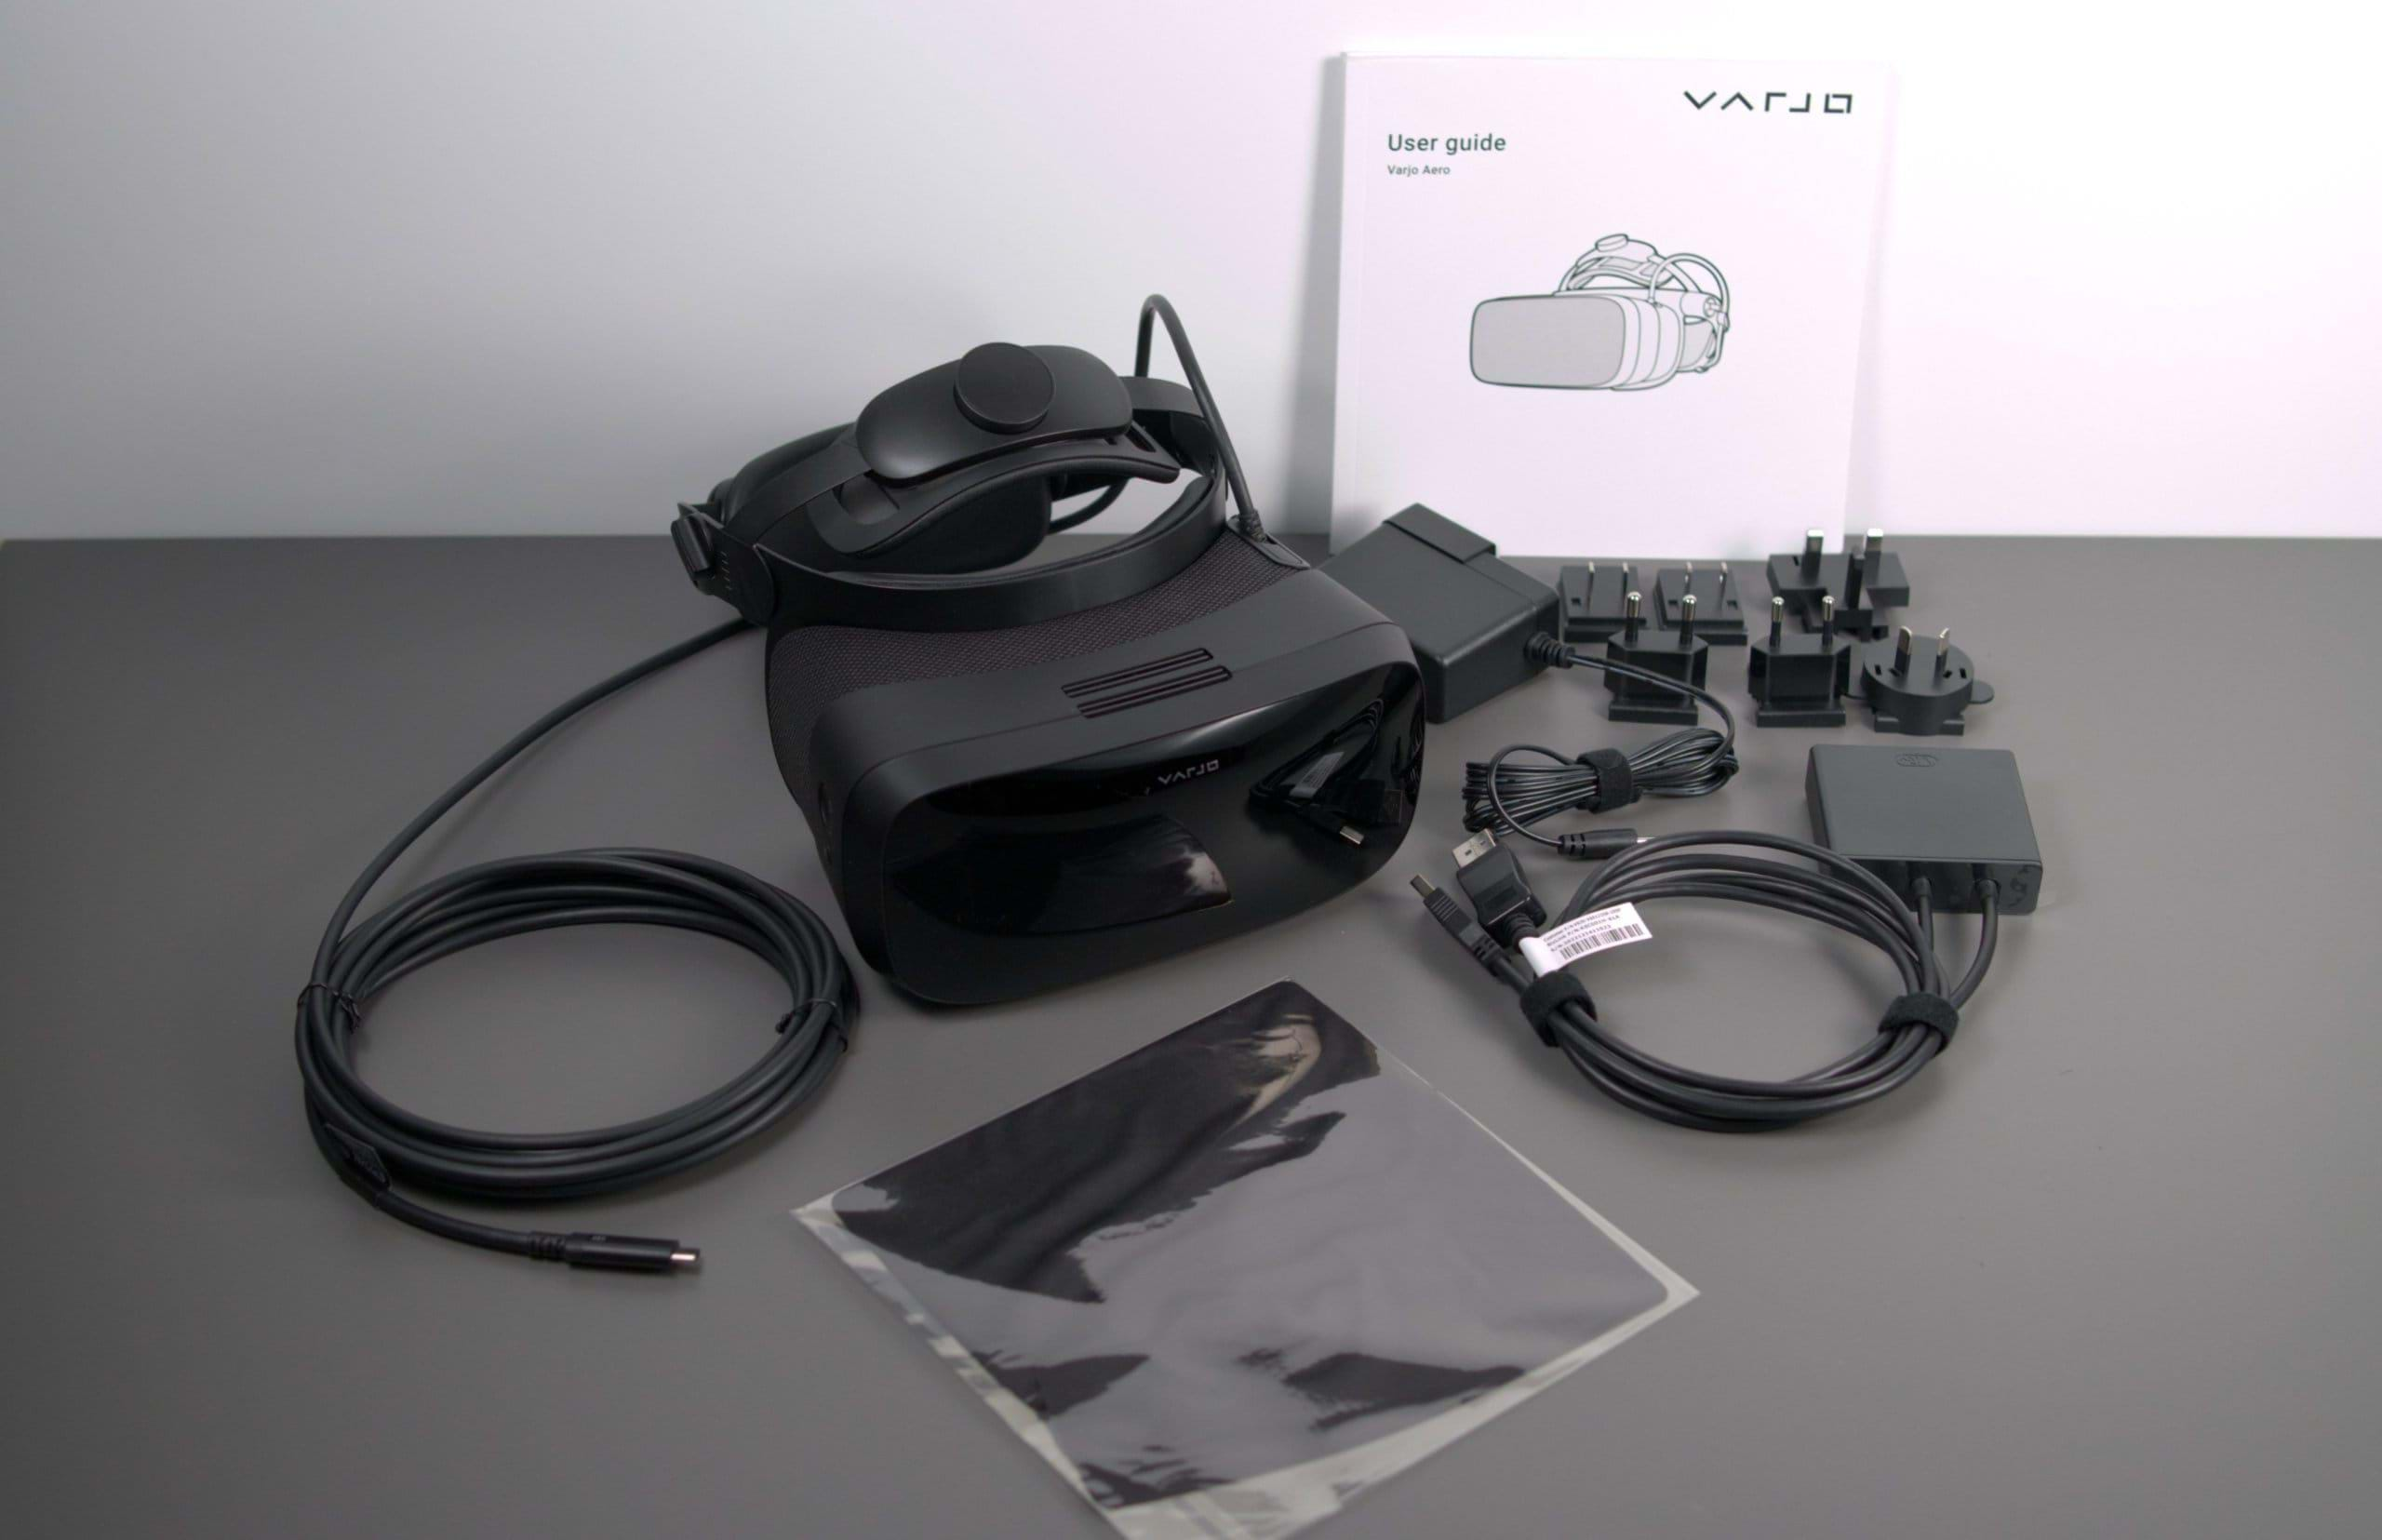
Inside the pen, you can find the software, a couple of demos, and the user guide in PDF format.
I honestly ignored all the stuff inside the pen (it’s a nice pen, really), mainly because I wanted to get the latest version of the software (and the manual), which you can get and read online as well.
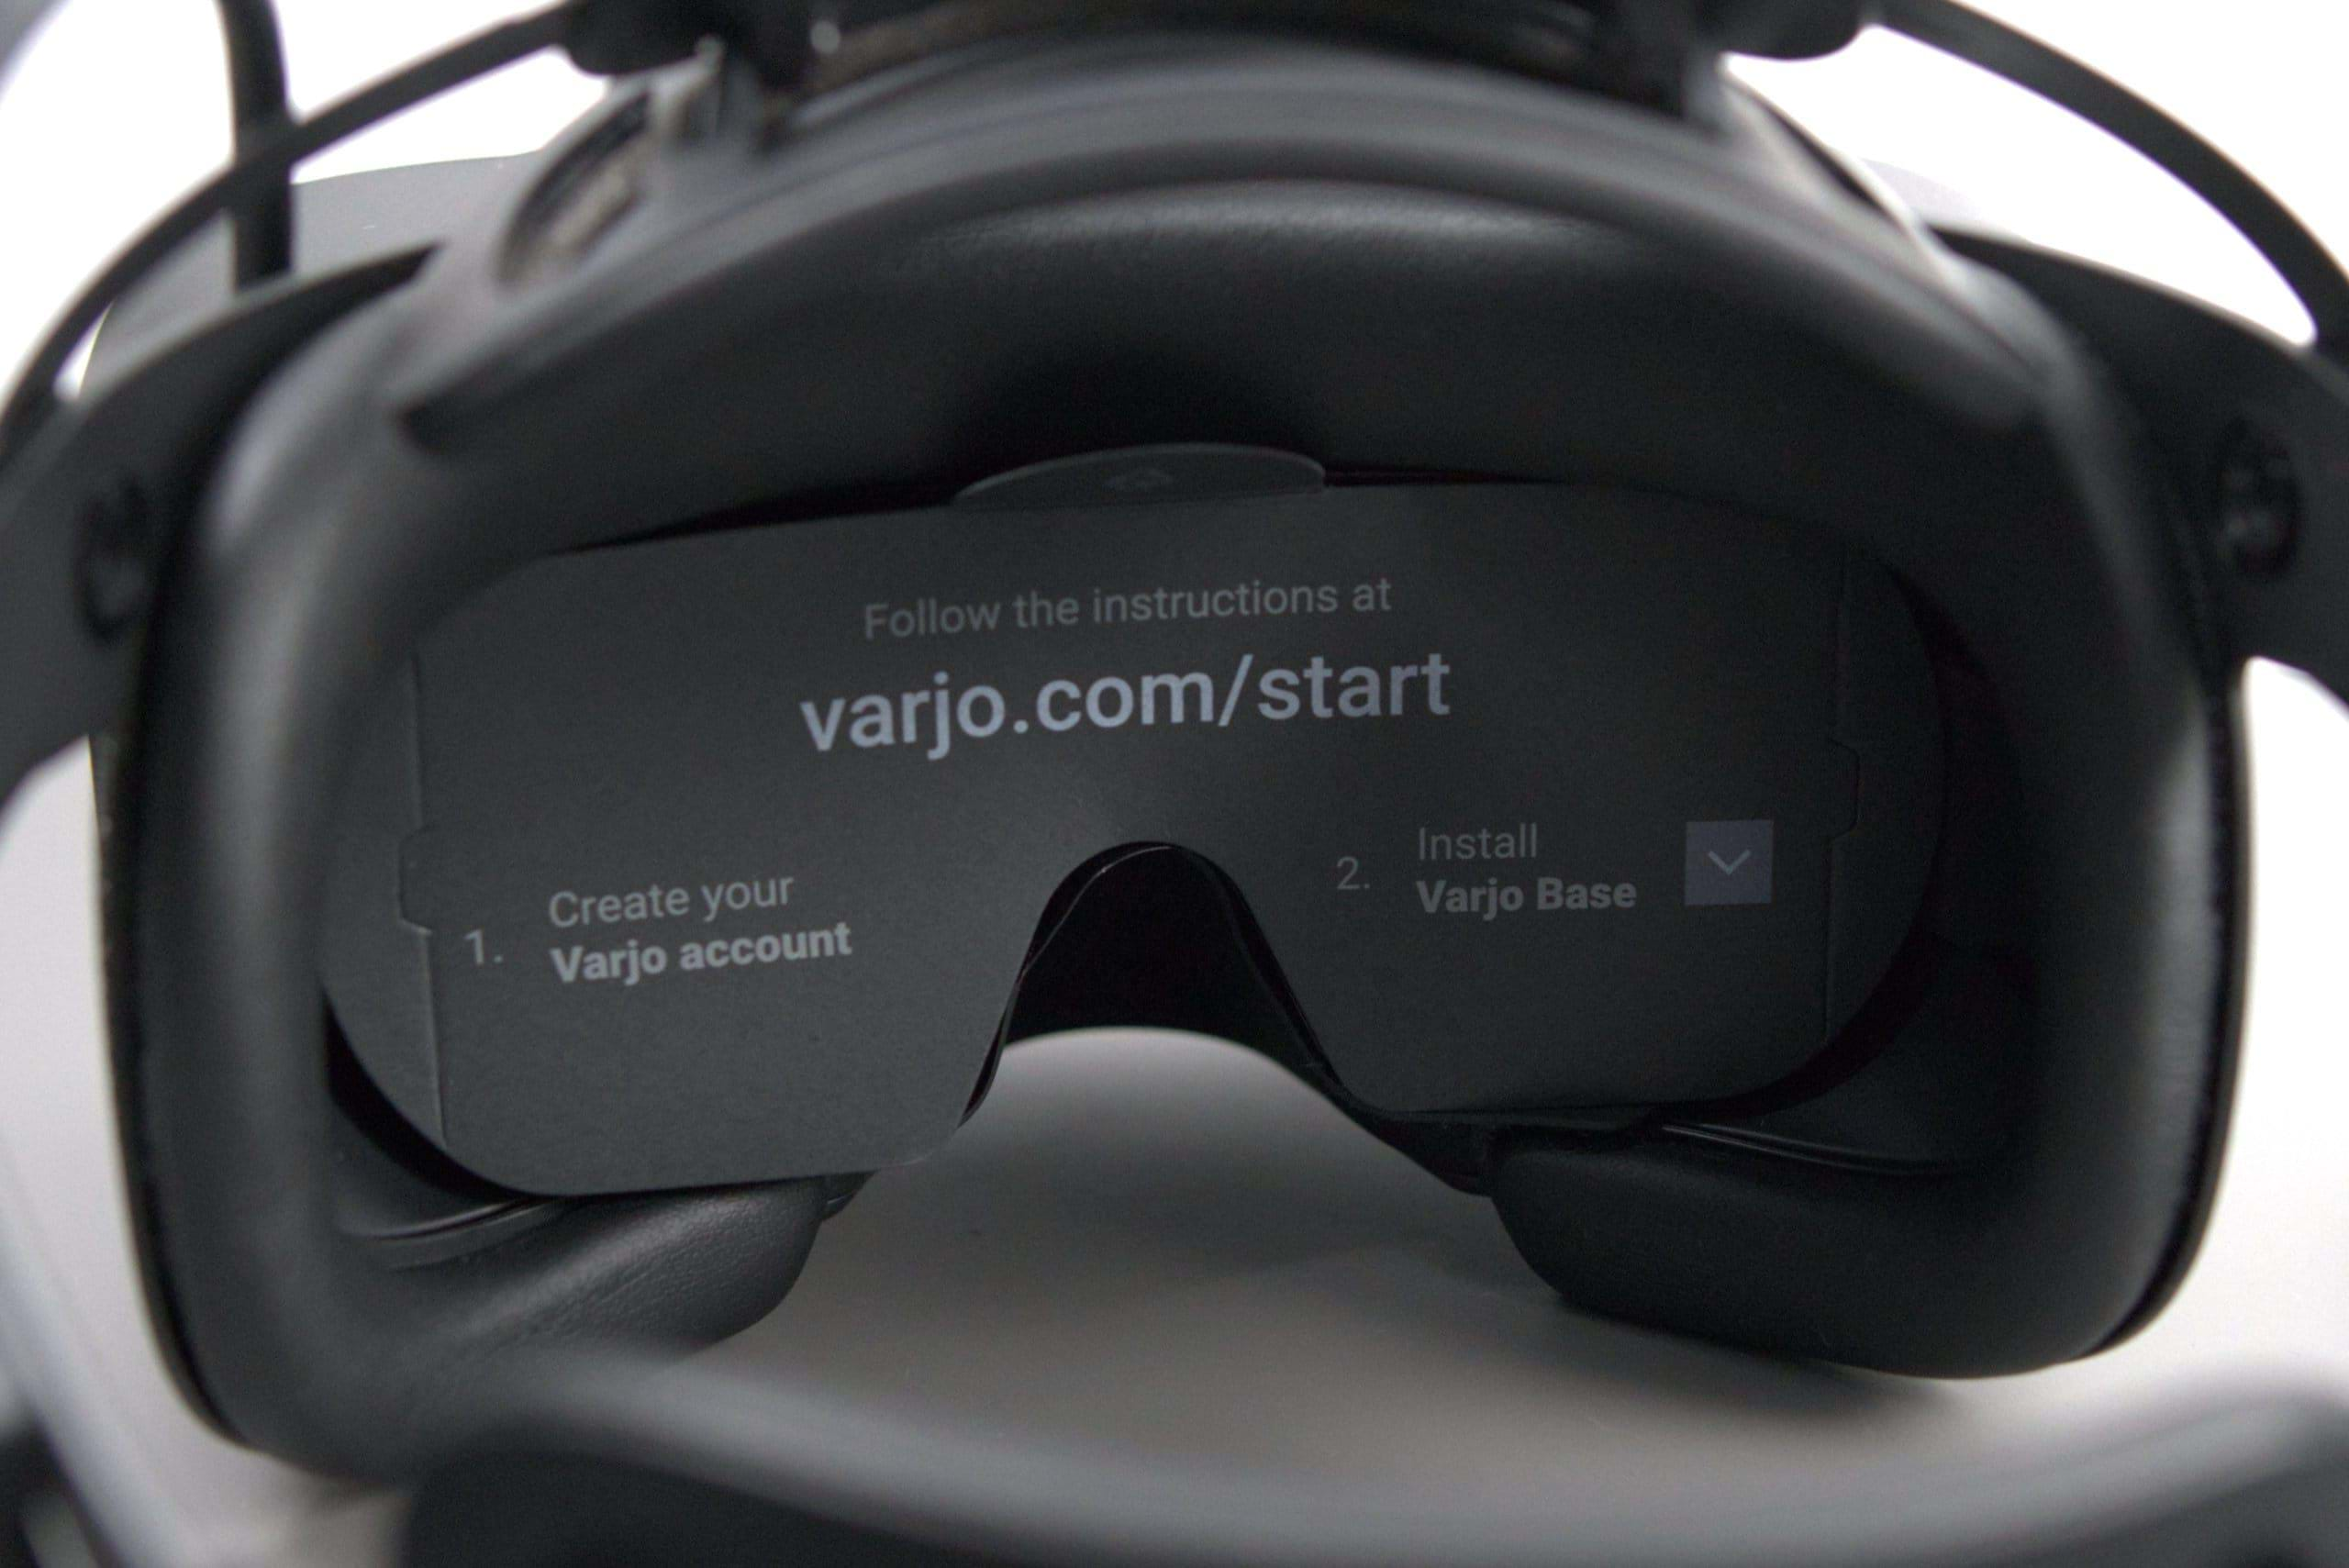
I have to point out that the lenses are also very well protected with a piece of cardboard (that reminds you of the URL you can access to start the installation project, a piece of hard plastic, and 2 pieces of clear plastic attached to the lenses.
Setting up
To set the Aero up, and as is usual nowadays, you have a support website that will guide you through the process. Visit varjo.com/start and go from there.
You will need to create an account and, if you remember what I previously indicated, you can do it as a company (commercial account) or as a private user (personal account).
After that, you will be granted access to the Varjo Account Portal, where you’ll be able to download software, such as the Varjo Base, which is the software that you will be using to set up and configure the Aero.
While installing it, you’ll also get all the necessary drivers. The Varjo Base software will also guide you through the rest of the process.
Run the software and then log in (inside the Varjo Base) using the account you created before. The software will then do a system check to see if your computer handles the headset, select the headset you have (the Aero, in this case), and follow the instructions.
Do not plug in the headset until you’re told to do so. And don’t forget to get the base stations (lighthouses) set up as well.
Just follow the instructions, step by step, slowly and steadily and you’ll be on to a great start.
The Varjo Base software
Aside from the setup, the software allows you to configure the headset. You can control things such as brightness, foveated rendering (the actual resolution it renders stuff in), motion smoothing, enable OpenVR and OpenXR support, and a bunch of other stuff.
You can also start the IPD calibration, open the on-screen menu (more on that in the next section), enable or disable the external view (where you can see, on a monitor, what is being seen in the headset), show some analytics and something else that I found fantastic.
You can use the software to take in-game screenshots and record videos. Unfortunately, not all sims played well here and Microsoft Flight Simulator kept crashing when I tried to record. I managed to record with X-Plane 12, DCS, and Aerofly FS4 for a few minutes (20-30) without any issues and, again, except for MSFS, I didn’t notice any major framerate hits either.
Varjo Base is easy and pleasant to use. The UI is very nice with a greyscale, dark theme, which I appreciate a lot. I use dark themes whenever possible and I have to thank Varjo for not blinding me with a white screen as I am using their software.
On-Screen menu
The headset has a couple of buttons on the right side. One is concave and the other one is protuberant. This way you can distinguish them both tactily with ease.
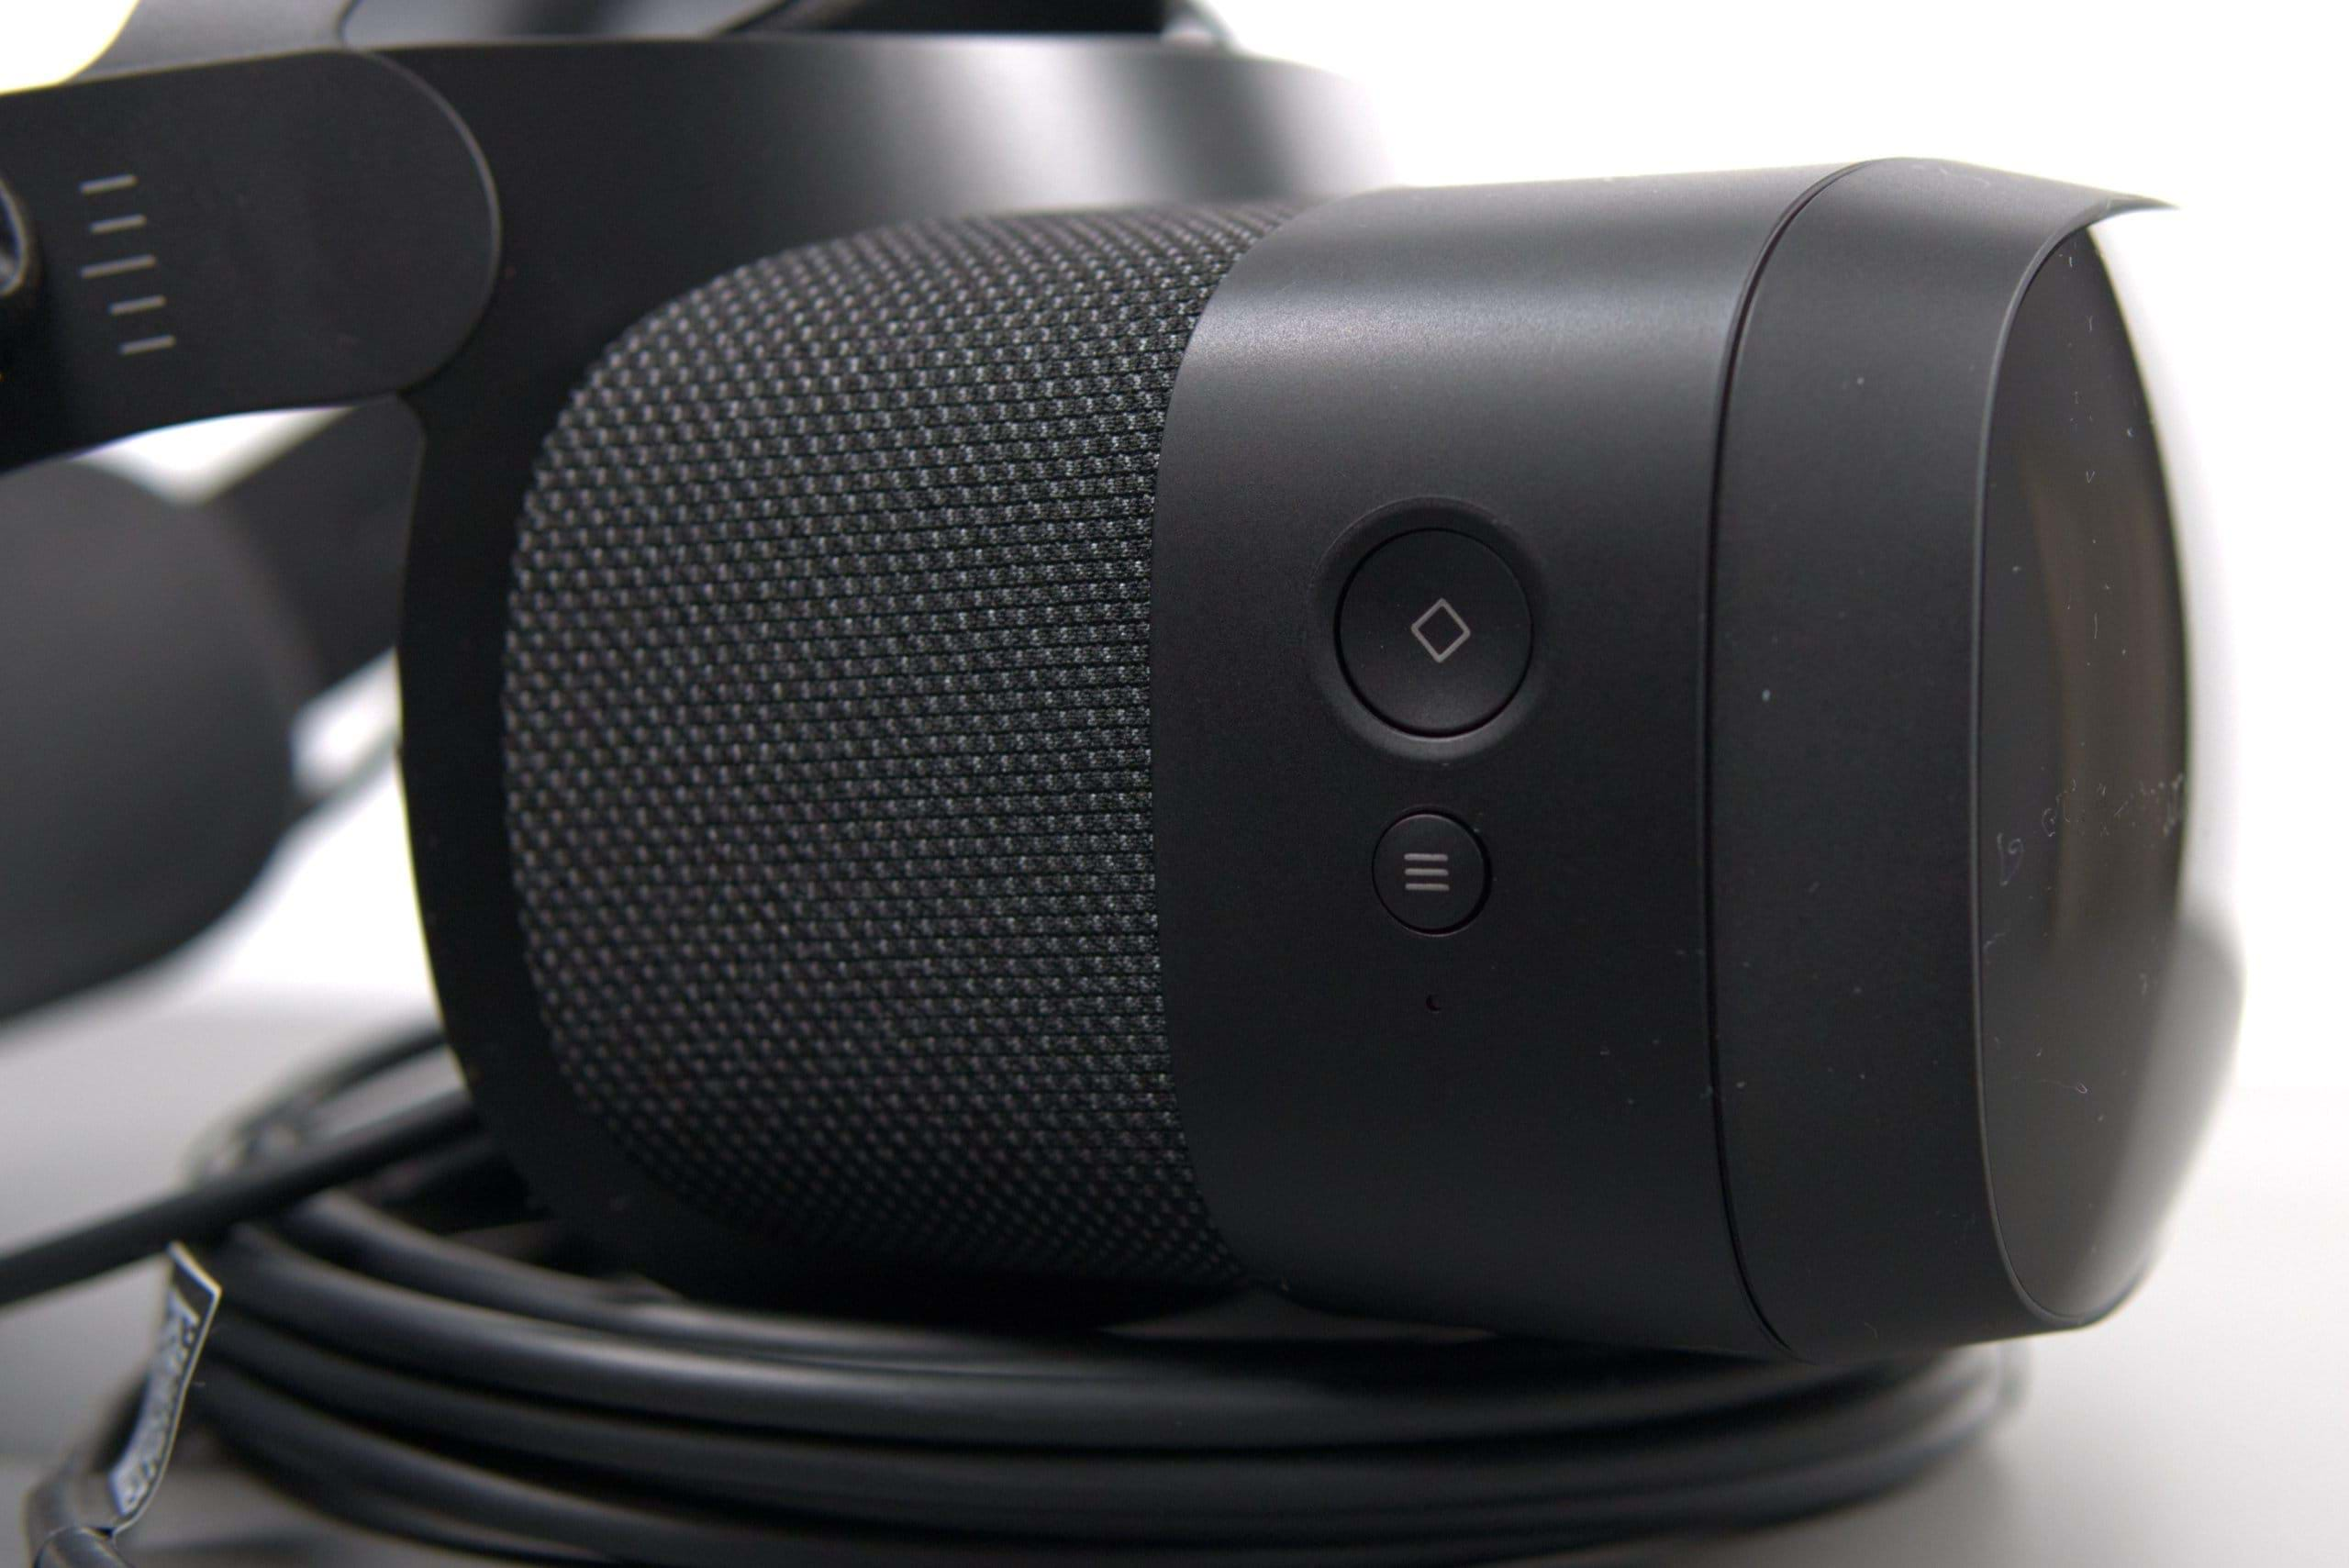
Pushing the protuberant button will make an on-screen menu pop up and you can then control it using your head movement to point to whatever you want to do/activate and then the concave one to accept your choice.
In this menu, you can switch to another application, go back to the workspace, set your sound volume, re-run the IPD test and setup, and move the virtual desktop around.
I find this extremely useful and I hope Varjo either expands or lets developers/third-party expand on the menu as I see a lot of cool stuff being made for simmers/gamers to control things such as when to take a screenshot, start/stop video recording and perhaps even external programs such as OBS, for example.
Audio
The Varjo Aero does not have embedded speakers. While for many this can be a bad thing, I really can’t say it is.
The experience I have with embedded audio on VR headsets is not the best. The HTC Vive had speakers, with foam, that I could place in a way that touched my ears and the Reverb G2 had a different system, which did not touch my ears so there was a lot of external sound pouring into my eardrums.
None of the solutions was a good one in my opinion as they had their flaws.
The Varjo Aero, on the other hand, offers a different solution. It provides a 3.5mm audio jack which allows you to connect a headset + mic and it also comes with the brand’s in-hear headphones (earbuds) with an integrated mic.
Now I have to say I am not a huge fan of earbuds, but this is the best solution for a headset that I’ve seen so far. The only way I could see it being better would be if it offered an actual over-the-hear regular speaker. But one that we could remove or push back as I sometimes do need to be able to hear external sounds as I am in VR.
Varjo’s, in my opinion, offers the best compromise so far. Again, not everyone will like it. I have my reasons to appreciate this system, so I can say I do like it.
Yes, sound quality always suffers with earbuds but I can’t say the audio on the other VR headsets I tried is any better. At least with the solution provided by Varjo, the audio is solid and there are few to no external interferences.
Adjusting the headset
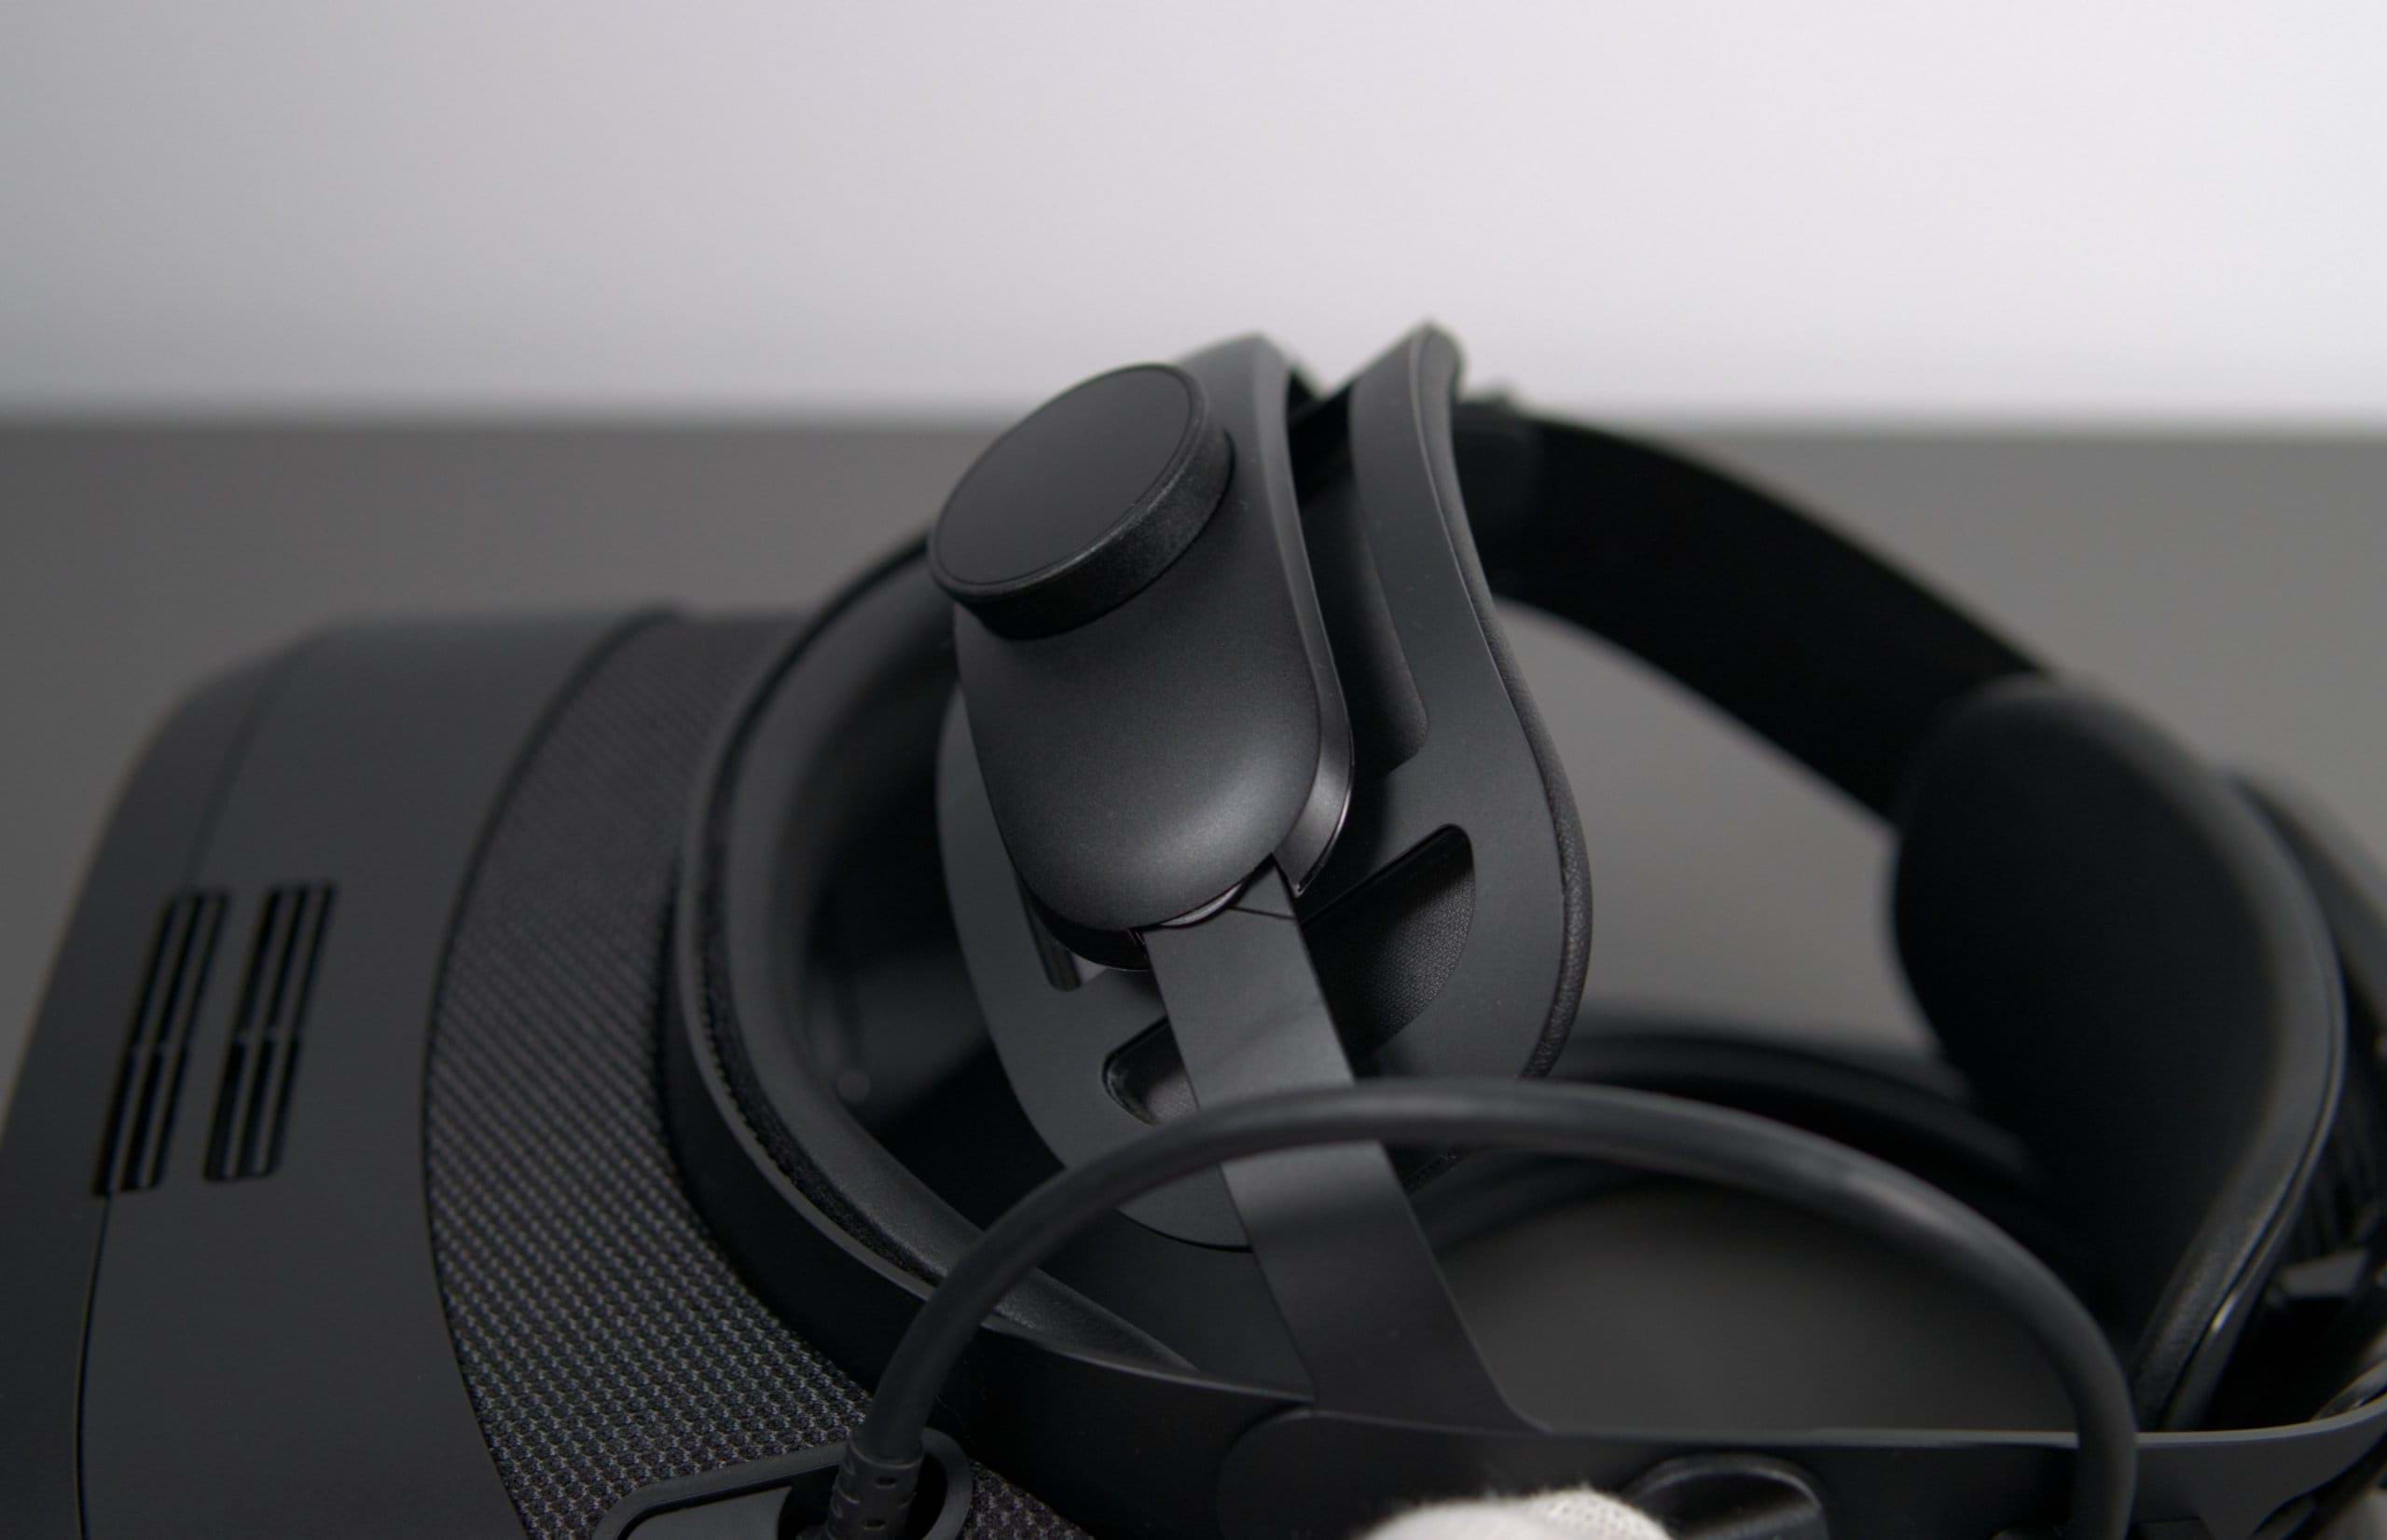
The Varjo headset can be adjusted through a couple of knobs (back and top) and a couple of side knobs with stops on the side. This helps you put the headset on and remove it more easily.
The 3-point adjustment system (top, back, and the 2 on the side) makes it easy to make the headset feel secure without being too tight.
The only complaint I have is that because of how the IPD automatic system works, I am forced to push the headset a bit lower on my face and while that is not entirely uncomfortable, I would prefer it if I could keep it a few millimeters higher.
At the same time, that will also prevent any “nose gap” so looking into the keyboard, like I used to do on the HTC Vive and the Reverb G2 is not possible.
Glasses
I wear glasses and that can be a problem if I want to strap something onto my face.
I didn’t have any problems with the HTC Vive. I didn’t have any problems with the Reverb G2. Nor the Pimax, nor the Rift S. I could use the headsets with my glasses on. Granted, I don’t use a bulky frame, but it’s impossible to use glasses on some headsets out there.
I’m happy to say that I can also use the Varjo Aero, while wearing my glasses, without any issues. The IPD system can detect my eyes nicely without any hiccups too. It was a major concern to me before getting the unit and, after taking the photos you see in this article I immediately tried it out even without plugging it in so I could see if I could use it with glasses.
I did and that was quite a relief.
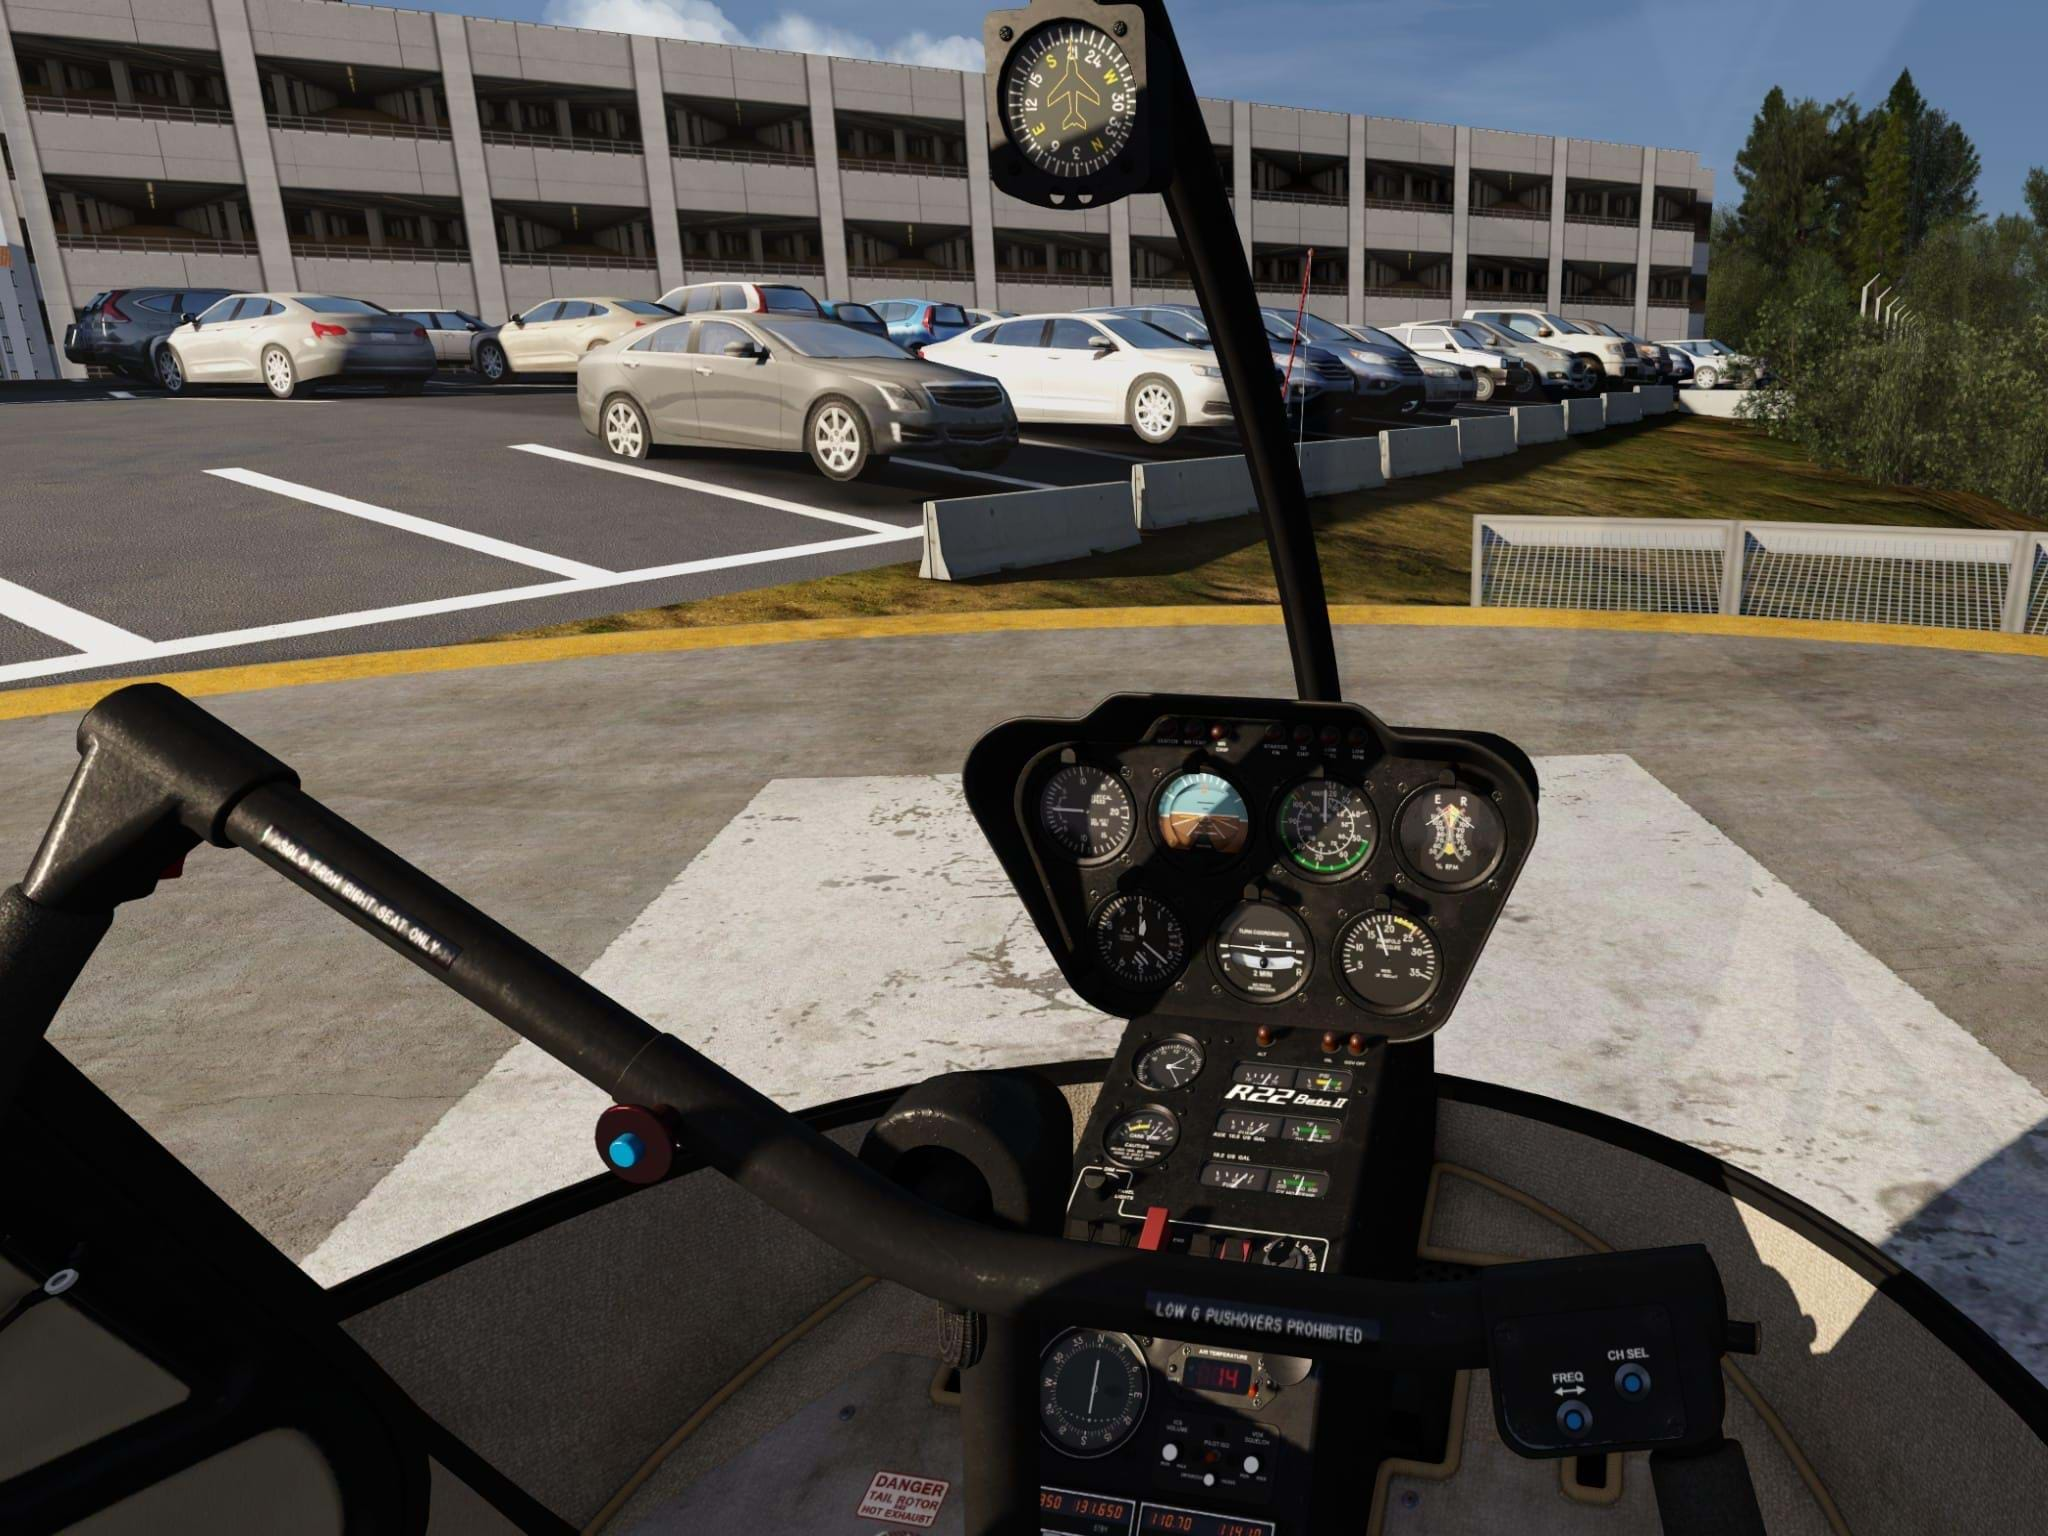
First experience: Microsoft Flight Simulator
Above: screenshot taken through the Aero Base software. The image quality inside the headset is pretty much the same you can see here.
The first sim I tried, to see if everything was working, was Microsoft Flight Simulator. MSFS has become my main sim for some time and the performance I’ve been getting from it, even in VR has been great so I was eager to try how it performed.
The first test was brilliant. I didn’t notice any major framerate drop (or at all) as it kept in the 45+ FPS. Very steady, very smooth, and so clear!
I could see the instruments so well, so much better! The extra ~33% of pixels the Aero has when compared to the Reverb G2 makes such a difference! I could read the gauges really well. As well as in my monitor when I am not using VR.
Skeptical me was mind-blown. So was the non-skeptical me and any other “me” that I may have inside my head – one of the many voices I hear.
Jokes aside, the image quality was fantastic. The screen door effect is basically null, and the performance was great.
I spent half an hour enjoying the sim in a renewed VR experience.
It was time to change sims. And expect disappointment. Or was it…?
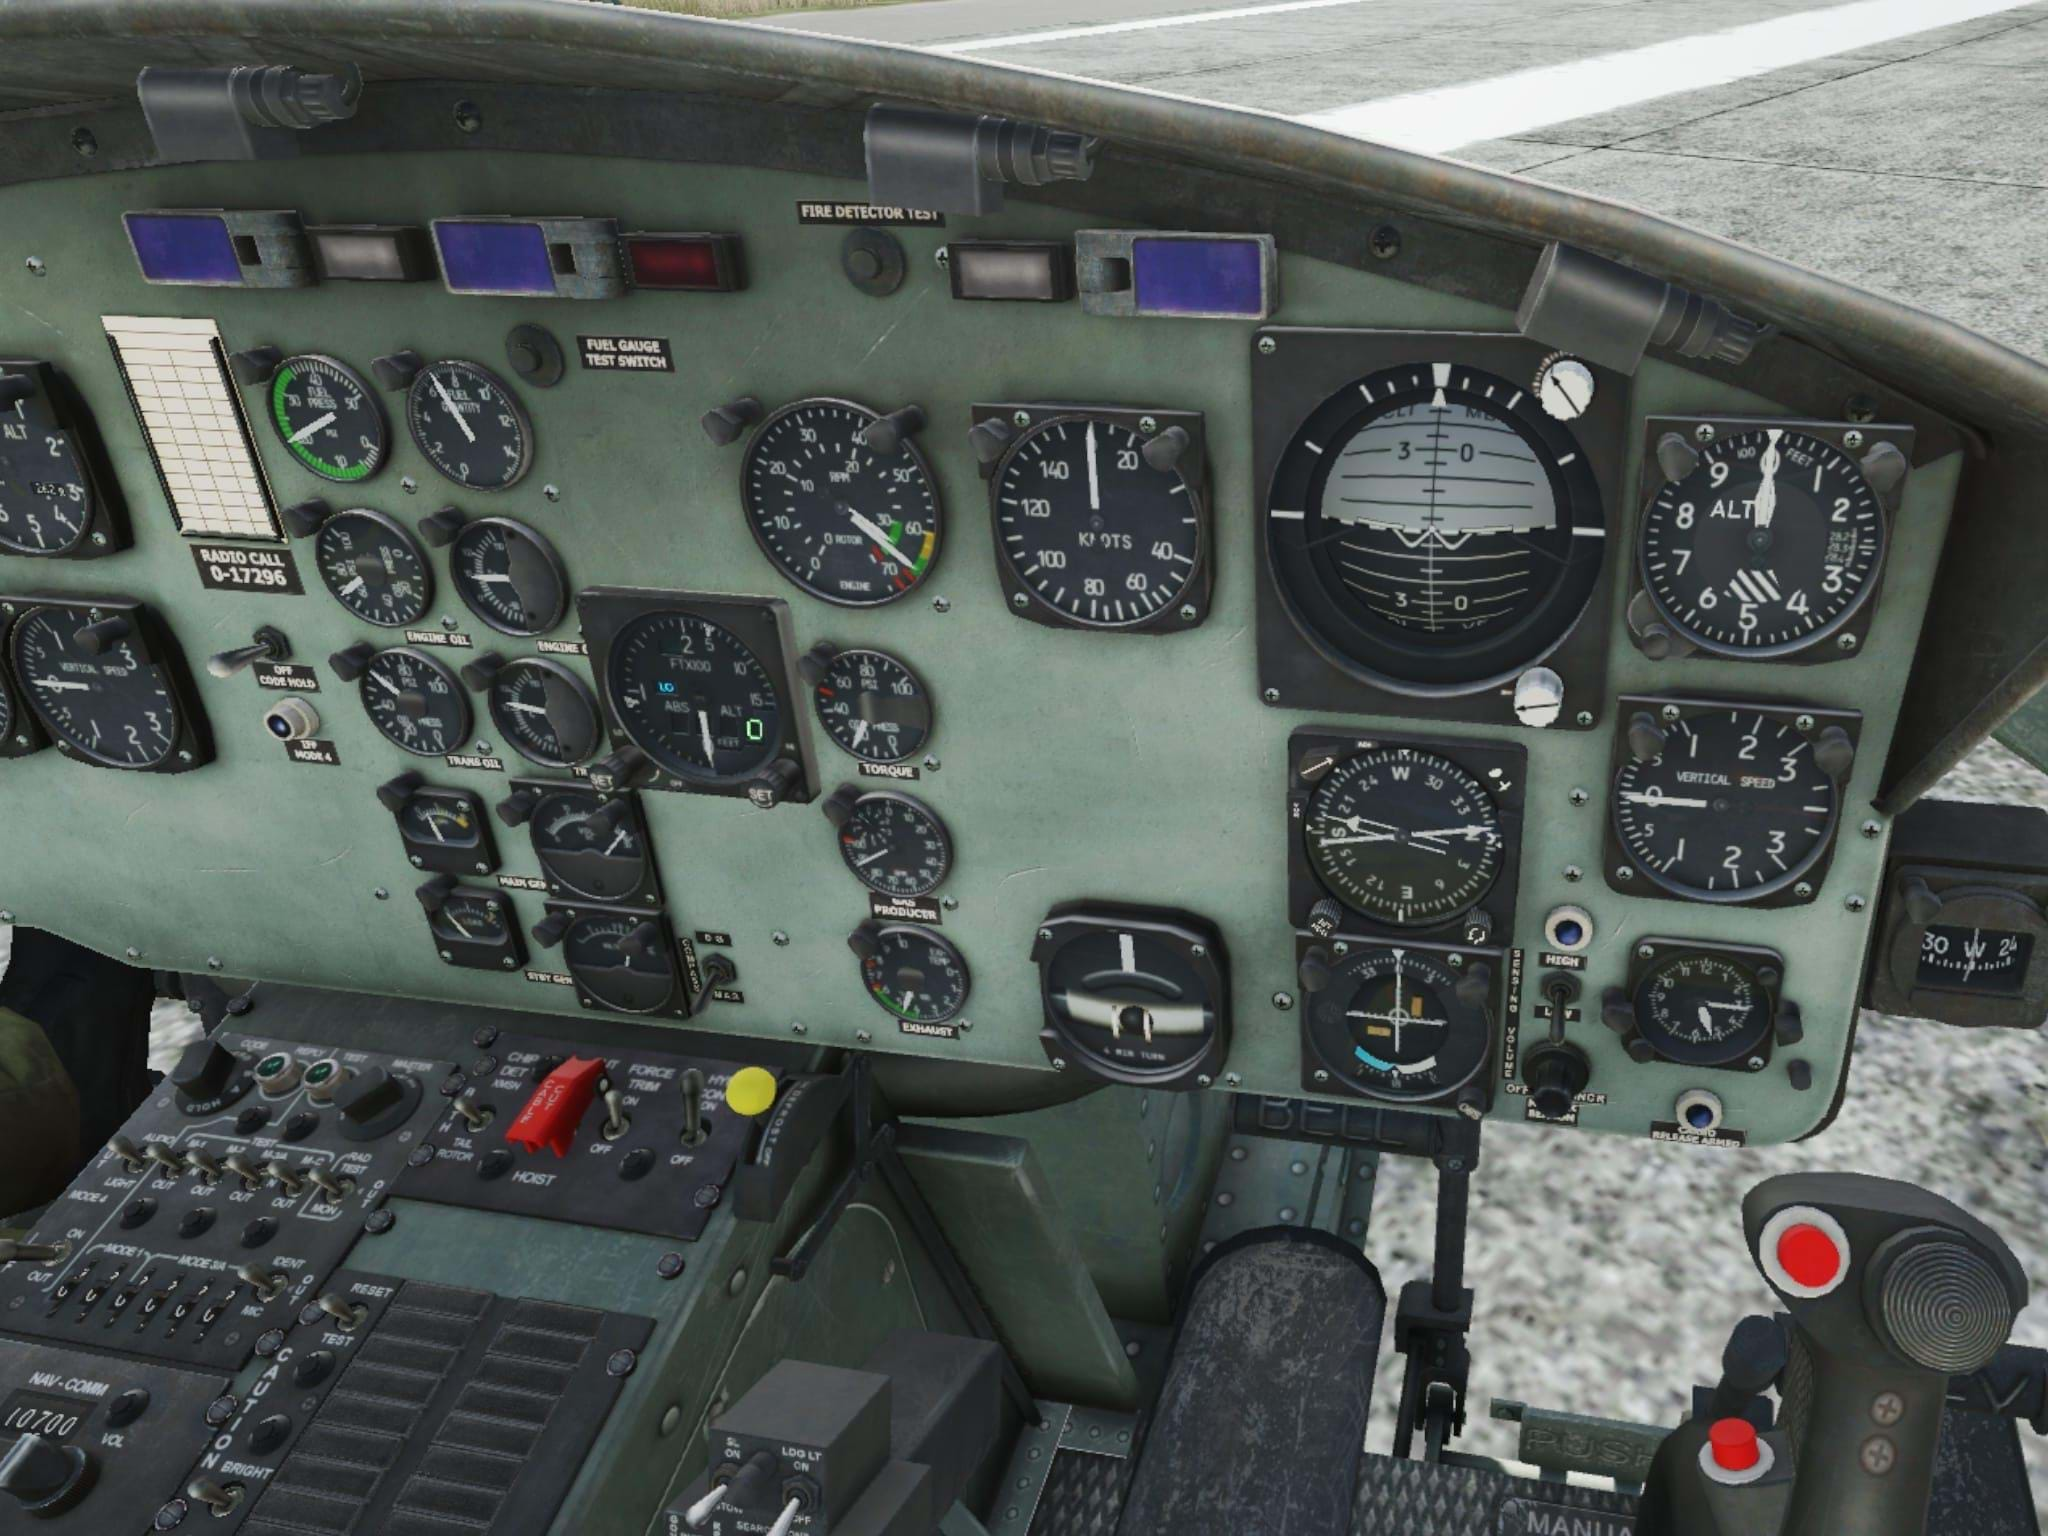
X-Plane 12 – and how I was afraid of performance with the Aero
Above: screenshot taken through the Aero Base software. The image quality inside the headset is pretty much the same you can see here.
I have been struggling with X-Plane 12 in VR with the HP Reverb G2. It was a great experience in X-Plane 11 with pretty decent framerates (the usual 45+ FPS) but with X-Plane 12, for a long time, I couldn’t get past single digits. Well, sometimes it does go a bit over 10 frames per second. But that was rare until one of the recent updates and I finally got it to hit 35+ FPS, which was enough without compromising too much image quality.
This got me to worry about the Aero since there are more pixels to feel. But I remembered seeing something about OpenXR on the X-Plane.com blog so I went to look for it. And I found something. There is an entry that mentions OpenXR.
Actually, the entry mentions Varjo, stating that “The Varjo will Just Work™”.
Yes, skeptical me kicked in again, especially with the bad experience I’ve been having with the Reverb G2 before.
So, it was time to get frustrated and boot up X-Plane 12.
Oh boy. Skeptical me was kicked in the groin again as I started getting some solid 45+ frames per second.
Steady 45+. Enough to make it a good experience, of course. I took off with the default R22, and flew for a bit, waiting for something bad to happen. And nothing happened.
Oh, and you know what? I started the flight with rain. It was pouring, the windshield was filled with water, and I still had it hanging around 45 FPS. A bit less sometimes, I have to admit, but I don’t think it ever went down 35-40.
I was mind-blown. I did not expect this to happen, yet, there it was, right in front of my eyes (really, practically glued to them since I was using a VR headset).
I switched helicopters, started flying in other areas, and didn’t have any major issues, with the framerate count maintaining some decent numbers around the 40-45 FPS mark.
But I have to say though, that if your computer struggles with some areas of the world, such as big cities, the Varjo Aero will not make it go away. I did have a few problems in New York or São Paulo, for example, but I was expecting that to happen because my computer always complains.
So, the decrease in performance in these areas is the same as without VR. A bit more, usually, since that’s what happens in VR. VR is more demanding so if a region affects your framerate by 10% over an area when you are not using VR, you could maybe expect an impact between 15% to 25% or so in VR. Don’t take these numbers as a scientific truth. This is just my experience and observation without going through a scientific method.
What a relief.
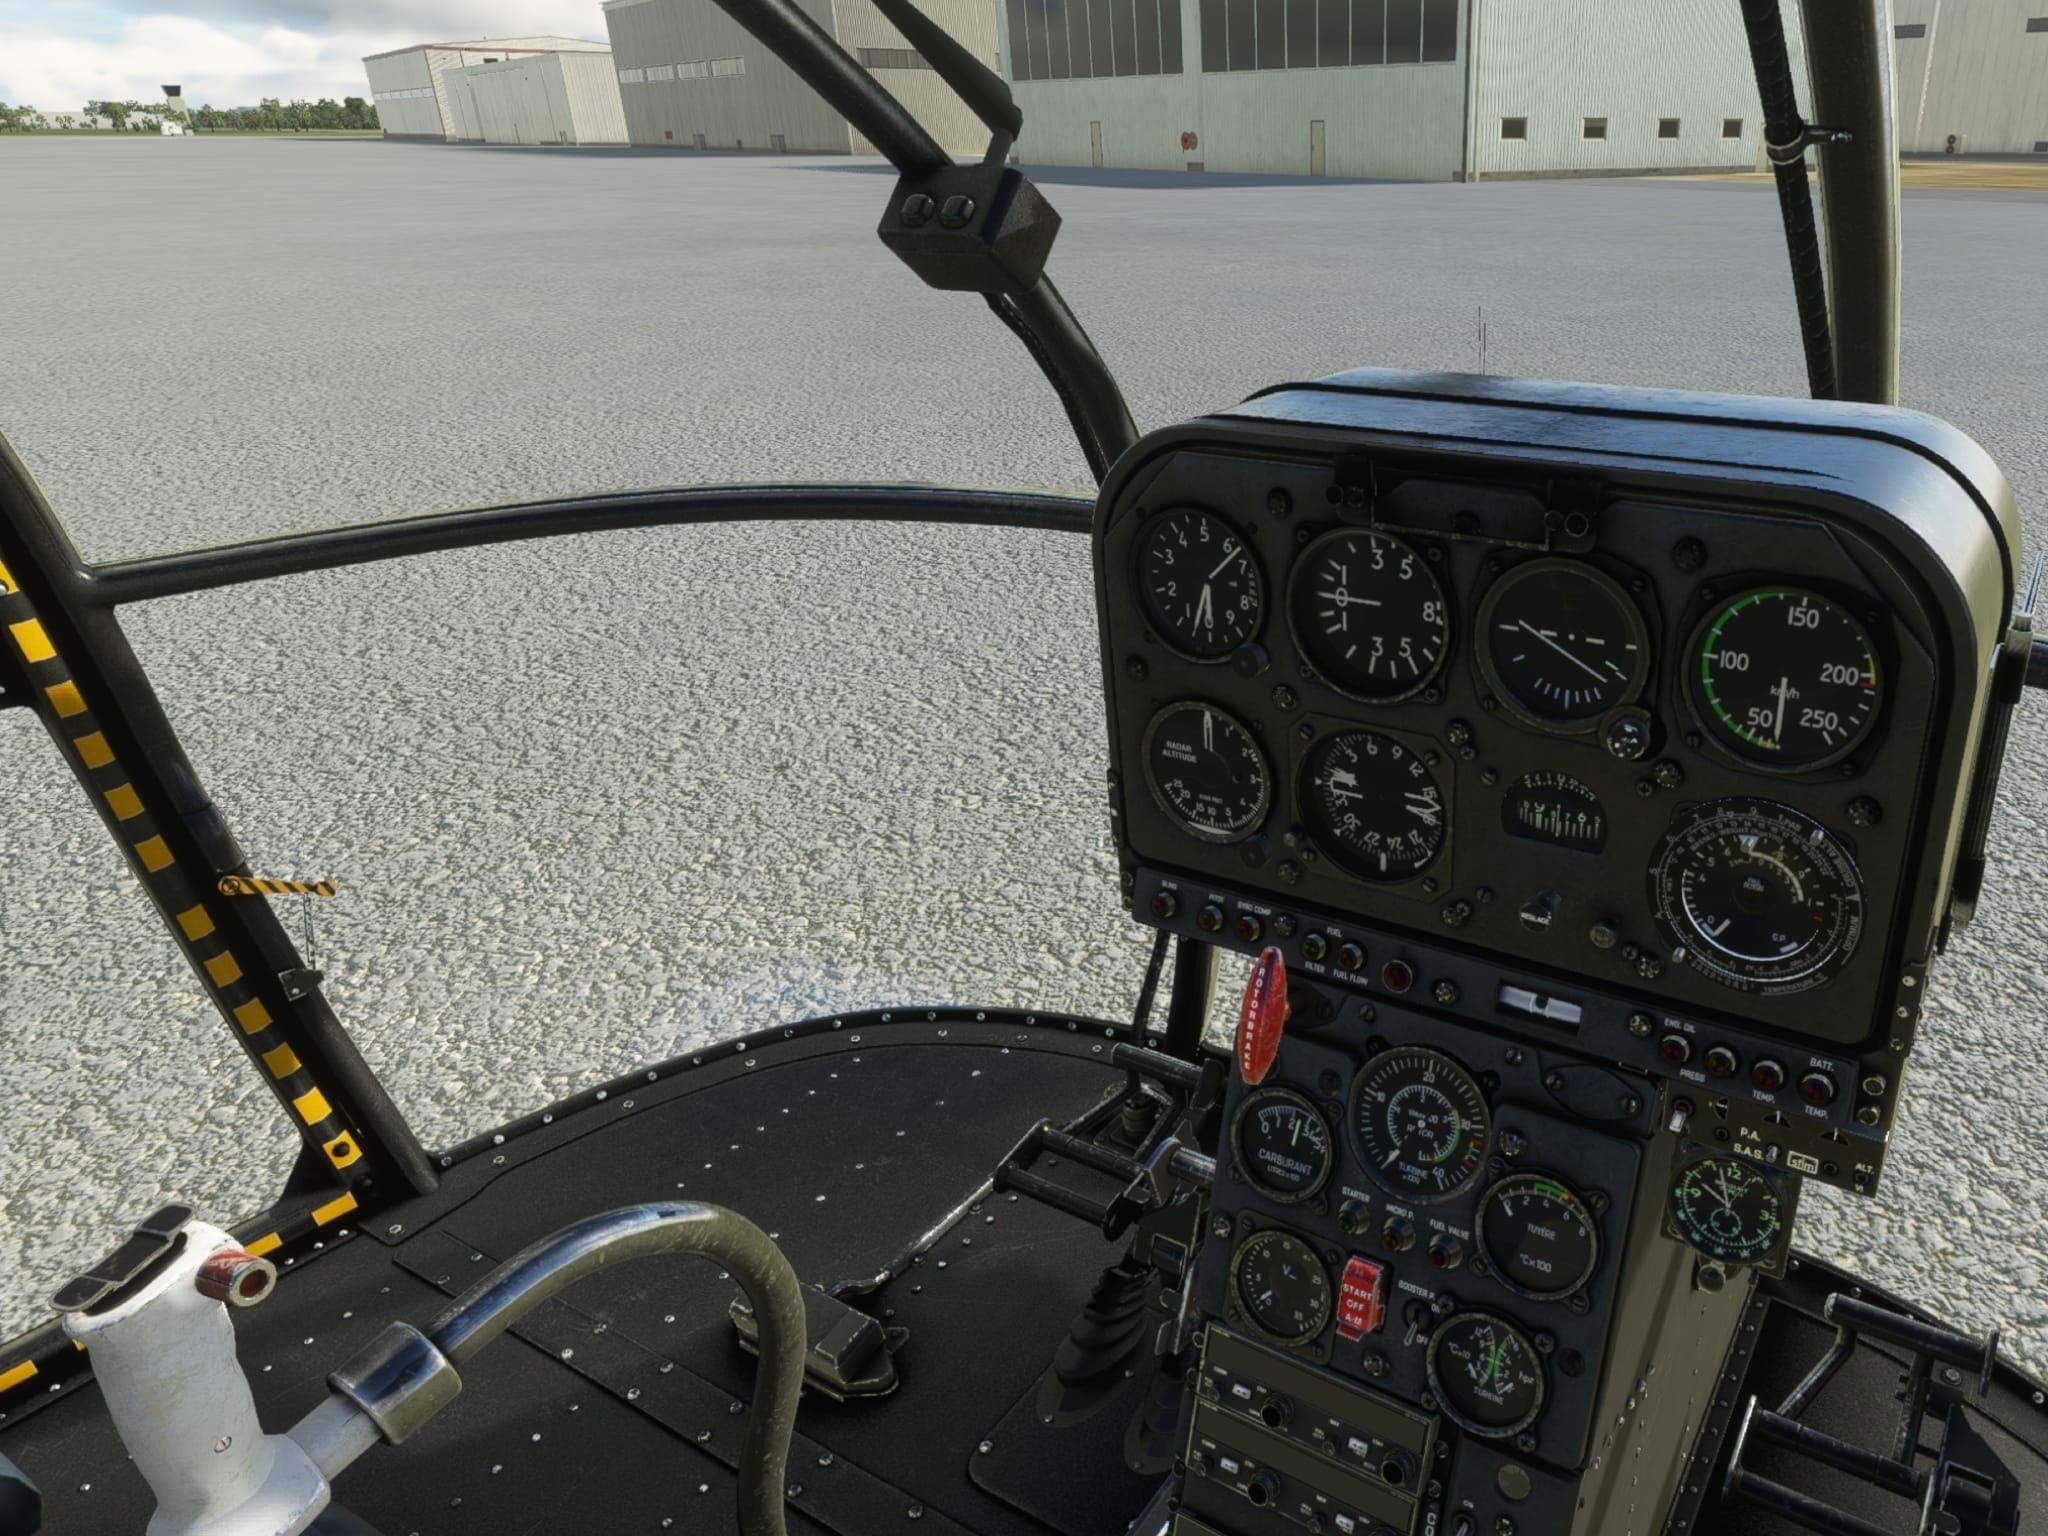
Going guns hot with the Varjo Aero (not really)
Above: screenshot taken through the Aero Base software. The image quality inside the headset is pretty much the same you can see here.
It was time to hit up DCS.
Civilian style. I don’t do pew pew pew folks, sorry.
I started a mission that I made some time ago with a few AI aircraft and ground units, to make it a bit more populated, which is the one I use for my testing, and off I went, with the old lady, the Huey.
Results with MSFS and X-Plane 12 got me pumped so I was keeping my fingers crossed for DCS. I was hoping that, at least, it behaved as well as with the Reverb G2.
No surprise there. Again, everything was clear, the gauges were sharp and beautiful, and head movement was holding as well as with the other sims (even with the Steam VR 1.0 base stations).
The framerate was kept around 45+ and all went smoothly and nicely. Flying in the Huey (or any other helicopter for that matter) with this clarity is an absolute blast.
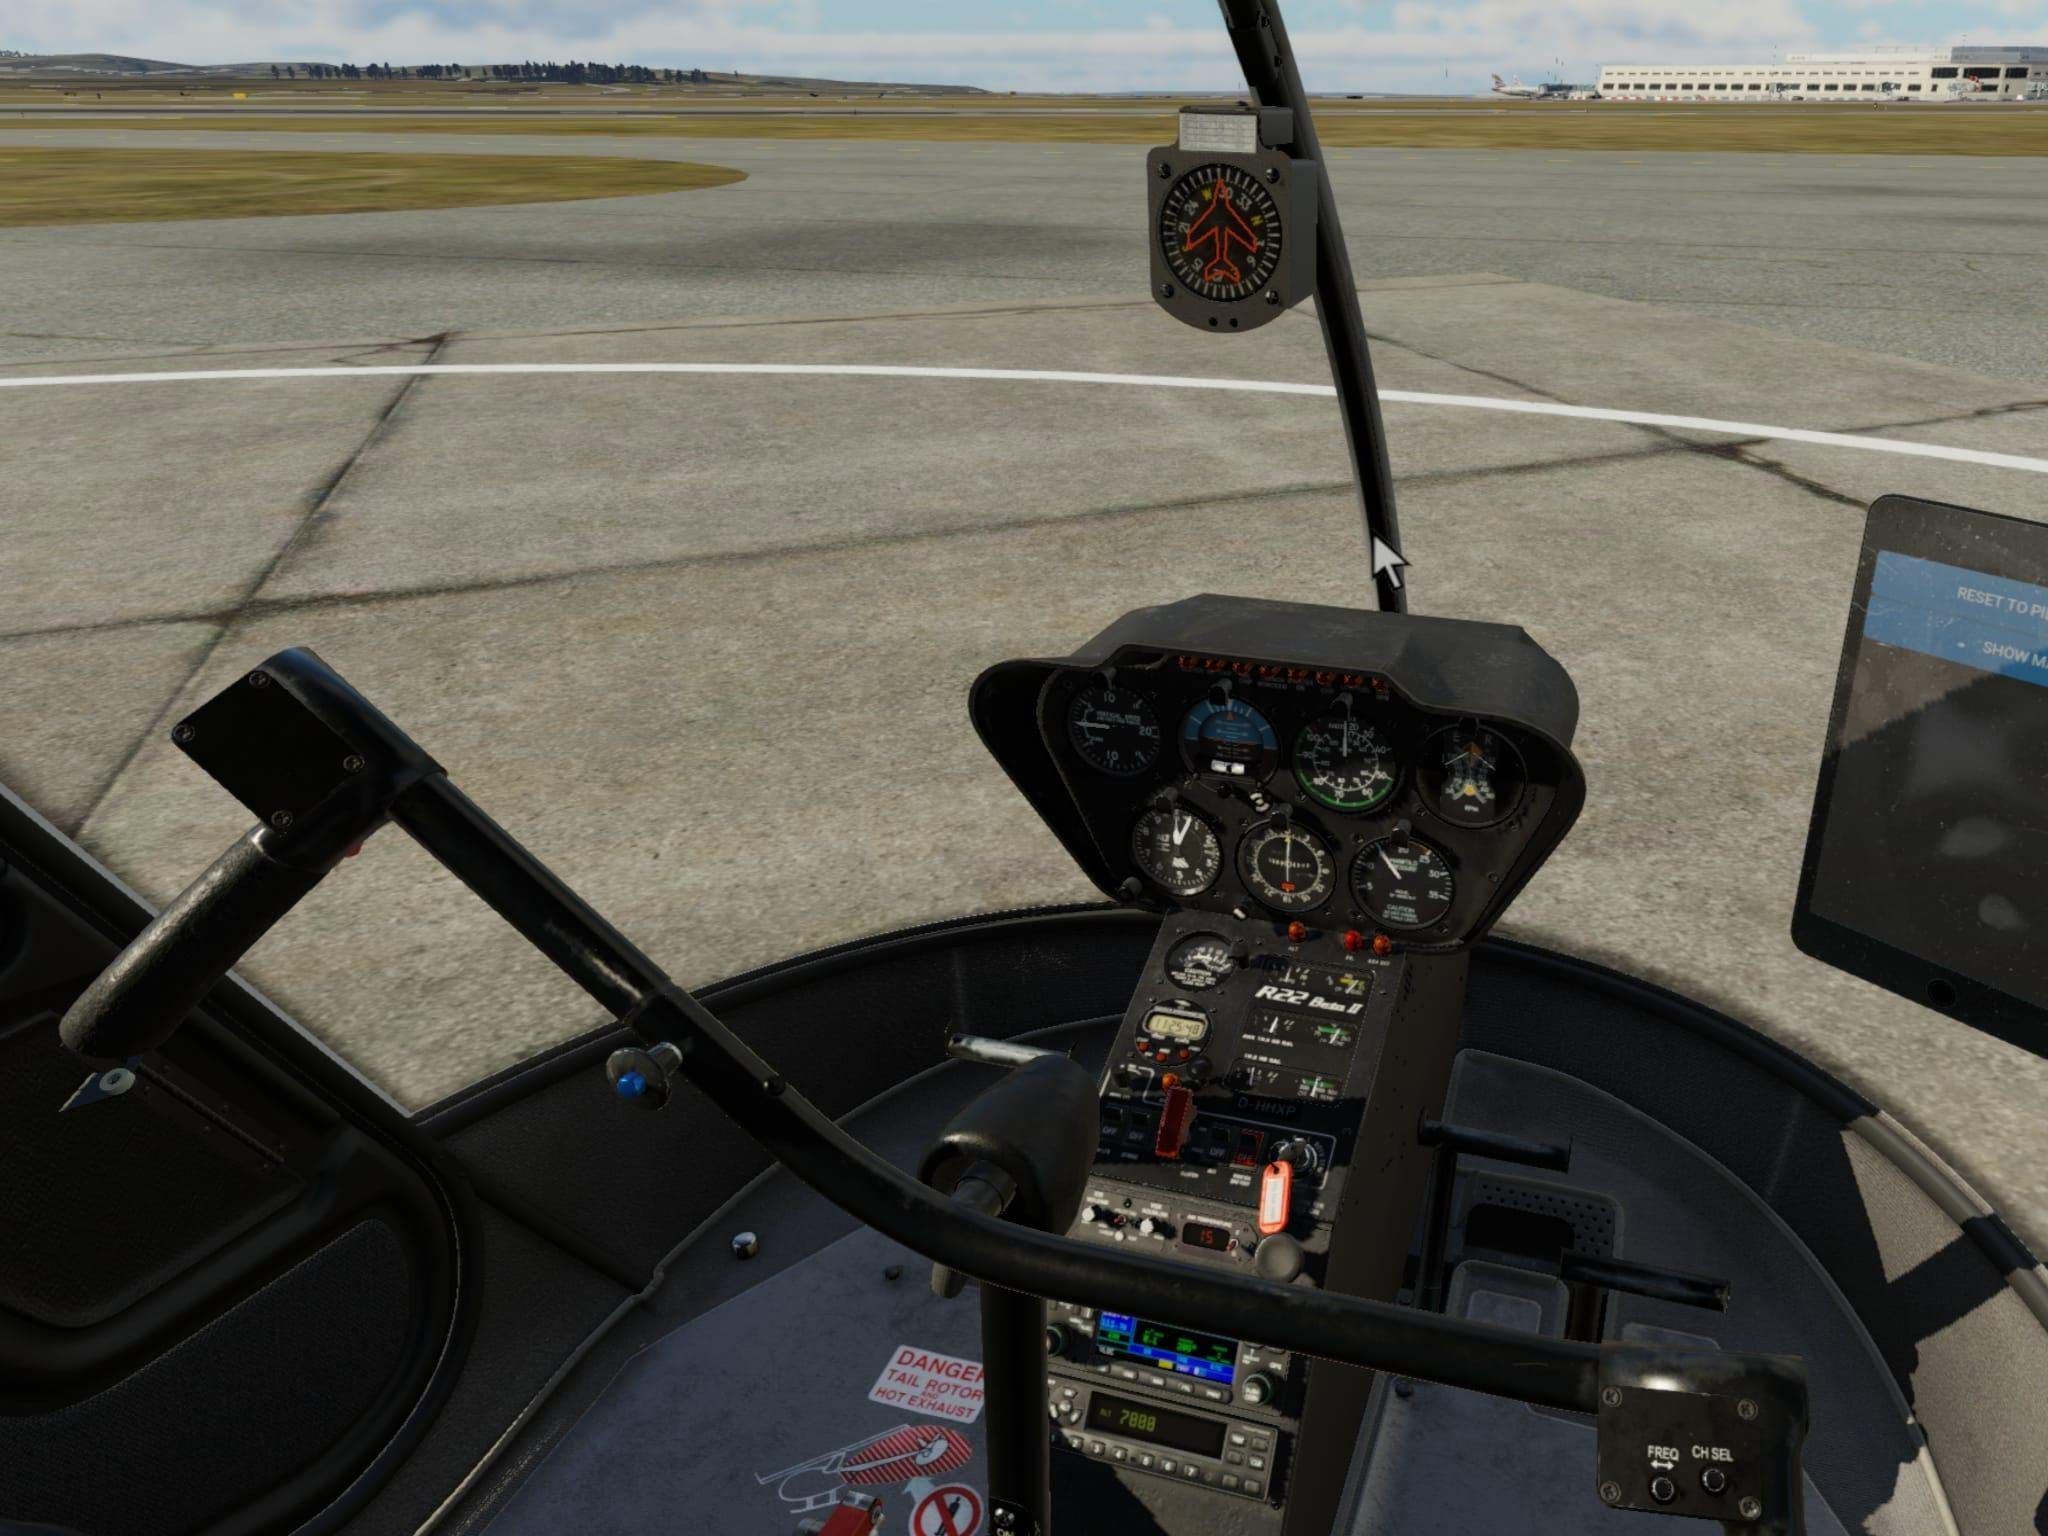
Aerosoft FS4
Above: screenshot taken through the Aero Base software. The image quality inside the headset is pretty much the same you can see here.
Aerosoft FS was the first “true” VR sim and the experience with it has always been great. Performance with the sim was always stellar (unfortunately mostly since the world is not very active or full) and IPACS has partnered with Loft Dynamics (former VRM Switzerland), a company working on the professional market to deliver a training VR motion platform solution.
Funny enough, Loft Dynamics uses Varjo headsets.
Because of all this, it was no surprise that the Varjo Aero performed flawlessly with Aerofly FS4 as well. The image is crystal clear, the framerate is high, the image is smooth, and the R22 is still one of my favorite helicopters to fly in any sim. Especially trying to take off and land from Piz Gloria. I kid you not, it’s quite an amazing challenge. Taking off is “easy”. Landing… Not really! With the R22, of course.
Anyway, the Aero performed like a start with this sim as well.
The good and the “bad”
I know this may sound a bit biased or skewed but I can’t really say there are bad things about the Varjo Aero. There are things that I like more, things that I like less, and things that I bring to your attention because I think they may be important to some people.
The Varjo Aero is quite easy to set up but one of the downsides of it, for me, is the fact that it requires base stations (or lighthouses). Considering the amount of technology Varjo has put into it, I would expect that dependency to be removed. But at the same time, it would probably make the product more expensive.
This brings me to the other downside, for me: the price.
While I know that you pay for what you get and the Varjo Aero is a brilliant piece of hardware, I wish the company could come up with a way to bring the price lower. But I also understand that that could be counterproductive as it would go against the inclusion of good technology into the unit.
I don’t think it’s very reasonable to ask for inside-out tracking and a price reduction, yet here I am doing it.
Am I saying the Varjo is overpriced? No. I think that to be overpriced, it would have to not be able to deliver on the promises it does. And it delivers. What I am saying is that for the market it’s being aimed at, it’s a very hefty investment, and not a lot of people will be willing or able to do. Let’s be honest here, we could get an RTX4090 for about that price.
But, at the same time, I can use an Aero with my RTX3080, so… See where I’m getting at?
I did notice something that was not huge, but I thought I should mention it.
There’s a little plastic part that goes around the nose and is visible from the inside. That plastic is glossy so if you pay attention to it, you can see a bit of reflection coming from the LCDs. It’s not too intrusive but it’s there.
Either way, none of these interfere with use and I have to say I am nitpicking more than anything right now because I really can’t find anything negative about the headset.
Now, one thing that does interfere is the fact that the Varjo Aero does not support AMD graphic cards. At least not yet. And that is quite disappointing as those that do use AMD cards will not be able to use this headset.
Speaking of which, you can find the requirements for the Varjo Aero here and I highly recommend you do so before making a decision.
45+
Oh, you noticed that, did you? Me mentioning 45+ constantly?
Well, I do believe 45 frames per second (per eye) is enough for VR. At least for me. So I ended up trying to configure things to hit around that mark. I am sure I could go higher on some if not all the sims, but I decided to keep it at a balance between quality and performance, with 45 FPS being my mark.
That’s what works for me.
My conclusions
The Varjo Aero is quite an amazing VR headset. It has great resolution, performs great, it’s easy to install and it even saved my X-Plane 12 experience.
It’s not a cheap headset but it’s definitely the best headset I have tried so far. It’s quite the upgrade for those who come from a Reverb G2, for example. It performs well, it’s comfortable, even with glasses (the model I use anyway), and the image quality and clarity are amazing.
The software it comes with works very nicely and I hope they find out what happens with MSFS since I believe that the fact it takes screenshots and records video natively is a fantastic tool for content creators.
I highly recommend it.
As for Varjo in general, I know they have been working to listen more to the community and become a more active player in the consumer market. I hope they continue to do both: listen to us and become bigger in the market. If what we will have ahead is anything like the Aero, I can’t wait to see their future products. The community is willing to pitch in and if Varjo gathers a good group of community and product-oriented folks, things may start to get really (more) interesting.
I’m glad Varjo is coming out of the shadows!