Now that we got to know the outside of a helicopter, it’s time we look at the cockpit and learn how is it that we can control helicopters.
Flying helicopters requires you to master these controls all the time and any changes in one of them usually requires you to do changes on another one or all of them together.
The 4 controls
Helicopters have 4 controls, of which can be considered the main ones: the collective, throttle, cyclic and pedals. They will all help you control your helicopter in all axis.
Let’s start, shall we?
The collective
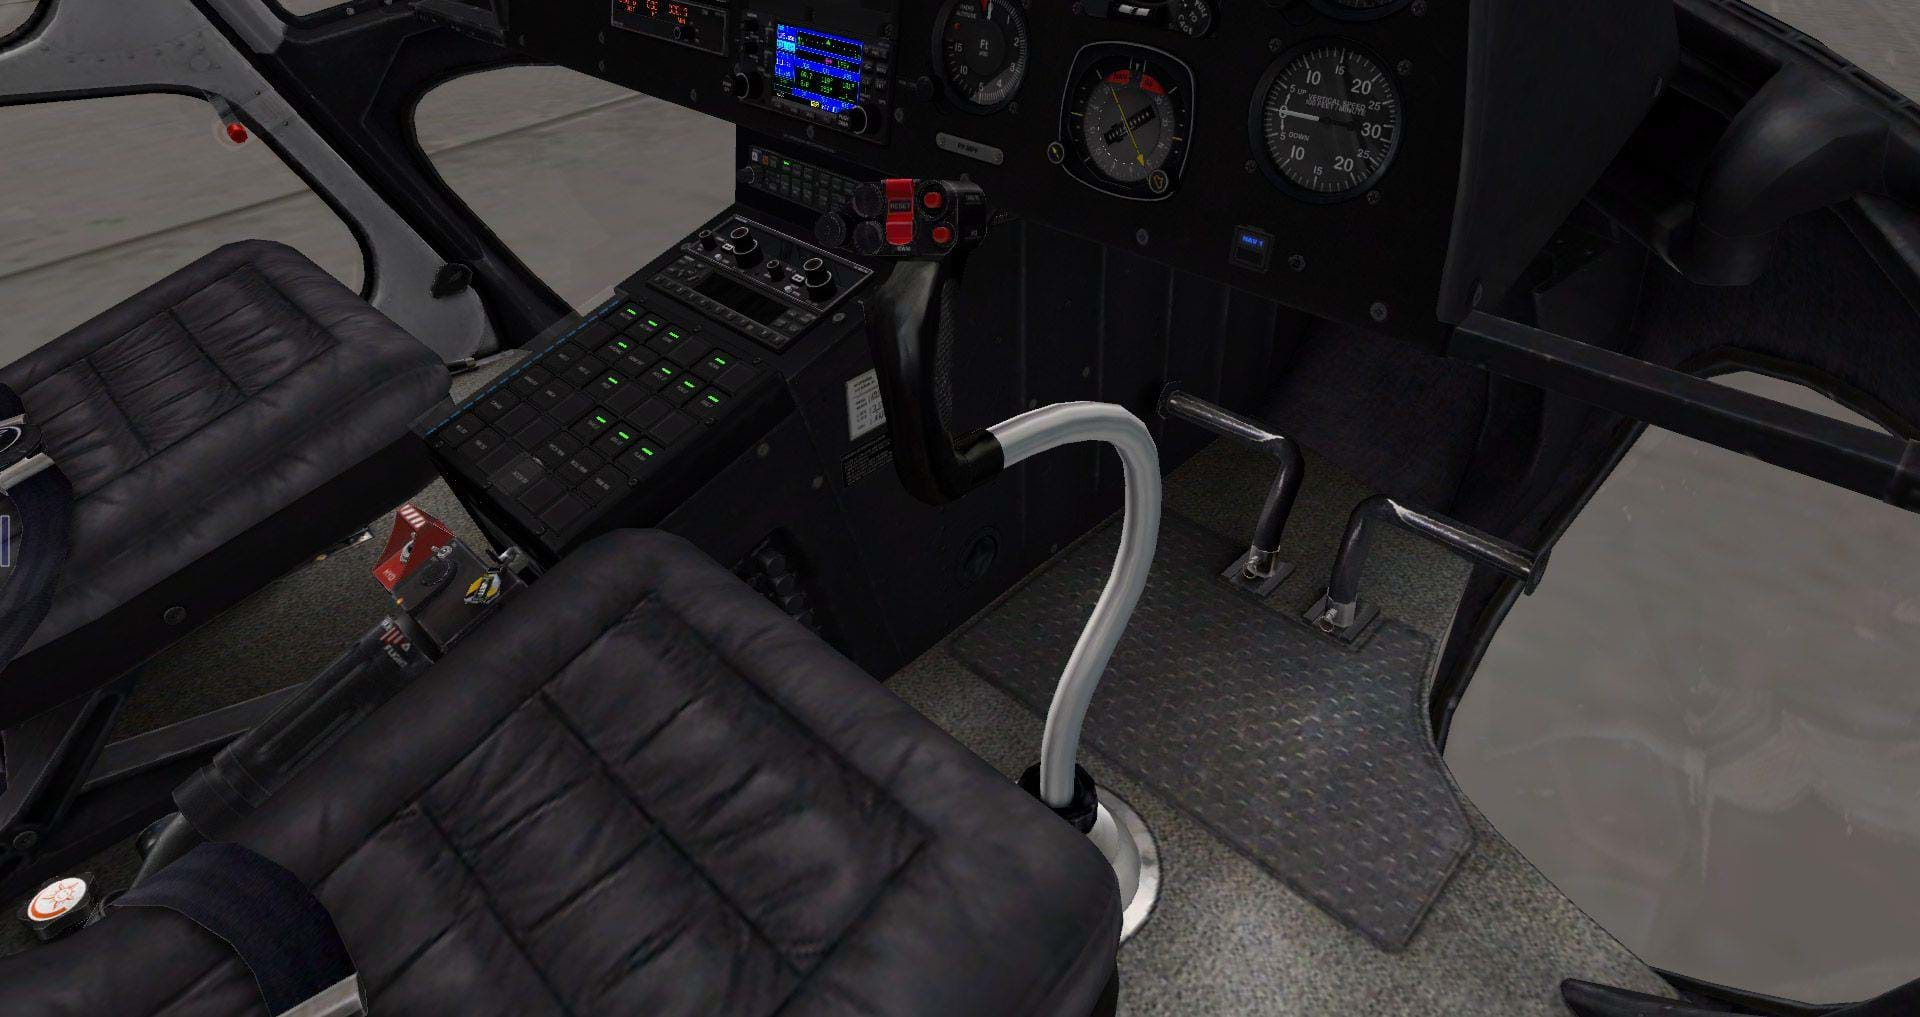
The collective can be found on the left side of the pilot (and co-pilot’s) seat. It’s a kind of a lever which you can move up and down. It moves in a similar motion to a parking brake in some cars.
The collective controls the swashplate, which is a cylindrical plate positioned beneath the rotor blades. When you pull the collective up, the swashplate will go up. When you push the collective down, the swashplate will go down.
The swashplate, on its turn, controls the pitch of the rotor blades. The more pitch the blades have, the more air they “bite” and the bigger the lift they produce. You can see it all working on the video below.
Therefore, raising the collective increases lift and lowering the collective decreases lift. In a very simplistic way, you could see it as the means to increase or decrease a helicopter’s altitude. It’s not that simple though, as we will see further down the line. Nothing is, really, but that’s what makes helicopters fun to fly.
The throttle
The throttle controls the engine’s RPM. As we saw above, the collective controls the rotor blades’ pitch which, in turn, increases or decreases lift. You see, ideally the rotor RPM would never change. Since it’s the blades’ pitch that controls lift, there’s no reason for it to change.
Nonetheless, when you increase the pitch, drag increases and the RPM tends to go down so the engine must move faster to keep up.
In some helicopters, you will need to control the engine’s RPM by using the throttle, to increase the engine’s RPM so that the rotor RPM maintains within the needed speed. You also need to decrease the engine’s RPM when you lower the collective as to keep the engine within a healthy RPM interval – and not blowing it up.
A helicopter throttle kinda resembles a motorcycle throttle although we rotate it in the opposite way we usually do in a motorcycle. To increase the engine RPM we rotate it counter-clockwise and to decrease the RPM we rotate it clockwise.
Governing the RPM
On most helicopters, we will not be using the throttle a lot since they are equipped with a governor.
This handy piece of equipment monitors the engine’s RPM and controls the engine as to maintain it within the require parameters. On helicopters equipped with a governor, we usually crank the throttle up as per the checklist and don’t touch it until we land and/or shut the engine down.
The cyclic
The cyclic is basically “the stick”. It’s the most visible control and the one people identify better as something that controls a helicopter.
Again, as we have seen above, the collective controls the swashplate up and down to increase or decrease lift. The cyclic also controls the swashplate, but in a different way.
Instead of moving the swashplate up and down in a uniform way, the cyclic controls the swashplate so that the lift is not even. When you push the cyclic forward, the lift will increase on the back of the helicopter. If you pull it backwards, it will increase in the front of the helicopter. If you push it left, it increases the lift on the right side and vice-versa.
What this does is allow you to move the helicopter in those directions. That’s right: in order for a helicopter to move forward, you will need to push the cyclic forward. If you come from a fixed-wing background (and most of us do), it’s counter-intuitive. We are used to crank the throttle to move forward and push the stick to pitch down, right? Not in a helicopter.
So, the cyclic allows us to move in these 4 directions: front back, left and right. In time, and with a lot of practice, we should be able to do it smoothly and place our helicopter in tight spots or land in pinnacles, top of buildings or even a dolly!
Video by Joe Hudson.
The anti-torque pedals
Fixed-wing aircraft have rudder pedals. Helicopters have something similar: anti-torque pedals.
There are several different helicopter designs: helicopters with 2 co-axial, tandem or intermeshing rotors, single rotor with no tail rotor (NOTAR), etc. We’re keeping things simple so we’ll assume all helicopters have a main rotor and a tail rotor. The principle of the anti-torque pedals is basically the same.
So, in this world where all helicopters share the same design and all of them have a main and a tail rotor, the anti-torque pedals control the tail rotor.
When we push the right pedal the tail rotor increases it’s lift to the left side (if we look at the helicopter from the top-down), yawing the helicopter to the right. When we push the left pedal, the opposite occurs: the tail rotor pushes the tail to the right, making the helicopter move its nose (yaw) to the left.
If you’re wondering why is it that they’re called the “anti-torque pedals”, the explanation is simple.
You see, when you pull the collective up, lift increases but so does the blades drag – we’ve seen that before. The engine has to move faster and more force (torque) is applied to the transmission of the helicopter, which is in the fuselage. According to Newton's 3rd law: "for every action, there is an equal and opposite reaction". So the rotor spinning in one direction will make the fuselage spin on the opposite direction.
To counter-act this spin (or to act against the torque), we use the tail rotor. We’ll see more about this later.
Conclusion
As you can see, the controls are pretty simple and they all make sense: they have a purpose in helping the helicopter in all directions.
In the next article, we will see how they all work together and, from there, we’ll learn how to take off, hover and all the other basic maneuvers.
Credits
I'd like to thank Joe Hudson for all the help and support while writing this article and, in particular, by adding some technical insight in order to make the videos be a bit more clear and realistic.
How to fly helicopters series
Check out the other articles on this series. Click here to see all the available material we have.