It looks like something out of the dark arts. You open your Facebook feed and there they are: some cool screenshots of a helicopter or a scenery. But, wait… It moves?
This is a panorama image test. Don't mind me.
Posted by Sérgio Costa on Saturday, July 6, 2019
They move, yes. You can move your phone or drag the image and you can now look all around. That’s cool! “How can I do that?”, you think.
Well, it takes a bit of time, some work and perhaps a bit of luck.
Oh yes, and a couple of free tools.
Please note that this is a tutorial for Windows users. Sorry, Mac and Linux users… I hope you enjoy it. I believe that whenever we find cool stuff we should share it with the community, so here it is!
The tools of the trade
You will need to download a couple of free tools and install one of them (the other one doesn’t need to be installed).
The first tool is called Image Composite Editor, by Microsoft which you can download here . This is the one you’ll need to install, so you can go ahead and do it once you download it.
The second tool is ExifTool, by Phil Harvey. Get it here . You’ll want to get the Windows Executable.
Again (at least at the time I wrote this article), these are free programs.
The process
Step 1 - capturing the images
This is the most time-consuming part of the process and the one where things can go very well or very badly.
As long as you can move the camera around a pivot point (meaning you can look around without leaving the same place, this works for any sim you wish to do it for. The idea is for you to look all the way around you.
Imagine you are in the center of a sphere and you need to photograph the whole internal surface of that sphere. That’s what you’ll need to do.
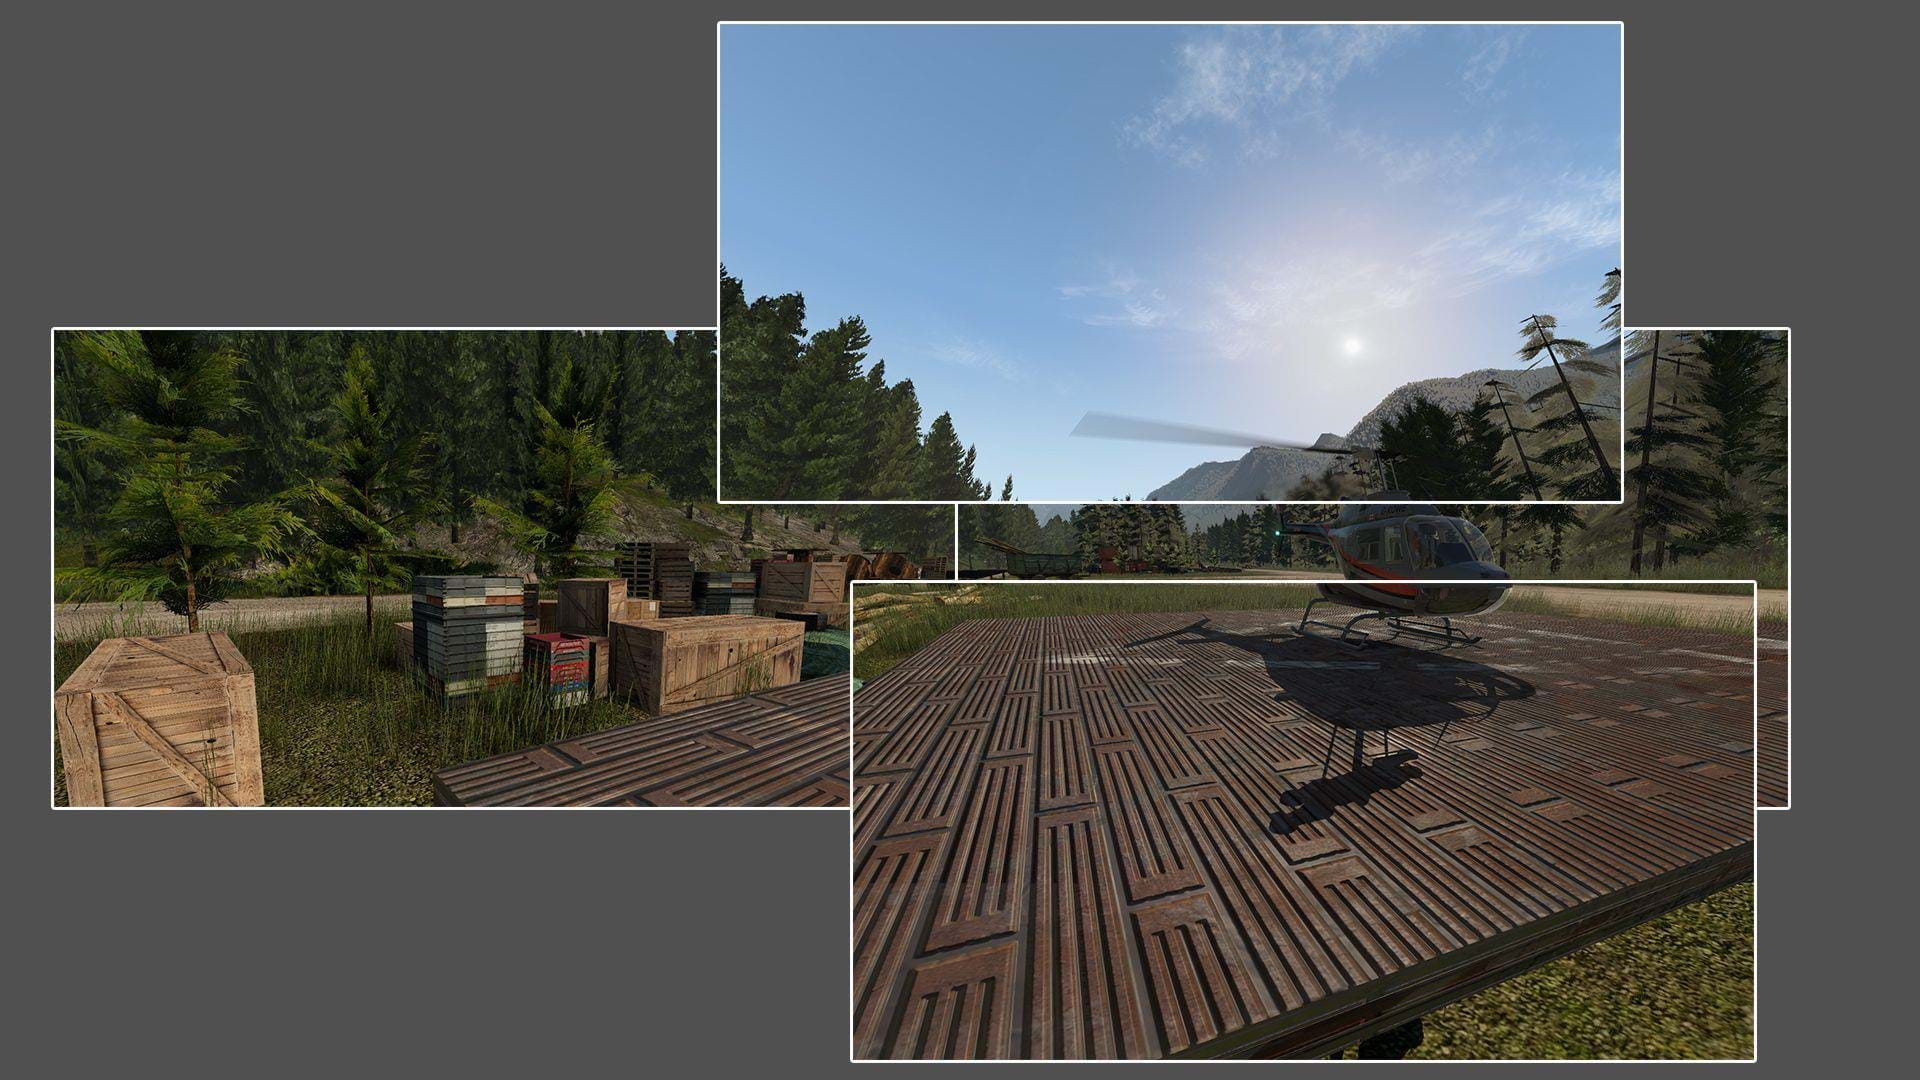
As you do it, though, make sure your screenshots overlap each other. This means that all your screenshots should have a “piece” of the image of other screenshots, so that Image Composite Editor understands how to stitch them together. Which is the next step.
This can be time consuming and frustrating as the images you produce may not work. In time, though, you’ll understand what works and what doesn’t.
Just like flying helicopters, just stick to it and practice, practice, practice!
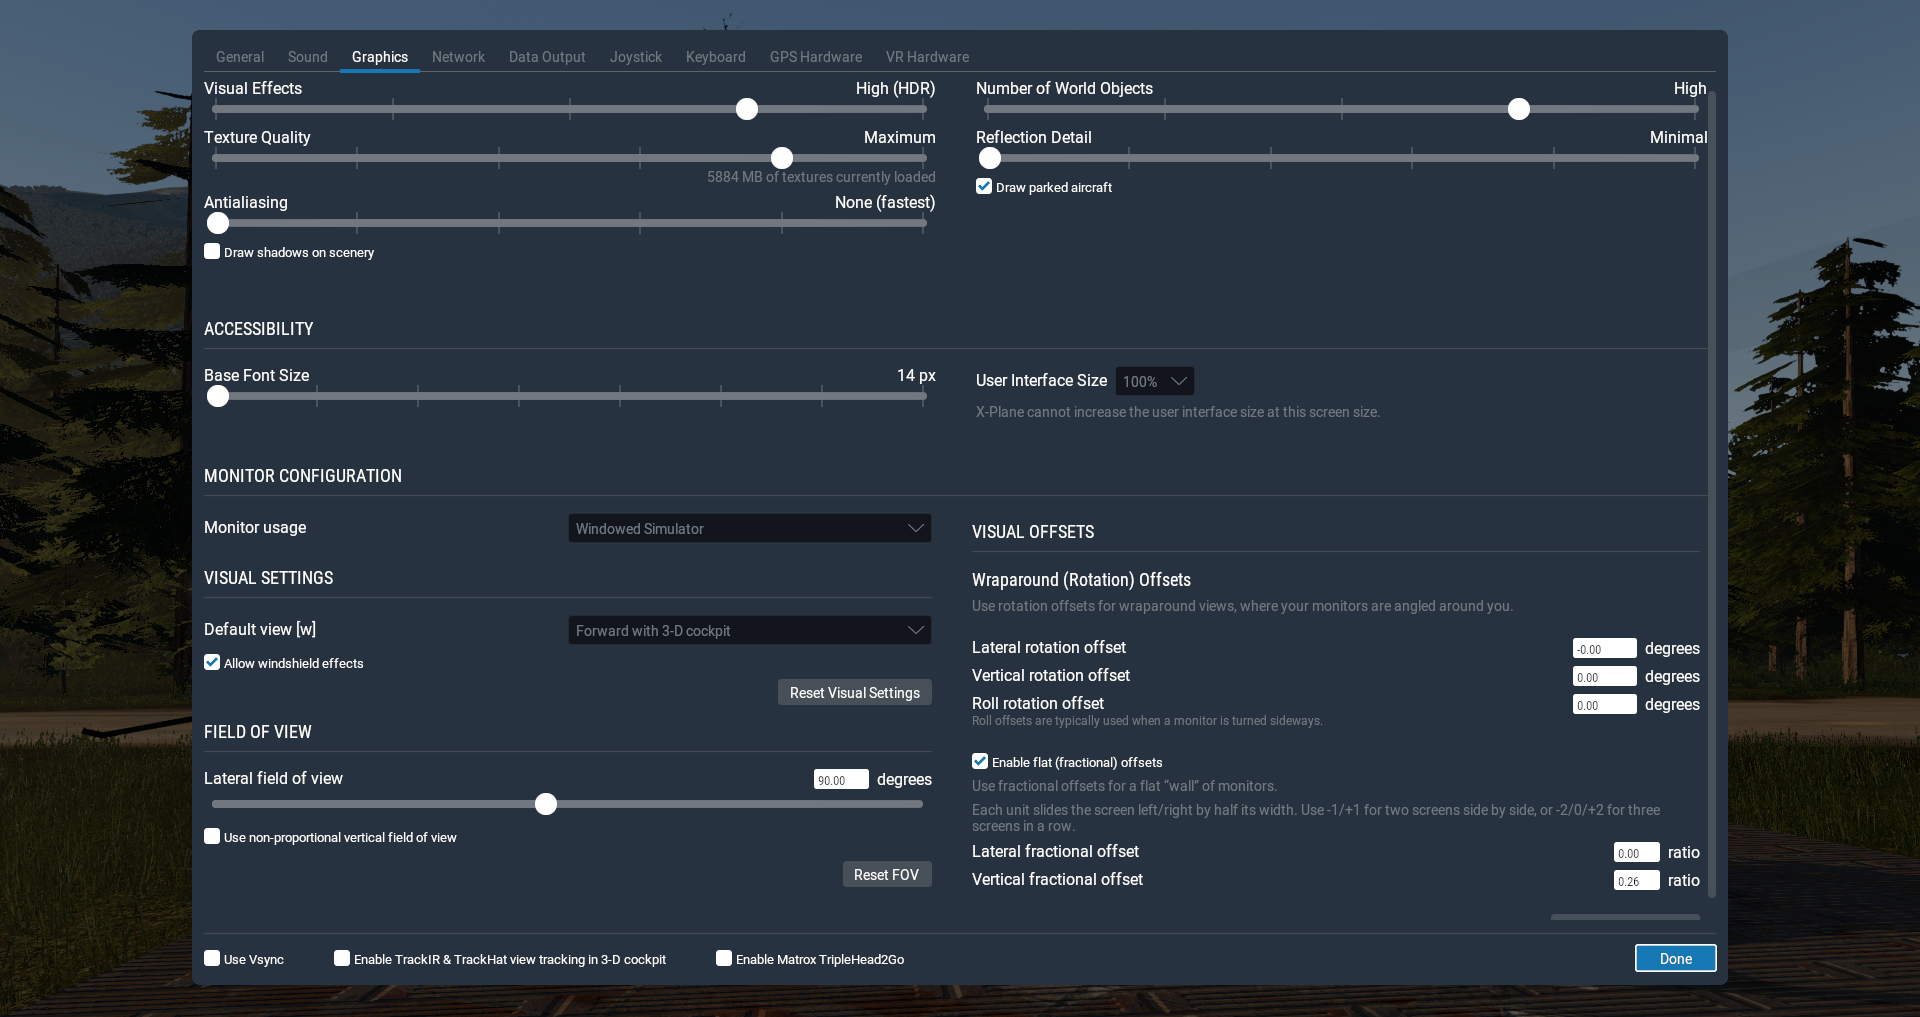
A tip: set your FOV (Field Of View) to 90. I found it works better this way.
Step 2 - stitching them together
It’s time to use Image Composite Editor and let it do its magic.
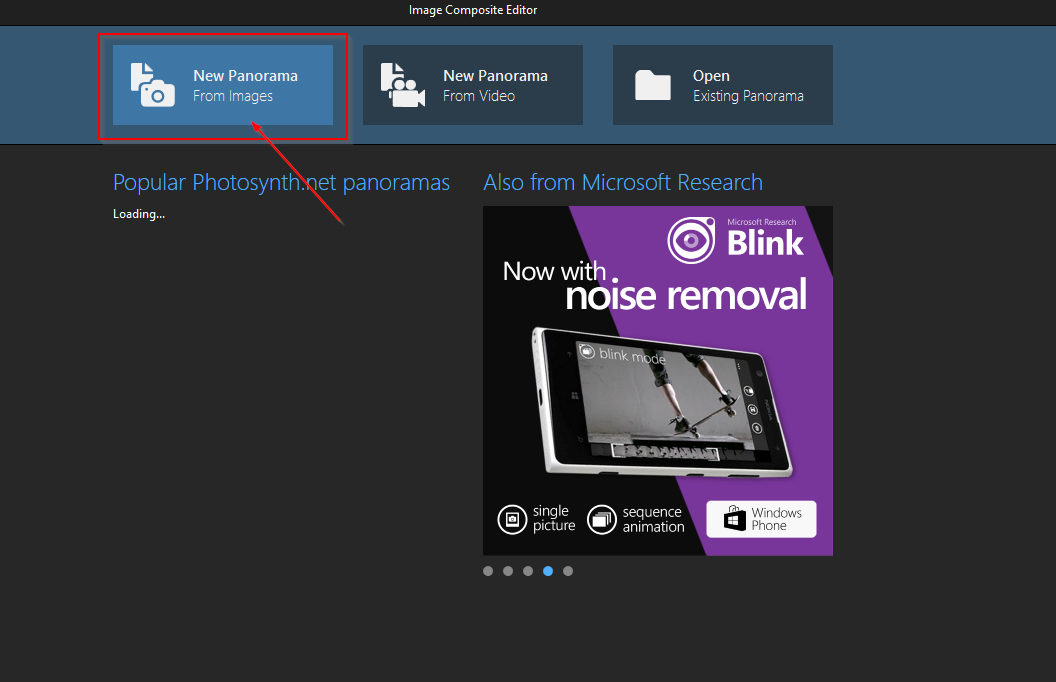
Open the application and select “New Panorama From Images”, by clicking the corresponding button on top of the screen. You will be given the possibility to select the images you want to use.
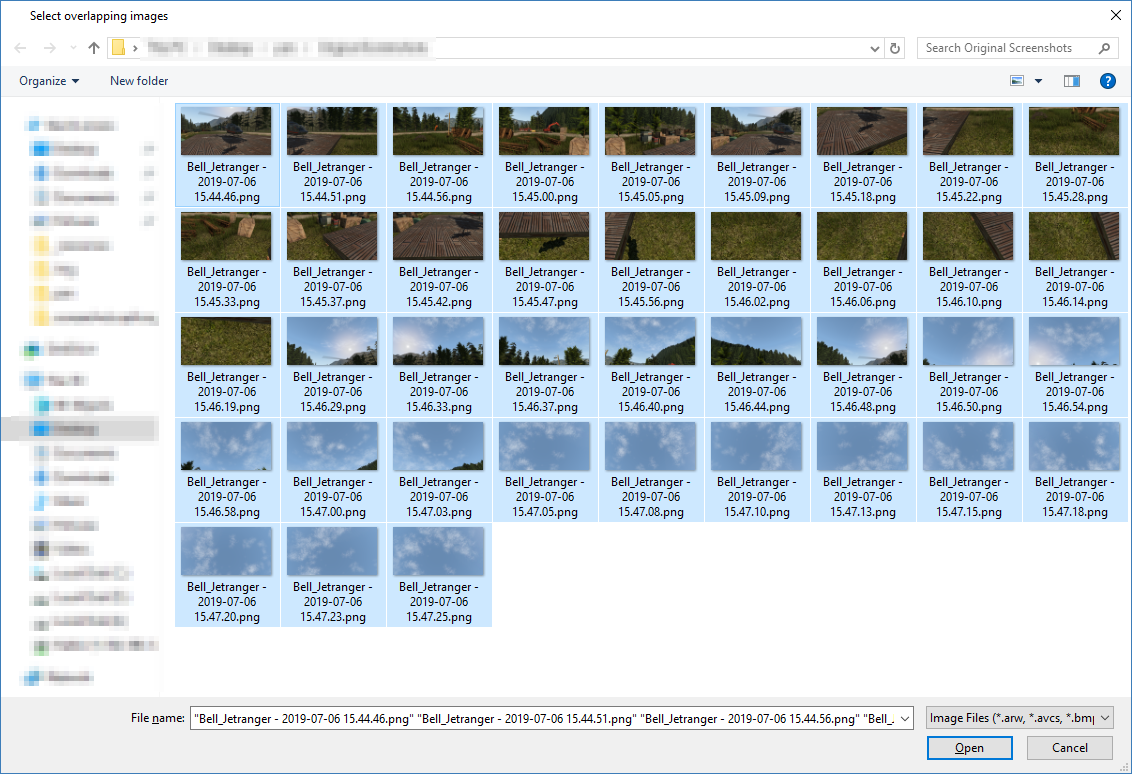
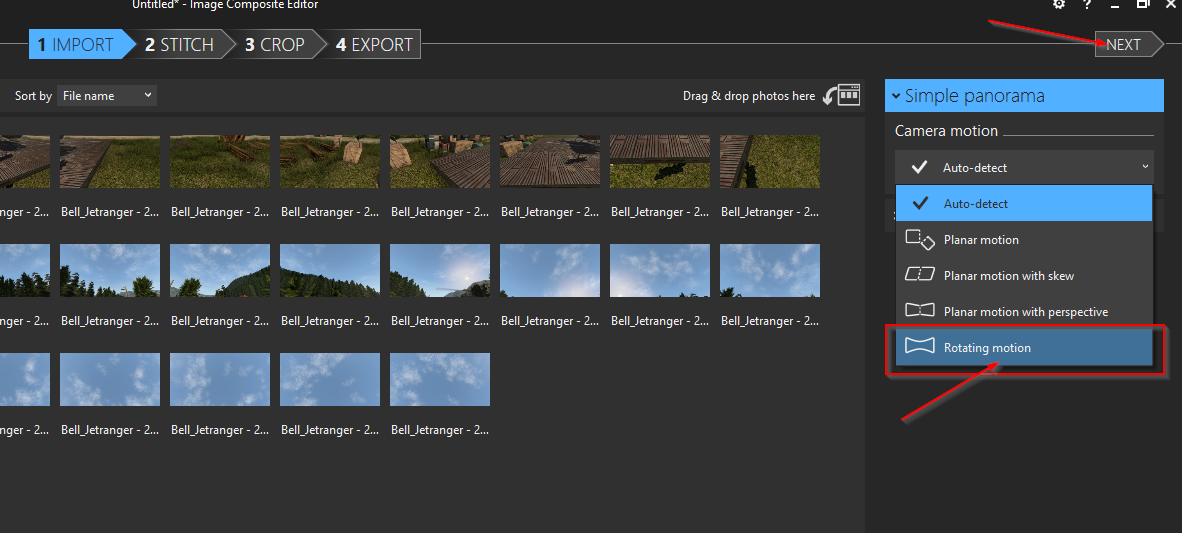
Once you do that, you’ll be facing a new screen, with all the images you just selected and a few options on the right.
I usually only change the “Camera Motion” option by selecting “Rotating motion”. I’ve left it on “Auto-detect” in the past and both these options worked fine but, on some images “Rotating motion” did a better job. Try both and see what works better for you.
You may find that some imagery doesn’t work very well, and you’ll find some “holes” in the final image. That usually means the software couldn’t find imagery to fill those gaps, for some reason. It usually has to do with the fact that we didn’t take screenshots of that area or it couldn’t figure out what to use.
Blue skies, for example, work badly as Image Composite Editor can’t decide where to put where. It’s always better to have some clouds on the sky so that there’s always some texture the software can use to do its thing.
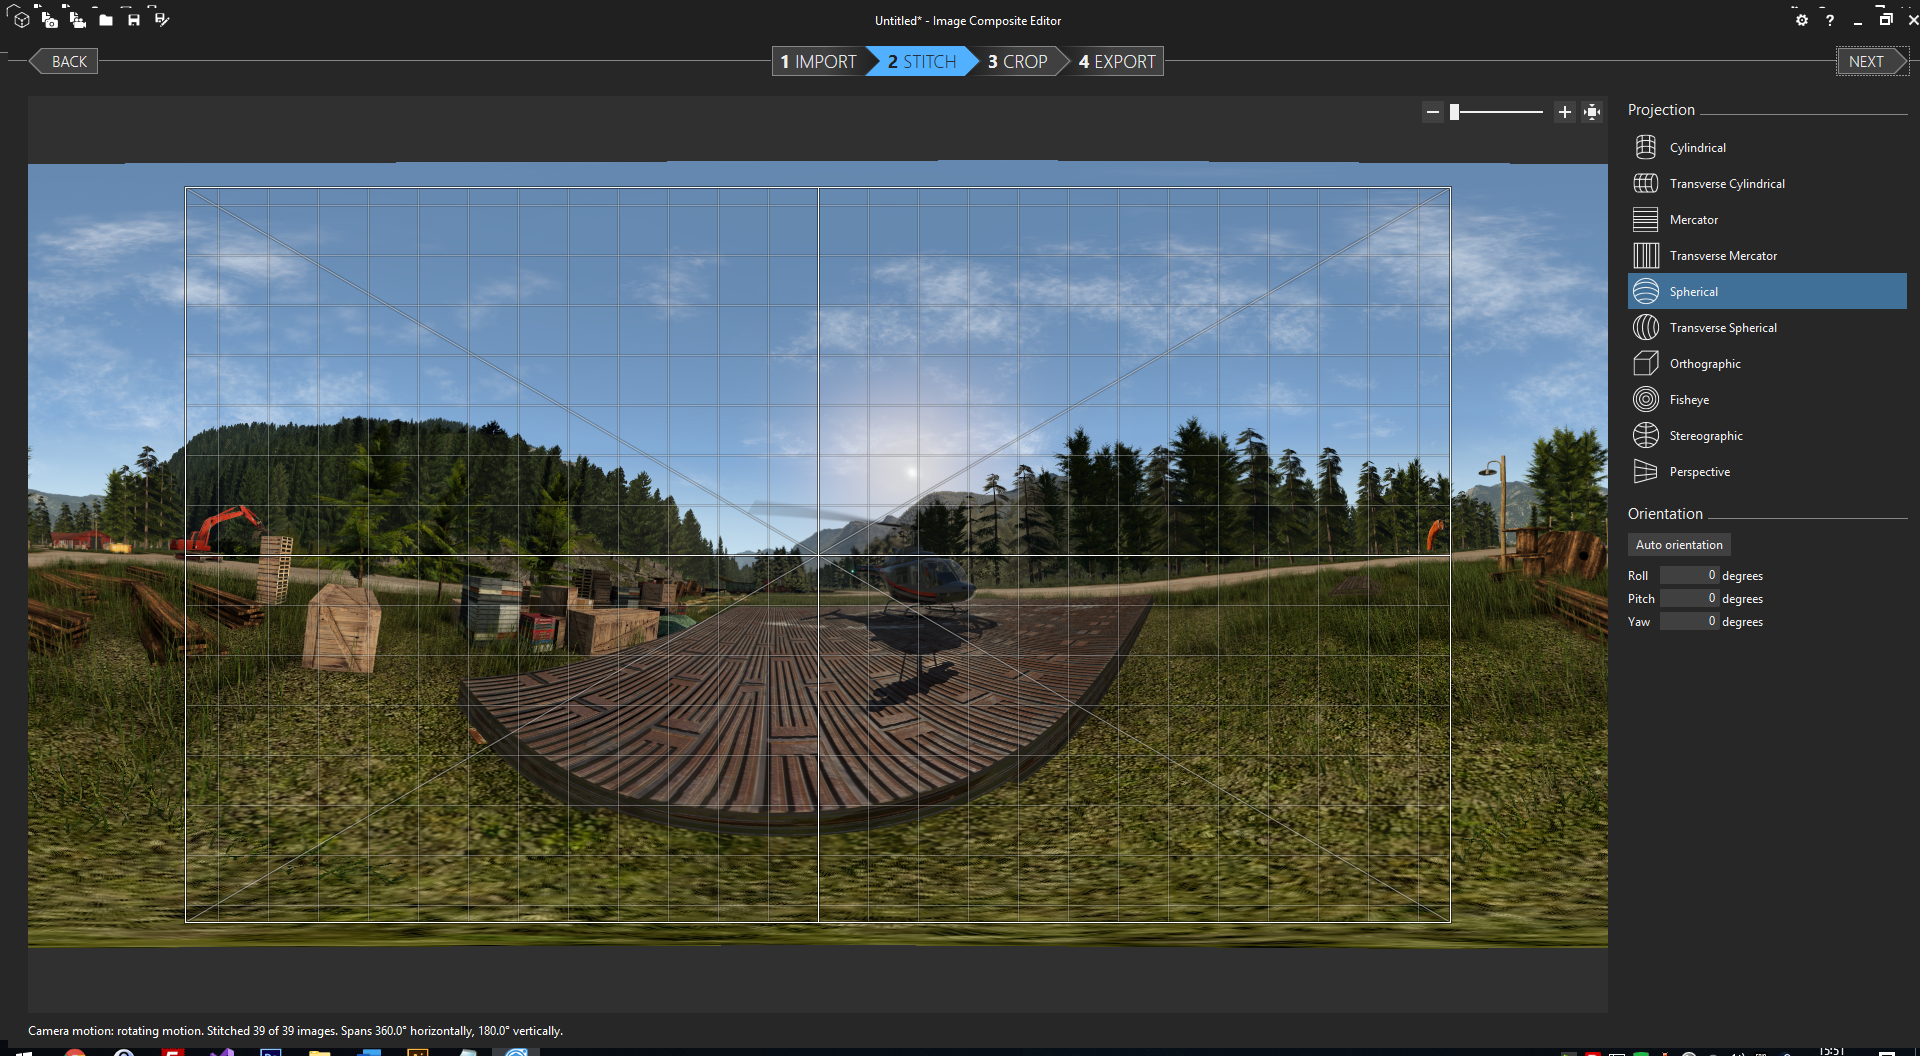

Click “Next” and let the software work. After it does its thing, you can export your image. You can export it as .jpg. That will work.
We’re done here.
Step 3 - taking care of the metadata
For Facebook to “understand” our image, we need to edit some of its metadata. Fortunately, there’s a tool that lets us do just that and I will tell you how to make it easier for you to use it.
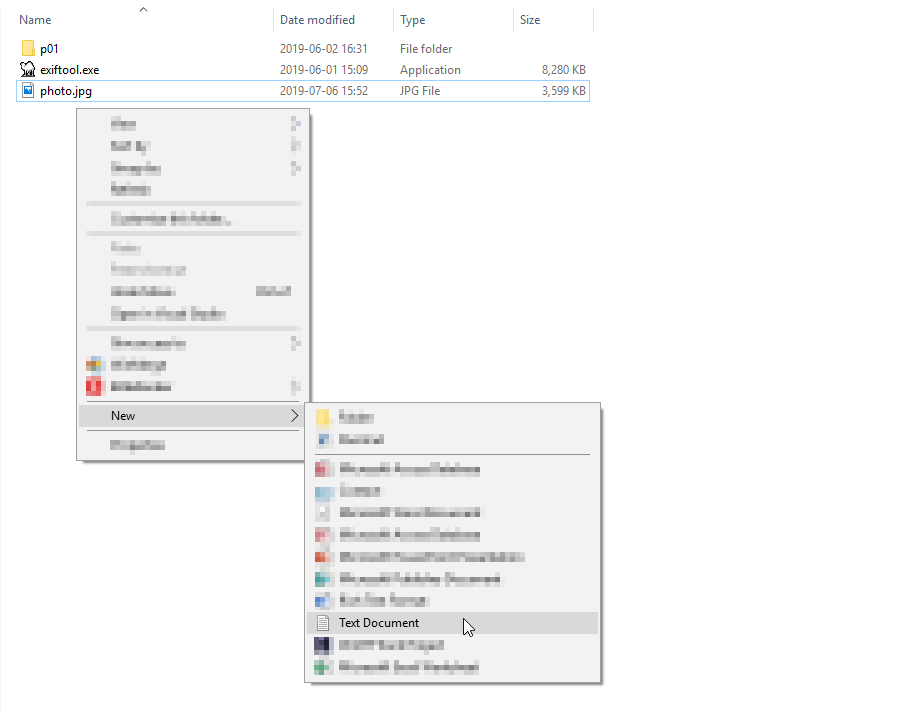
After you download and unzip the ExifTool software I mentioned above, copy the image you created on the previous step into the same folder you have ExifTool. I named my image “photo.jpg”.
You’ll only need to do the following once. Instead of having to open a command line window and going through some DOS commands (don’t worry, you won’t have to), I will show you how to create a small file that you can double-click on to do the hard work.
Again, just to make sure we are on the same page, you will only need to do this once. You can obviously reuse the file for future images.
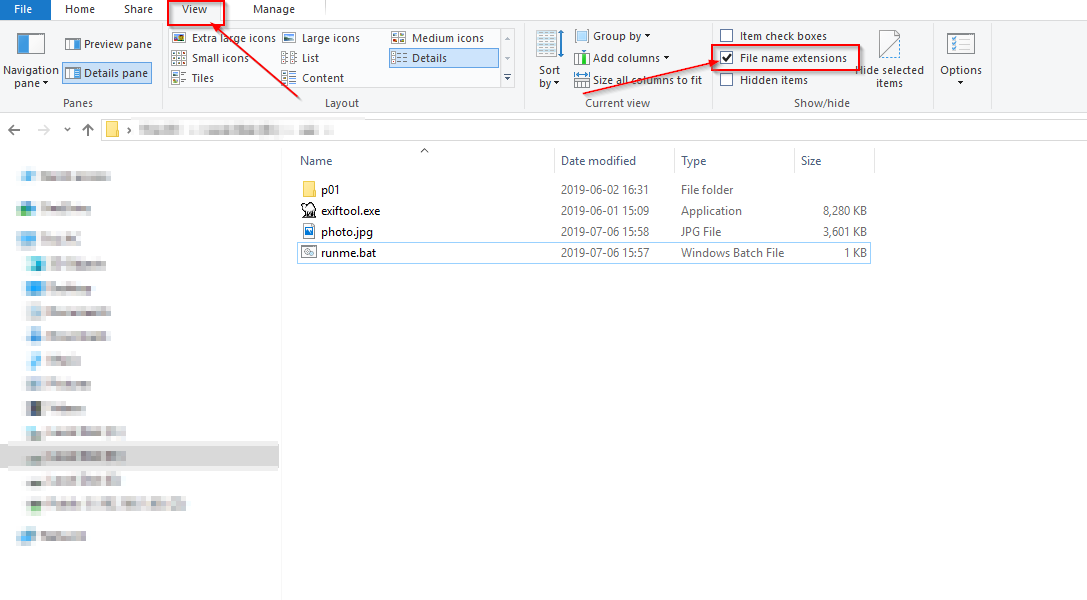
Right-click on an empty area, inside the folder where you have ExifTool (and now your panorama photo as well) and select “New > Text Document”.
Call it “runme.txt”, for example. Next double-click to open it and write the following:
exiftool -ProjectionType="equirectangular" photo.jpg
Please note that you should replace “photo.jpg” in the line above with the name of your panorama image you created before. Save and close the text file.
Rename the file to “runme.bat”. Please note that you might need to activate the option “File name extensions” on the top “View” menu.
We're done here.
From now on, we’re back on normal and everything that follows will have to be done for every new image.
Double-click the file you just created (“runme.bat”). A windows console will open for a few seconds and then close. You should now have a new file called “photo.jpg_original” which is, well, the actual original image. The “photo.jpg” image you now have is the one with the edited metadata and the one we are going to use on Facebook.
Step 4 - publishing on Facebook
This is the easy part. Head out to Facebook.com, login and post the “photo.jpg” image we edited on step 3.
The post popup should give you a couple of hints that the process worked: you’ll notice the 360º icon on top of the thumbnail of your image and you’ll also have something like “Say something about this 360 photo…”.
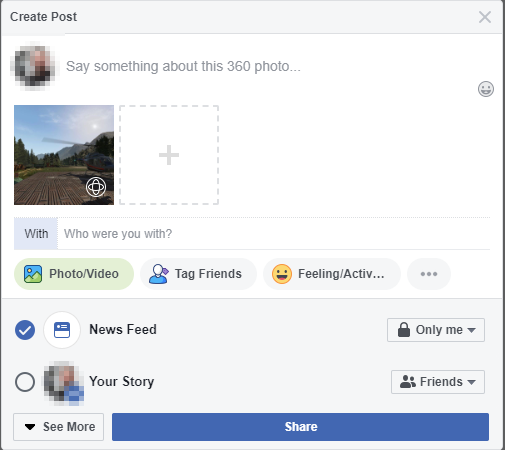
That’s it! You published your first panorama screenshot!
Easy, right?
I hope you enjoyed this tutorial and that you will show us some cool screenshots! Feel free to post them at our Facebook group [ https://www.facebook.com/groups/helicopterflightsim ]. Just don’t spam us! But feel free to show us your work!