So much that, honestly, I never thought I’d have so many people asking me about it. But the truth is that people feel a bit lost when it comes to setting things up for helicopters in Microsoft Flight Simulator.
While it’s not hard to do, some of these may be elusive but I promise you we’ll get you up to speed in only a few minutes.
As opposed to what happened with FSX (and any of the previous Flight Simulator versions that had helicopters, really), although the regular fixed-wing axis may work, it doesn’t mean they all do. There’s actually some curiosity that I will tell you about in the end. Let’s focus on what’s important now.
The 40th-anniversary edition of MSFS brought us helicopters (finally) and, with it, some specific assignments for this particular type of aircraft. As opposed to FSX, where all the axes were pretty much the same and the throttle assignment took care of the helicopter collective, the new version of the sim allows you to specify which axis controls what in a helicopter.
To see these axes, you may need to filter the controls and, instead of viewing just the assigned controls, select “All”. This way you’ll make sure you are not missing anything.
You can also make use of the “SEARCH BY NAME” feature on the left, above the filter option to find these quicker.
Primary Control Surfaces
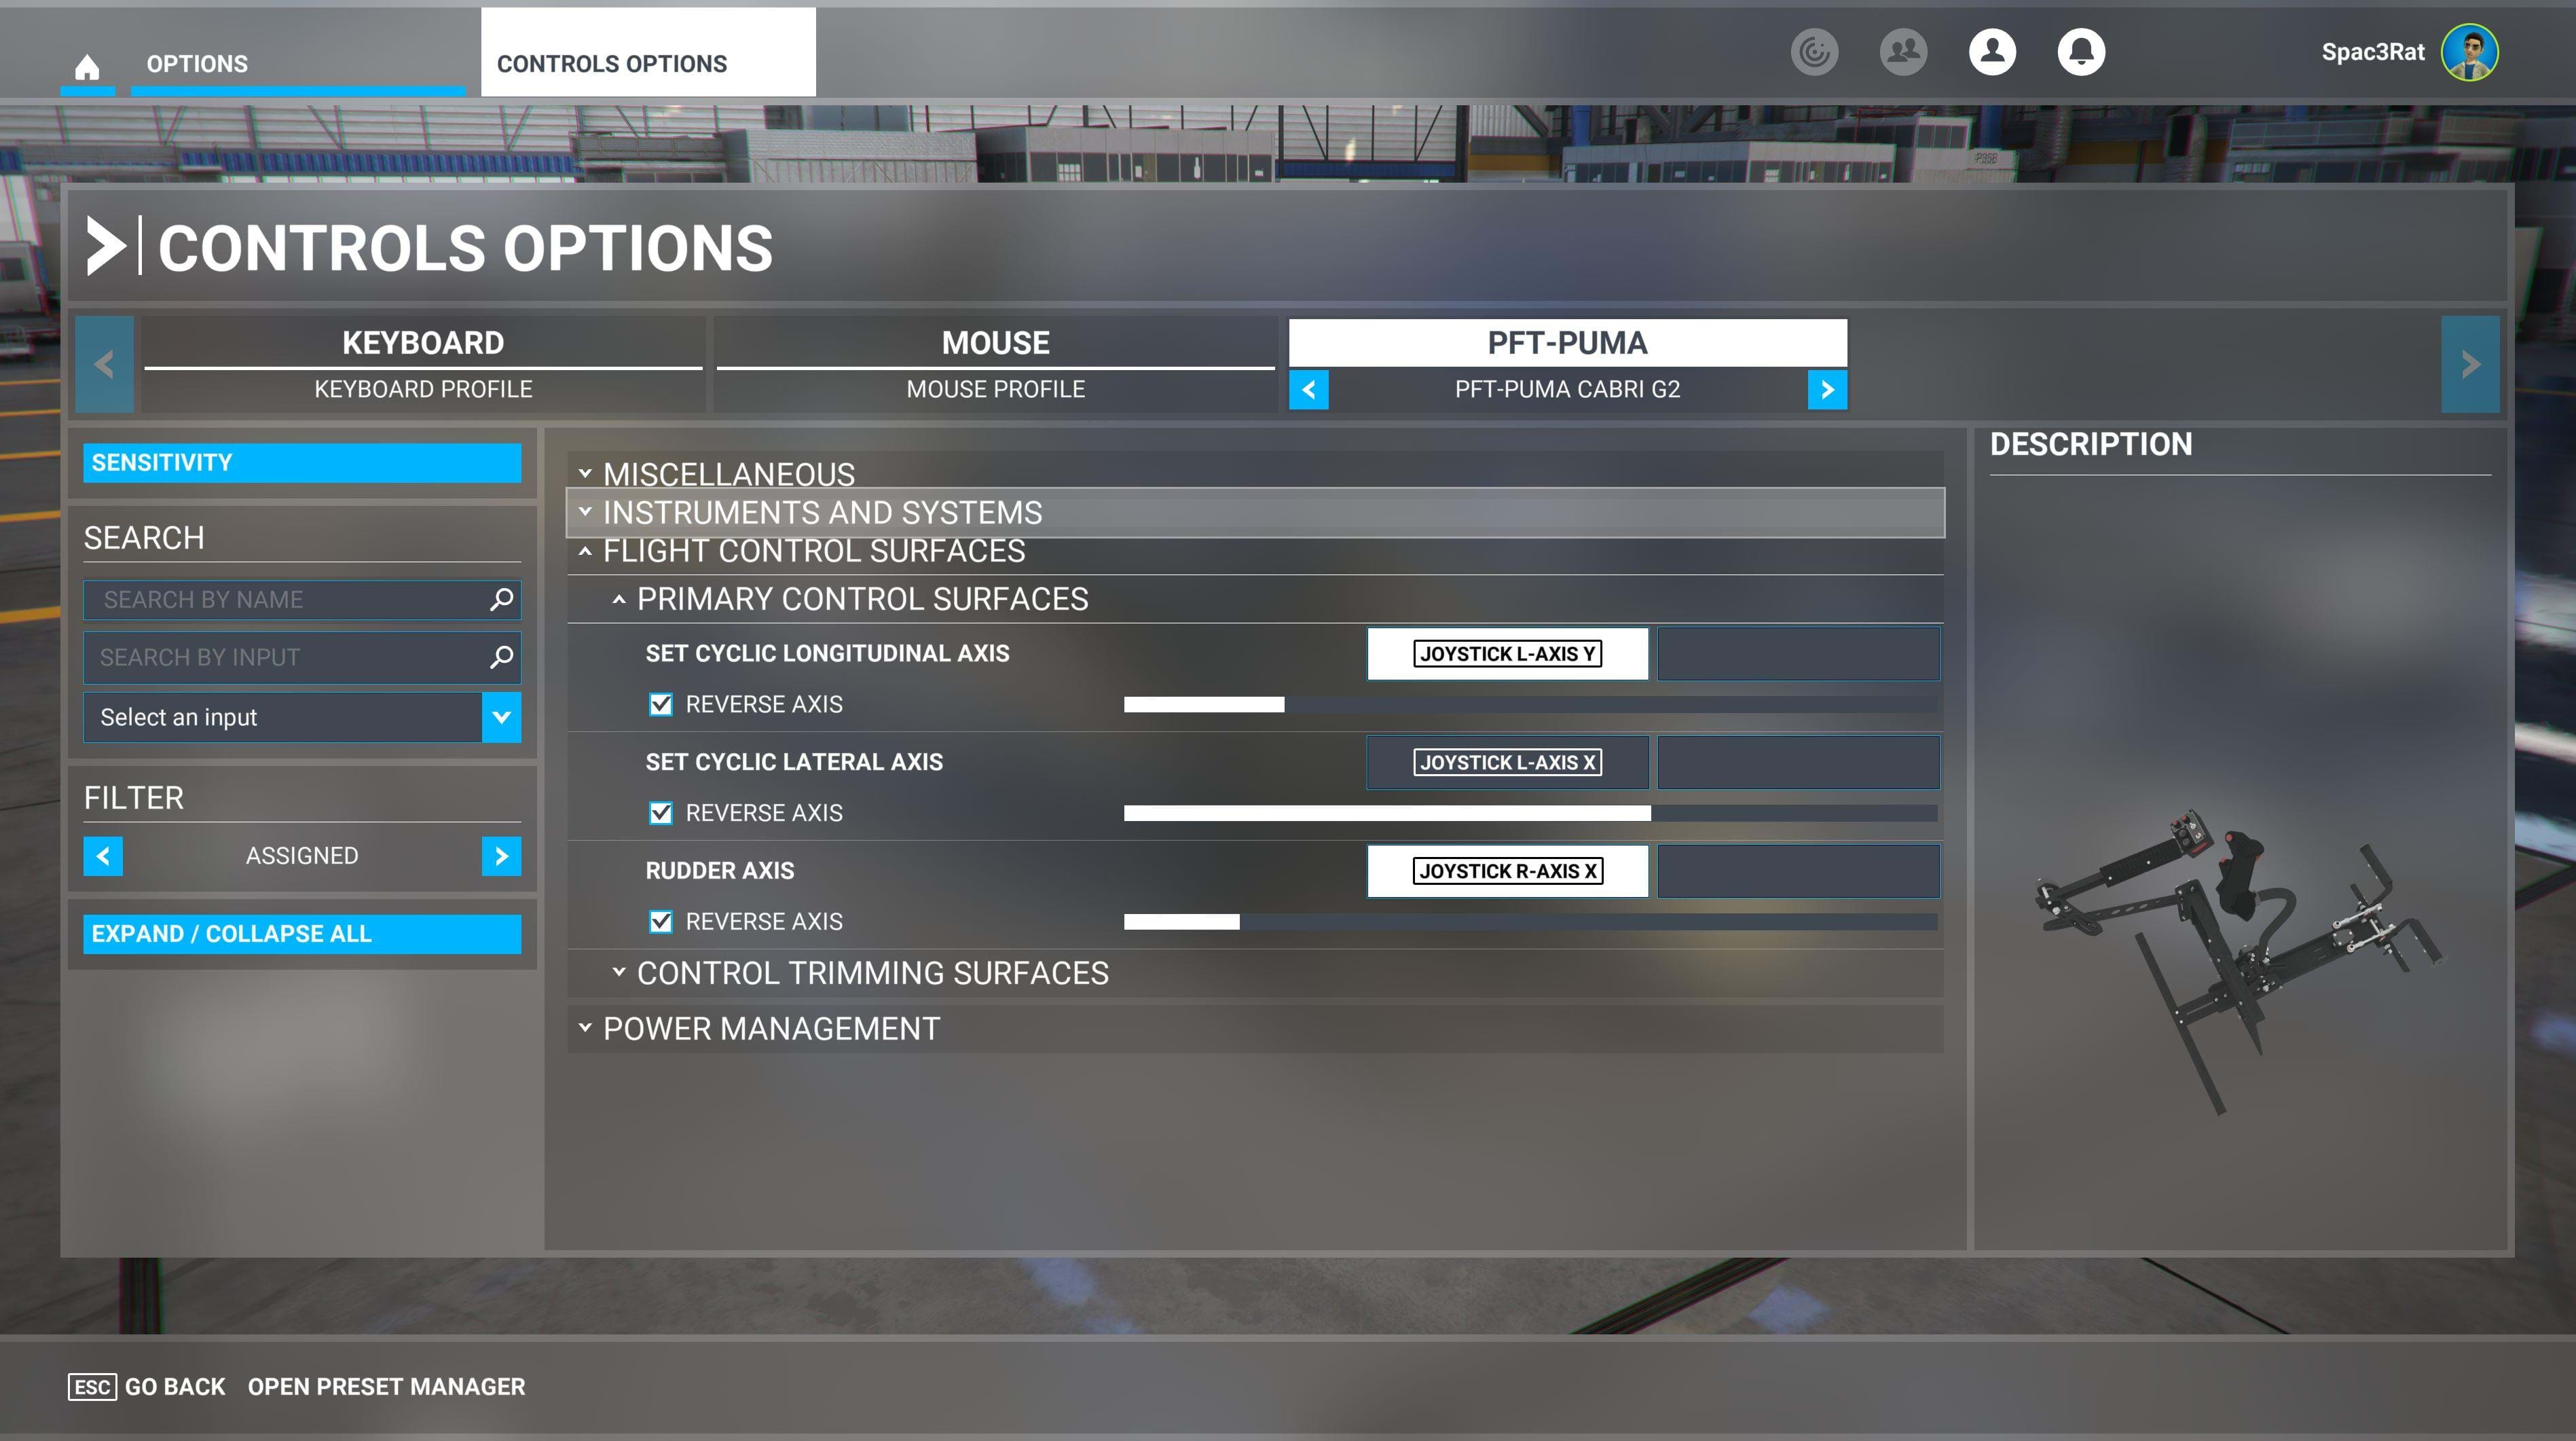
Let’s start with the cyclic (“pitch” and “roll”) as well as the anti-torque pedals (“yaw”).
You can search for “cyclic” (without commas, of course) and you will find a couple of axes: SET CYCLIC LONGITUDINAL AXIS and SET CYCLIC LATERAL AXIS.
You will need to assign your joystick grip to these too. Back-and-forth movement should be set to the CYCLIC LONGITUDINAL AXIS and the left/right movement to the CYCLIC LATERAL AXIS.
With this, you can now control the cyclic, of course.
MSFS calls the anti-torque pedals RUDDER AXIS, so you can set your twist grip or pedals to this axis.
All 6 degrees of motion controls are set.
Power Management
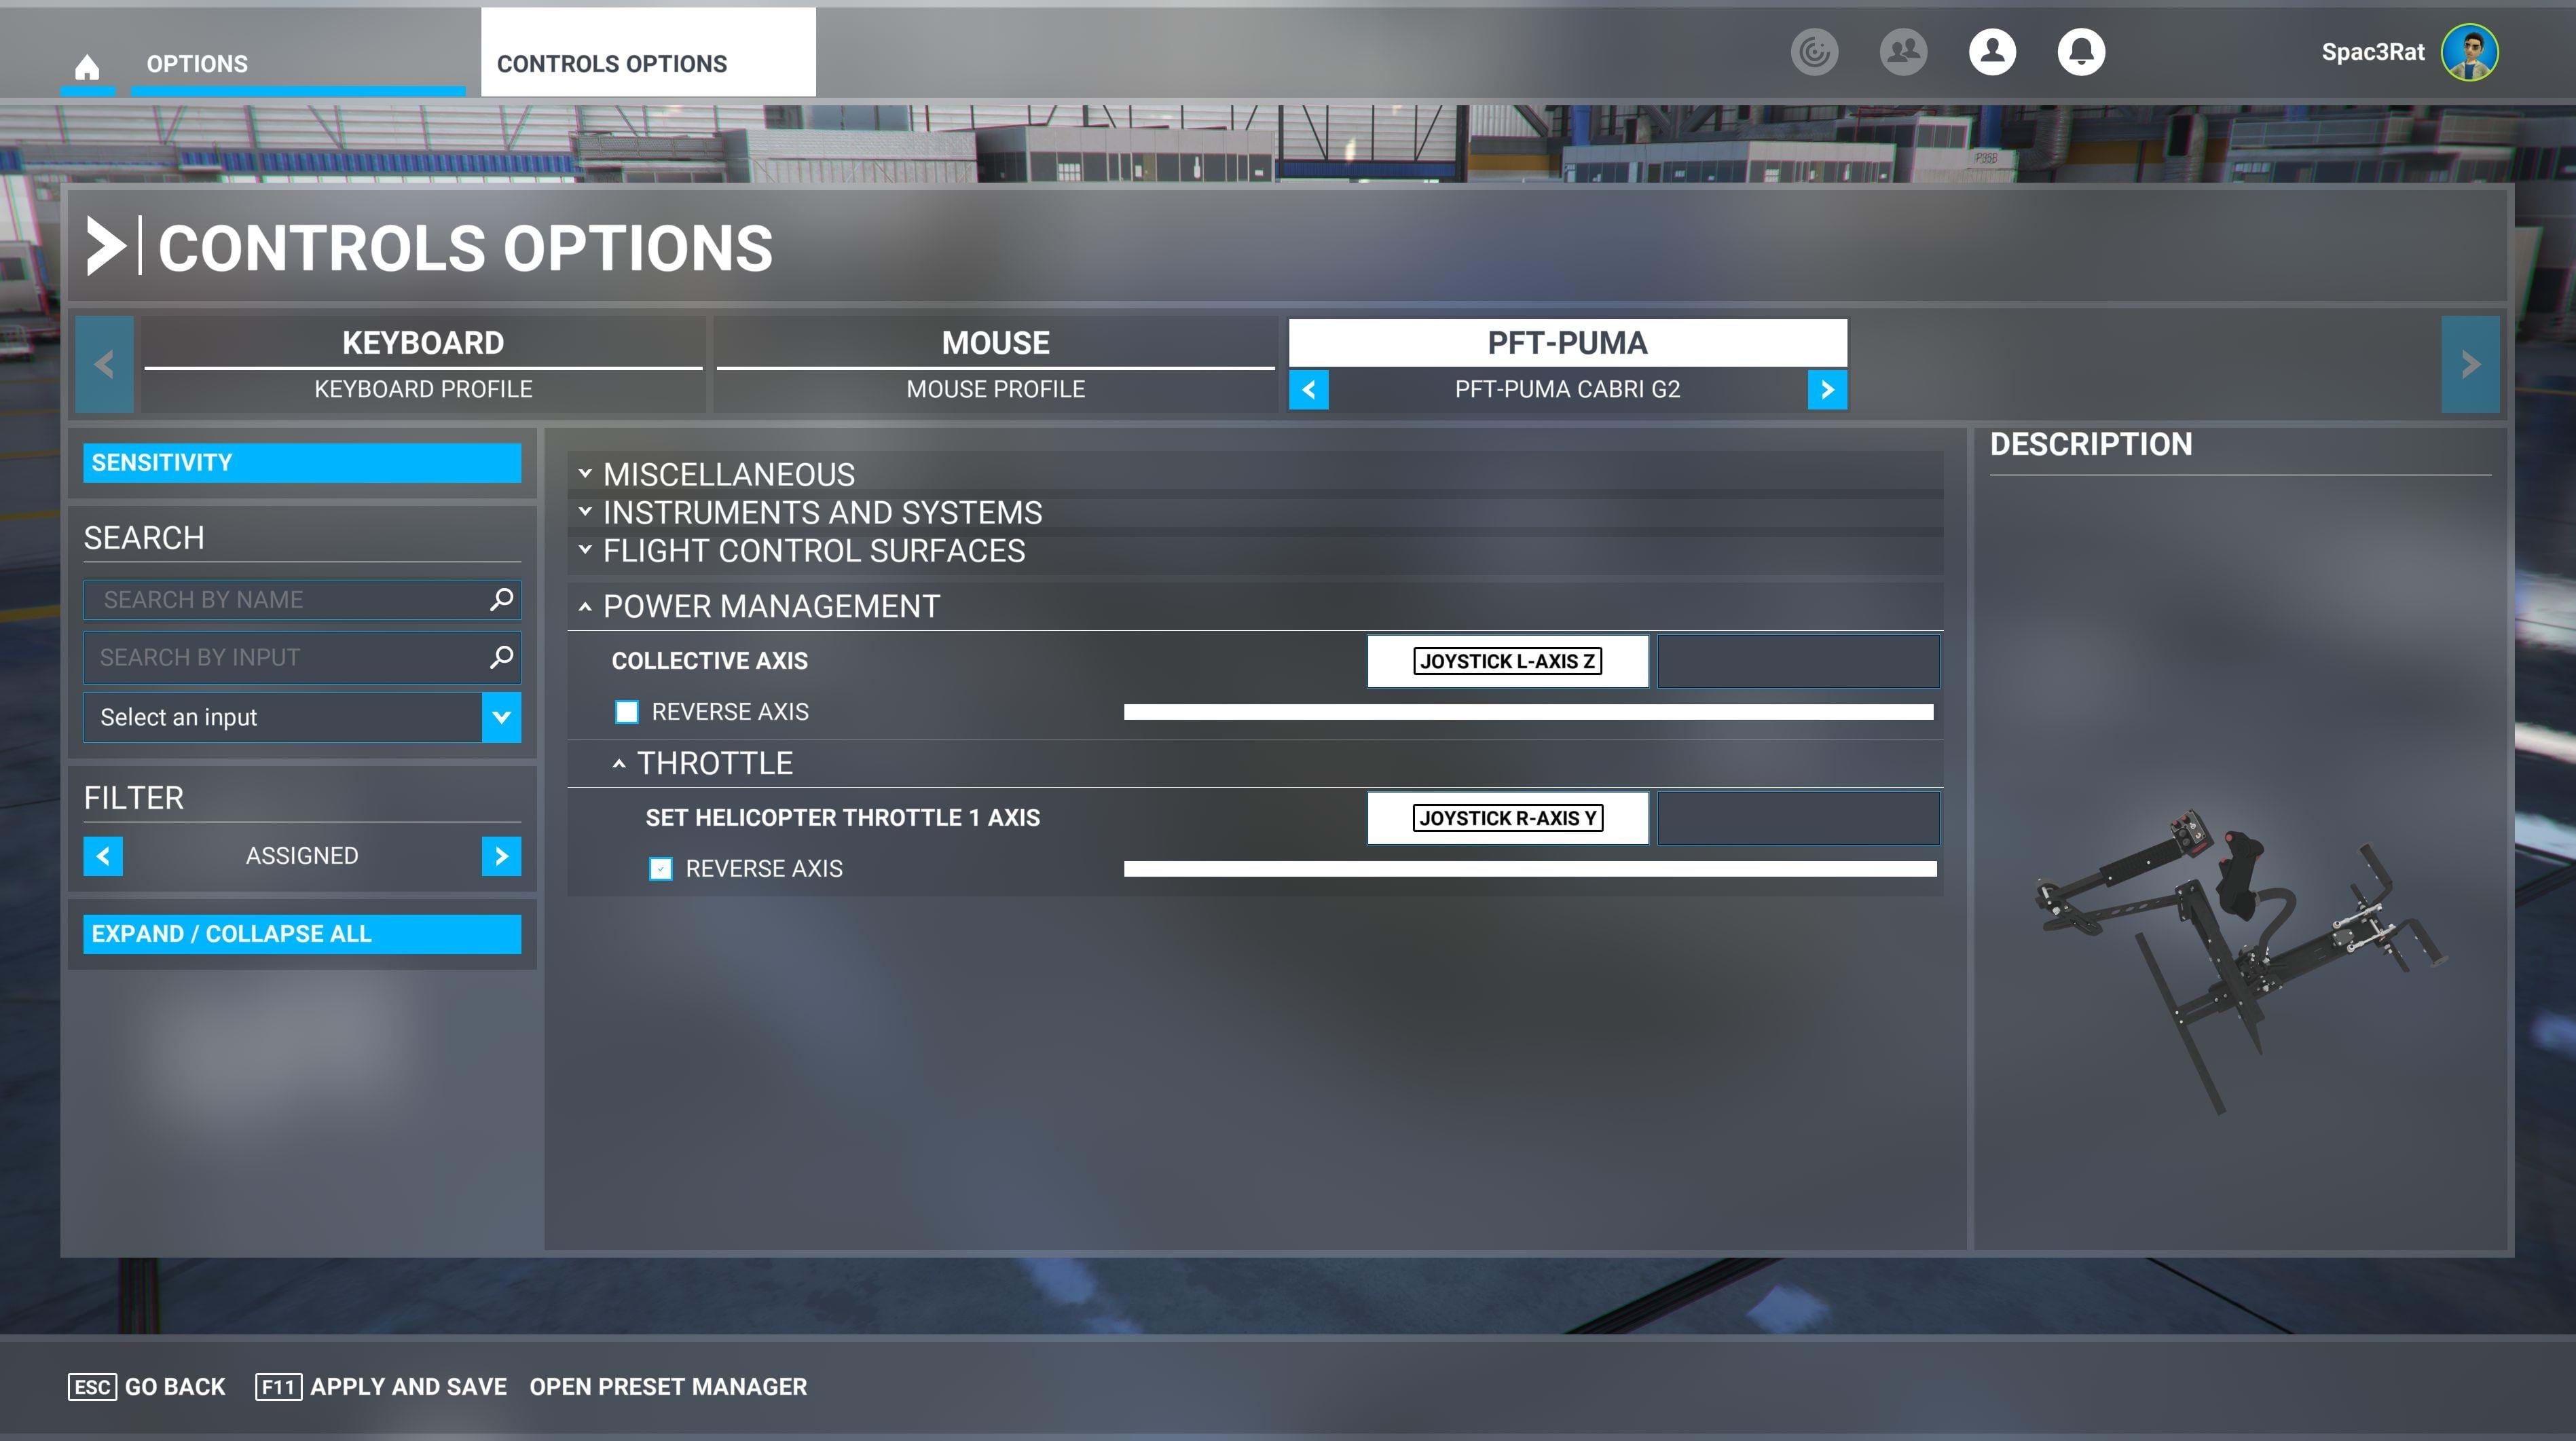
As for the collective and throttle (yes, they are different, check my video about that here), you will set your collective axis to, well, COLLECTIVE AXIS (just search for collective and you’ll find it).
For those that have a physical hardware collective, the “lever” part of it should be assigned to this. For those that use the regular aircraft throttle for this (like a HOTAS), you’ll need to assign your throttle axis to this axis.
Yes, things can get a bit confusing here because if you are using a HOTAS you will assign your physical throttle to the helicopter collective. But we still have an actual helicopter collective.
If you have a spare axis, you can search for “helicopter throttle” and you will find SET HELICOPTER THROTTLE 1 AXIS, which is what you should be assigning your axis to.
Now, please note that, at the time this article was written, there are still issues with the MSFS default throttle/governor so any helicopter based on the native helicopter dynamics may not be working 100% correctly. This is something Microsoft knows and should be taken care of in the future.
Trim
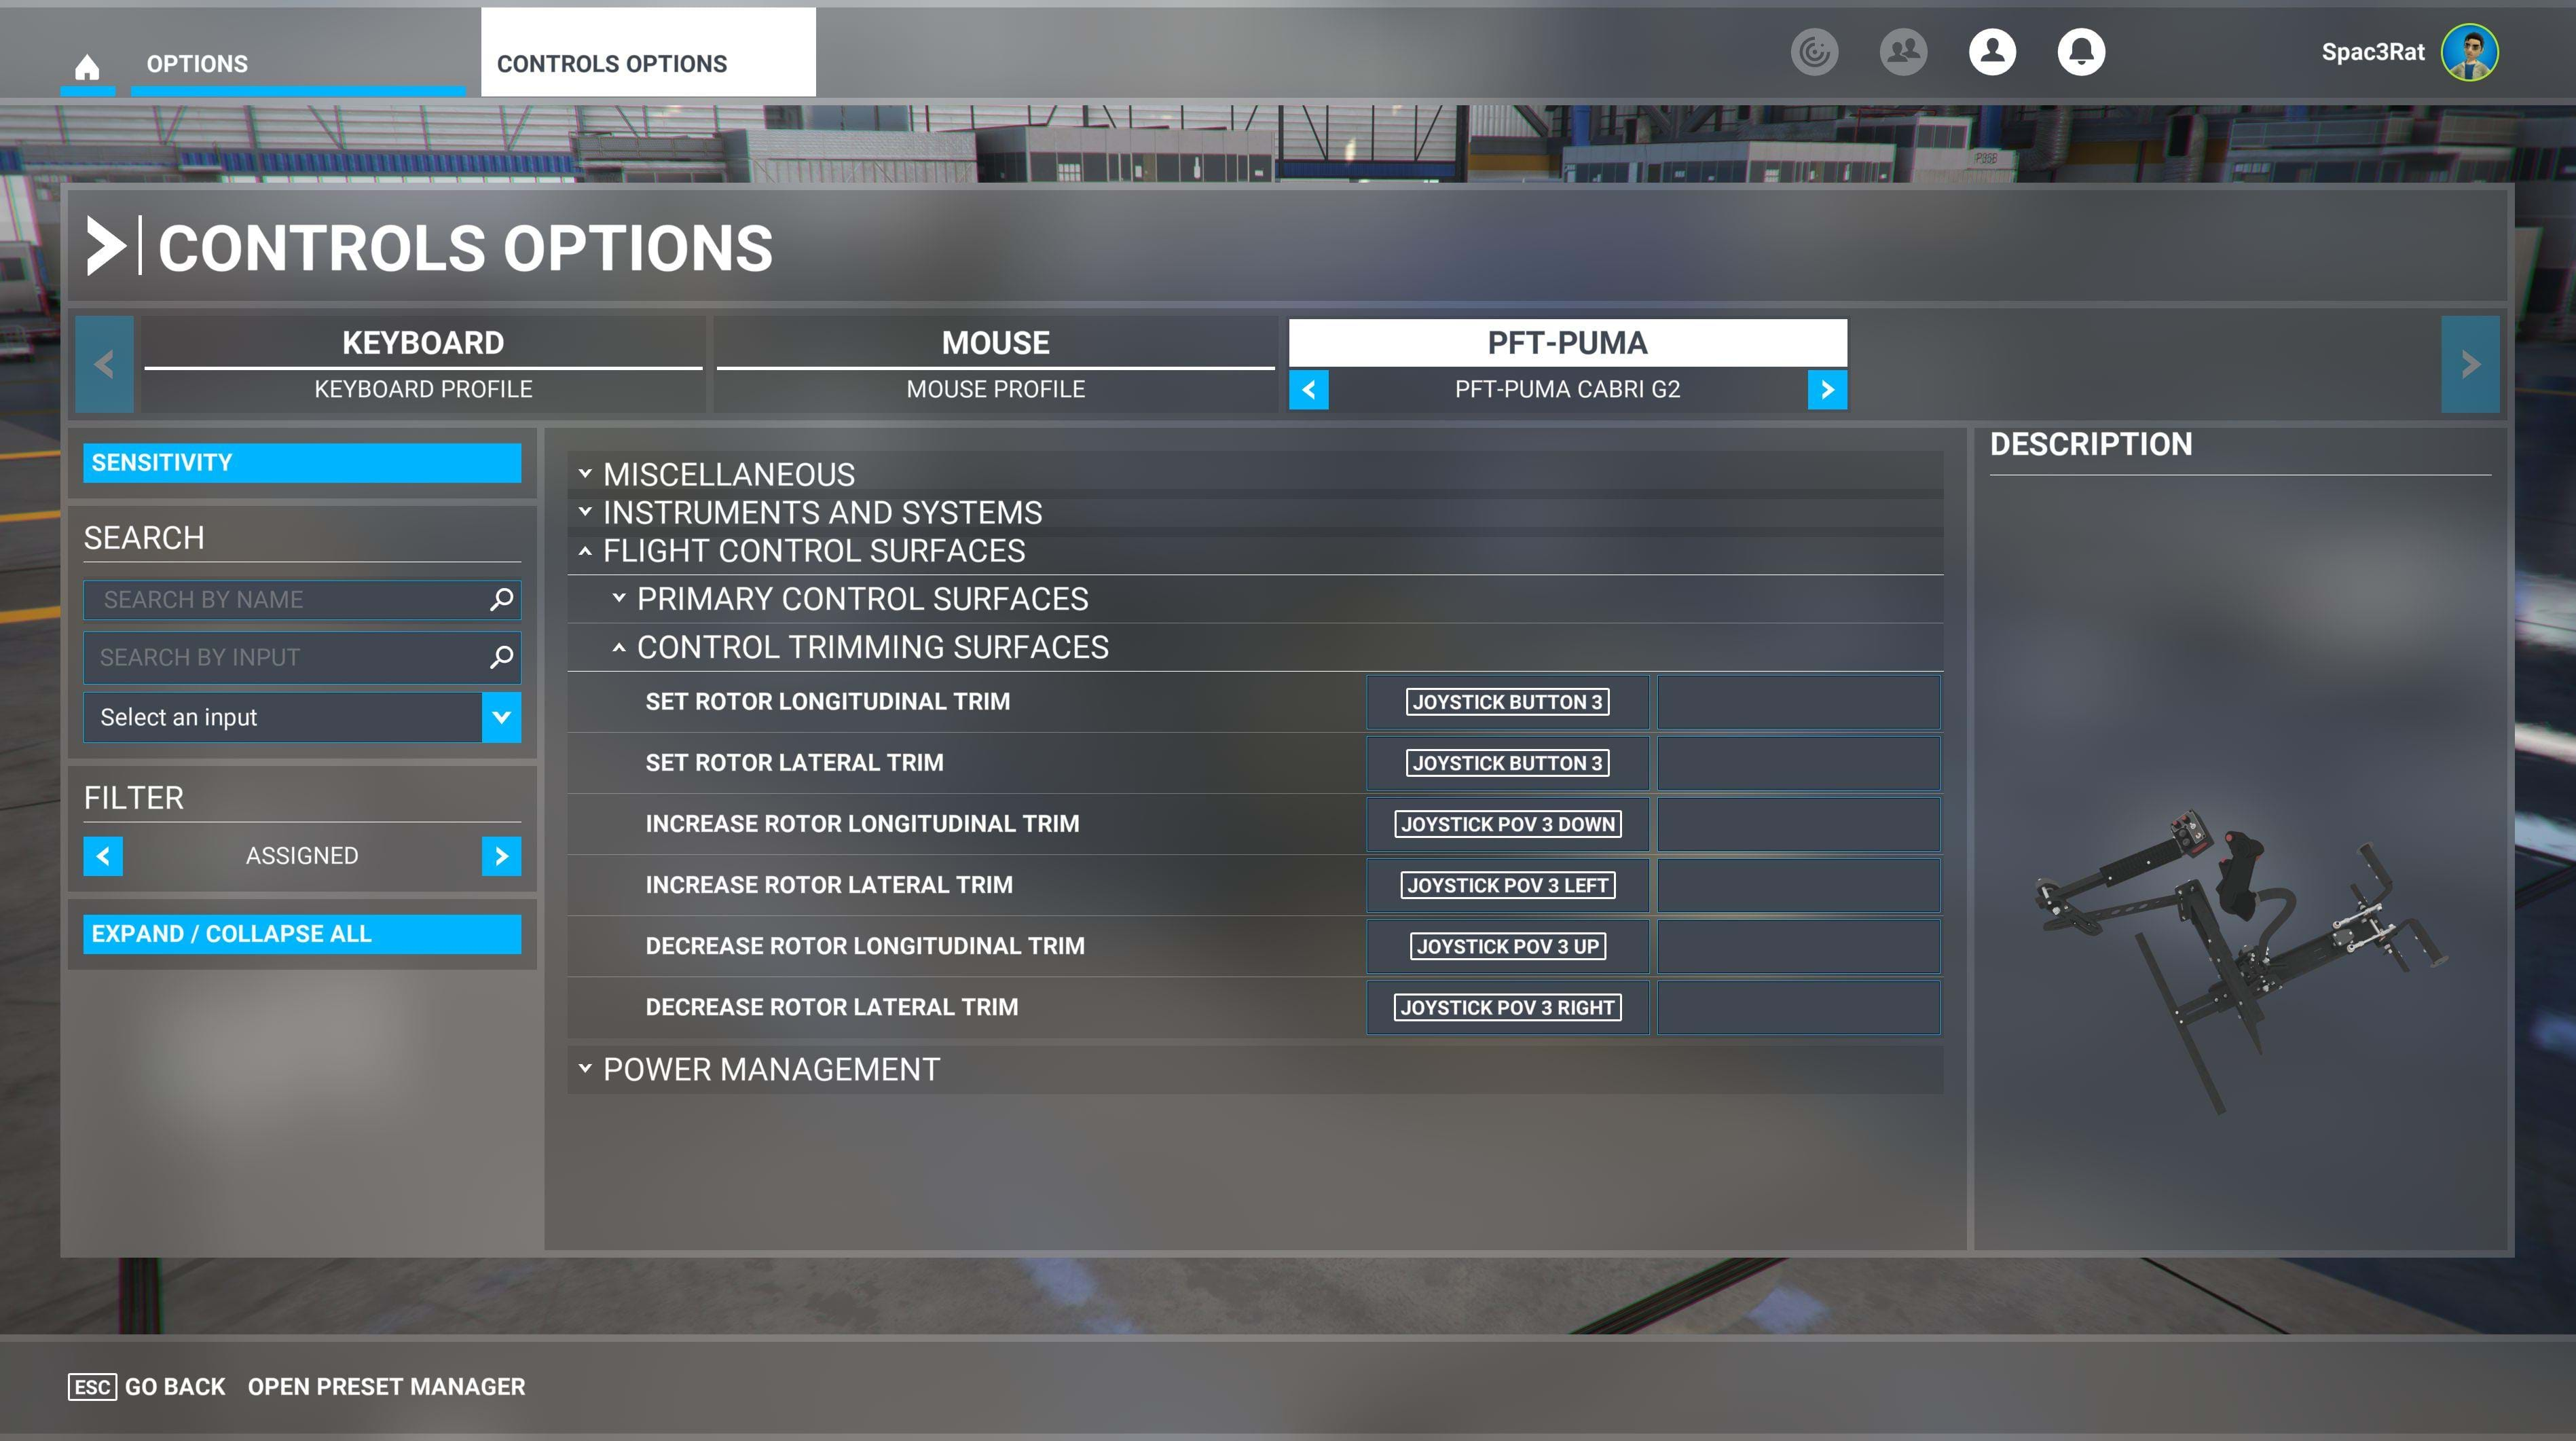
Some helicopters, such as the Cabri G2, for example, offer a rotor trim ability, meaning you can adjust the rotor cyclic position to make a cruise flight more comfortable, for example.
Some folks use the trim for hovering too, but I personally don’t like it and prefer to keep it in the default position. I rather have myself learning and adjusting than depending on a setting that may change in the future.
Finding these is easy and you just need to search for “trim”. You will find a lot of trim entries but the ones you will need are as follows:
- INCREASE ROTOR LONGITUDINAL TRIM
- DECREASE ROTOR LONGITUDINAL TRIM
- INCREASE ROTOR LATERAL TRIM
- DECREASE ROTOR LATERAL TRIM
These are not axes but buttons and you may assign them to a hat on your stick, for example.
You will also find 2 other entries:
- SET ROTOR LONGITUDINAL TRIM
- SET ROTOR LATERAL TRIM
These act as a way to reset both trims independently. I have assigned both to the same button so when I press it, I reset both the longitudinal and the lateral trim.
Curves
I’ve had a few readers asking me about these. A lot of folks have been using curves with several degrees of success!
Here’s the thing: I don’t use them myself and I don’t believe there is a cookie-cutter solution. Curves influence controls and how the helicopter behaves based on how they are set up but different controls should be set up differently… For the same helicopter.
This means that a Thrustmaster Warthog HOTAS will need to be set up in a way for the default Cabri G2 but a Pro Flight Trainer Puma X will have to be set up differently. And if you want to fly the Bell 407 instead, curves are to be different as well.
Even within the same joystick and helicopter there may be small differences. My advise? If you feel like you do need to use curves, I recommend you adjust it to what your needs are. I know, it’s lousy advice, right? After all, I am not helping you by giving you a solution.
But the fact is, the solution for this lies only within what your needs are, what your hardware is, and which helicopter you decide to fly.
And even if you sat in front of my computer and you flew the helicopter I set it up to, you could not like how it was, making this a very, very abstract and personal thing.
Pitfalls
A word of caution: I have seen folks having issues because they are finding the collective command, but they are not assigning their joystick/HOTAS/collective assignment correctly. Instead of assigning them to the COLLECTIVE AXIS, they are assigning them to other collective controls. This is a mistake I have seen happening repeatedly in the community.
Other than that, it’s all pretty straightforward and you just need to find the right commands and assign them accordingly.
If you have any problems, issues, or questions, please let me know so I can help you and possibly improve this article too so others may learn better from it.