“What the actual heck is that?”. This sentence could demonstrate what crossed my mind the first time I saw the Thrustmaster TPR pedals. Such weird design!
After the initial shock, I decided to learn a bit more about the pedals, but I saw them as something more indicated for fixed wing aircraft. Especially airliners. So, I kind of dismissed them, I’m afraid.
But, since the first announcements by Thrustmaster, I have had quite a few readers and community members ask me about them. People were very curious about the product – we have to admit the design does get your attention – and, knowing the quality of the Thrustmaster products, people obviously wanted to know more.
Those that were buying the pedals were very happy about them and my curiosity started to peak. I would love to try them out, but I didn’t know of anyone that used them and could lend them for me to spend a few days trying it.
Fortunately, I managed to get my hands on a unit to test it out. Game on!
The first contact
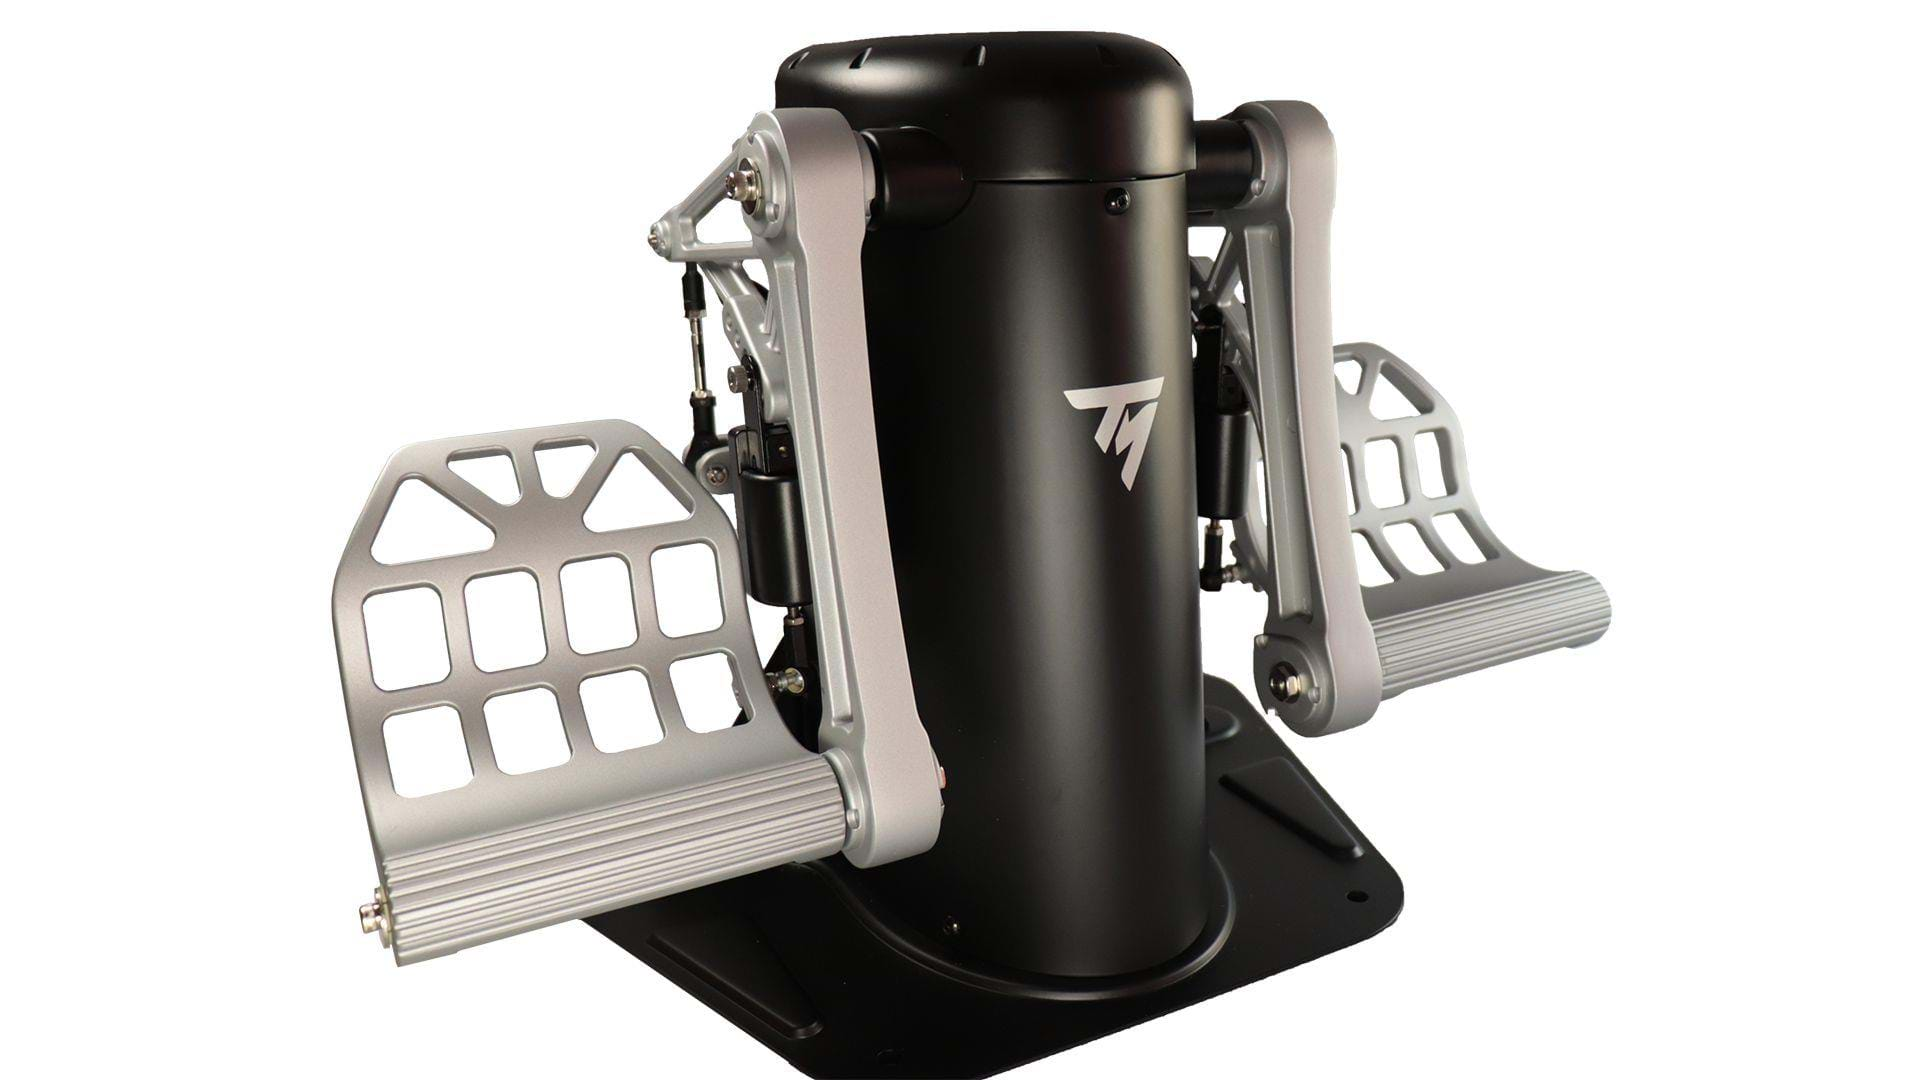
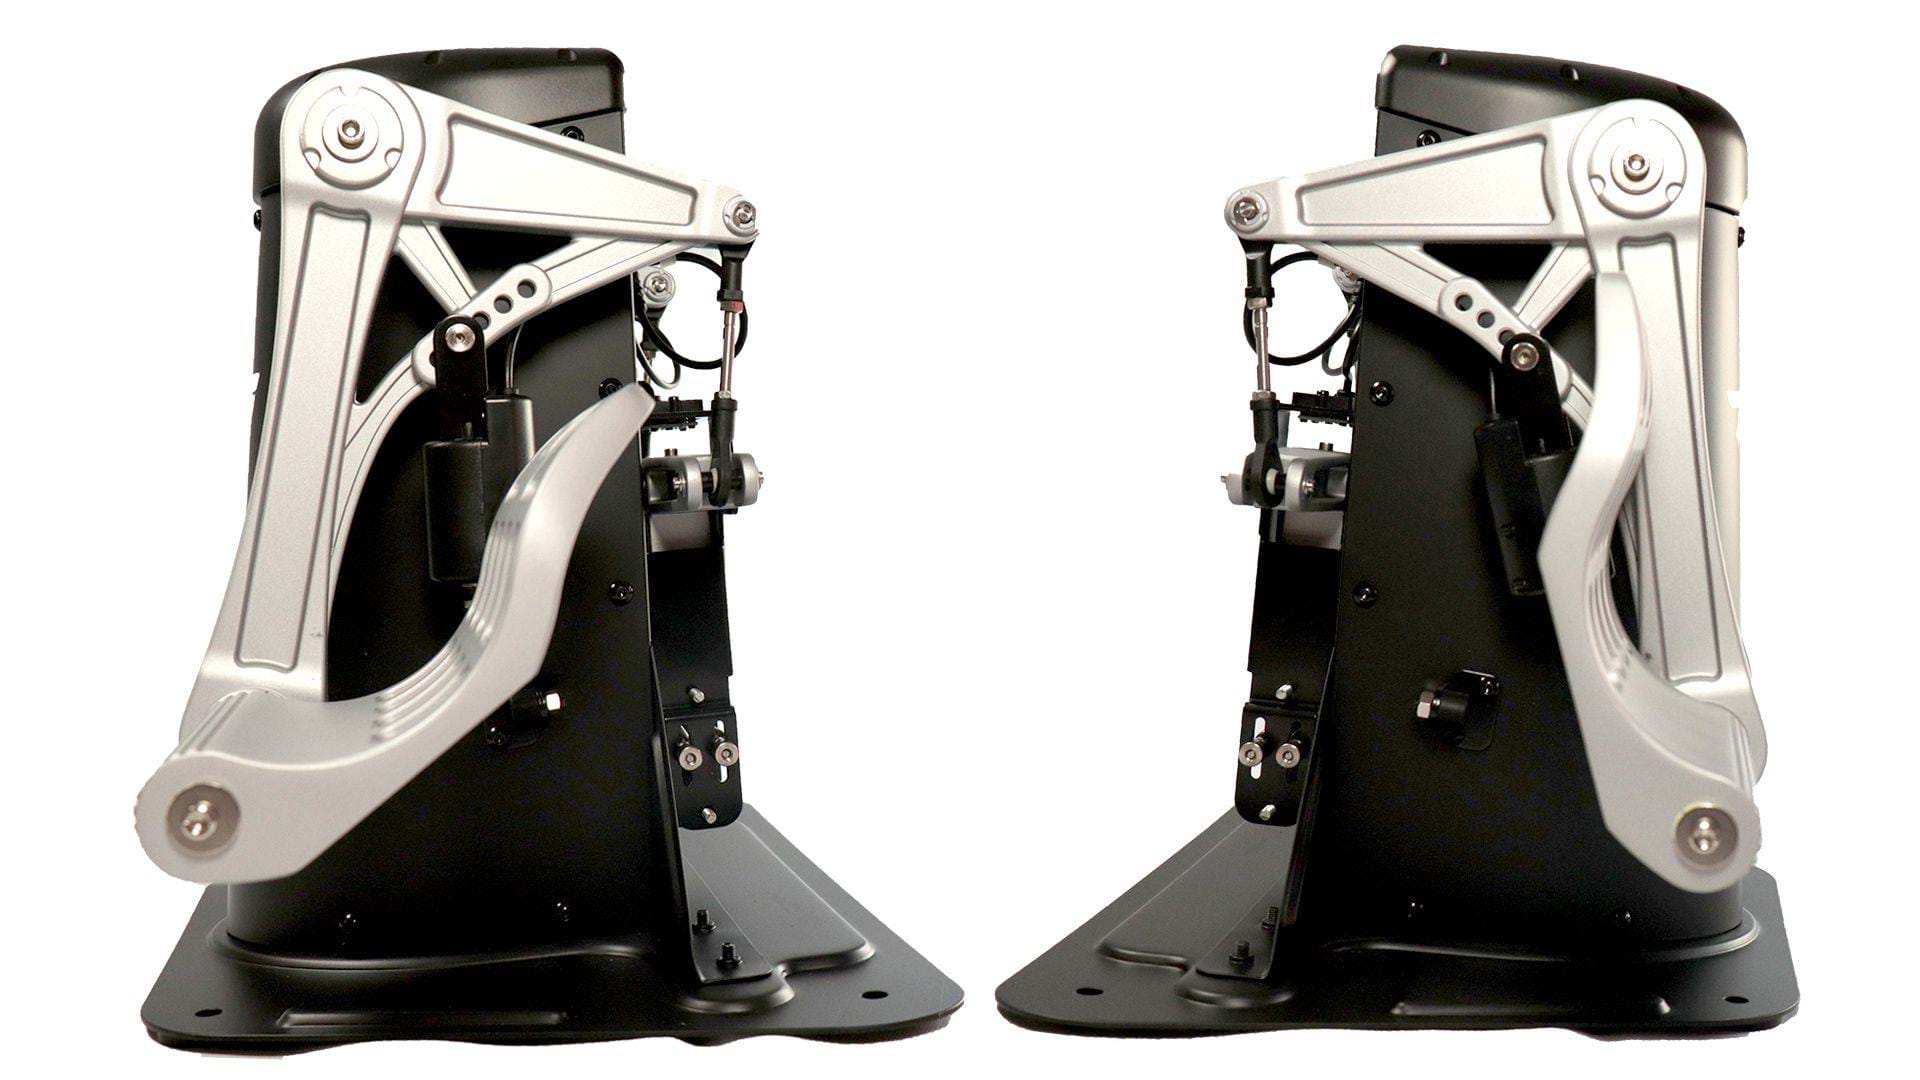
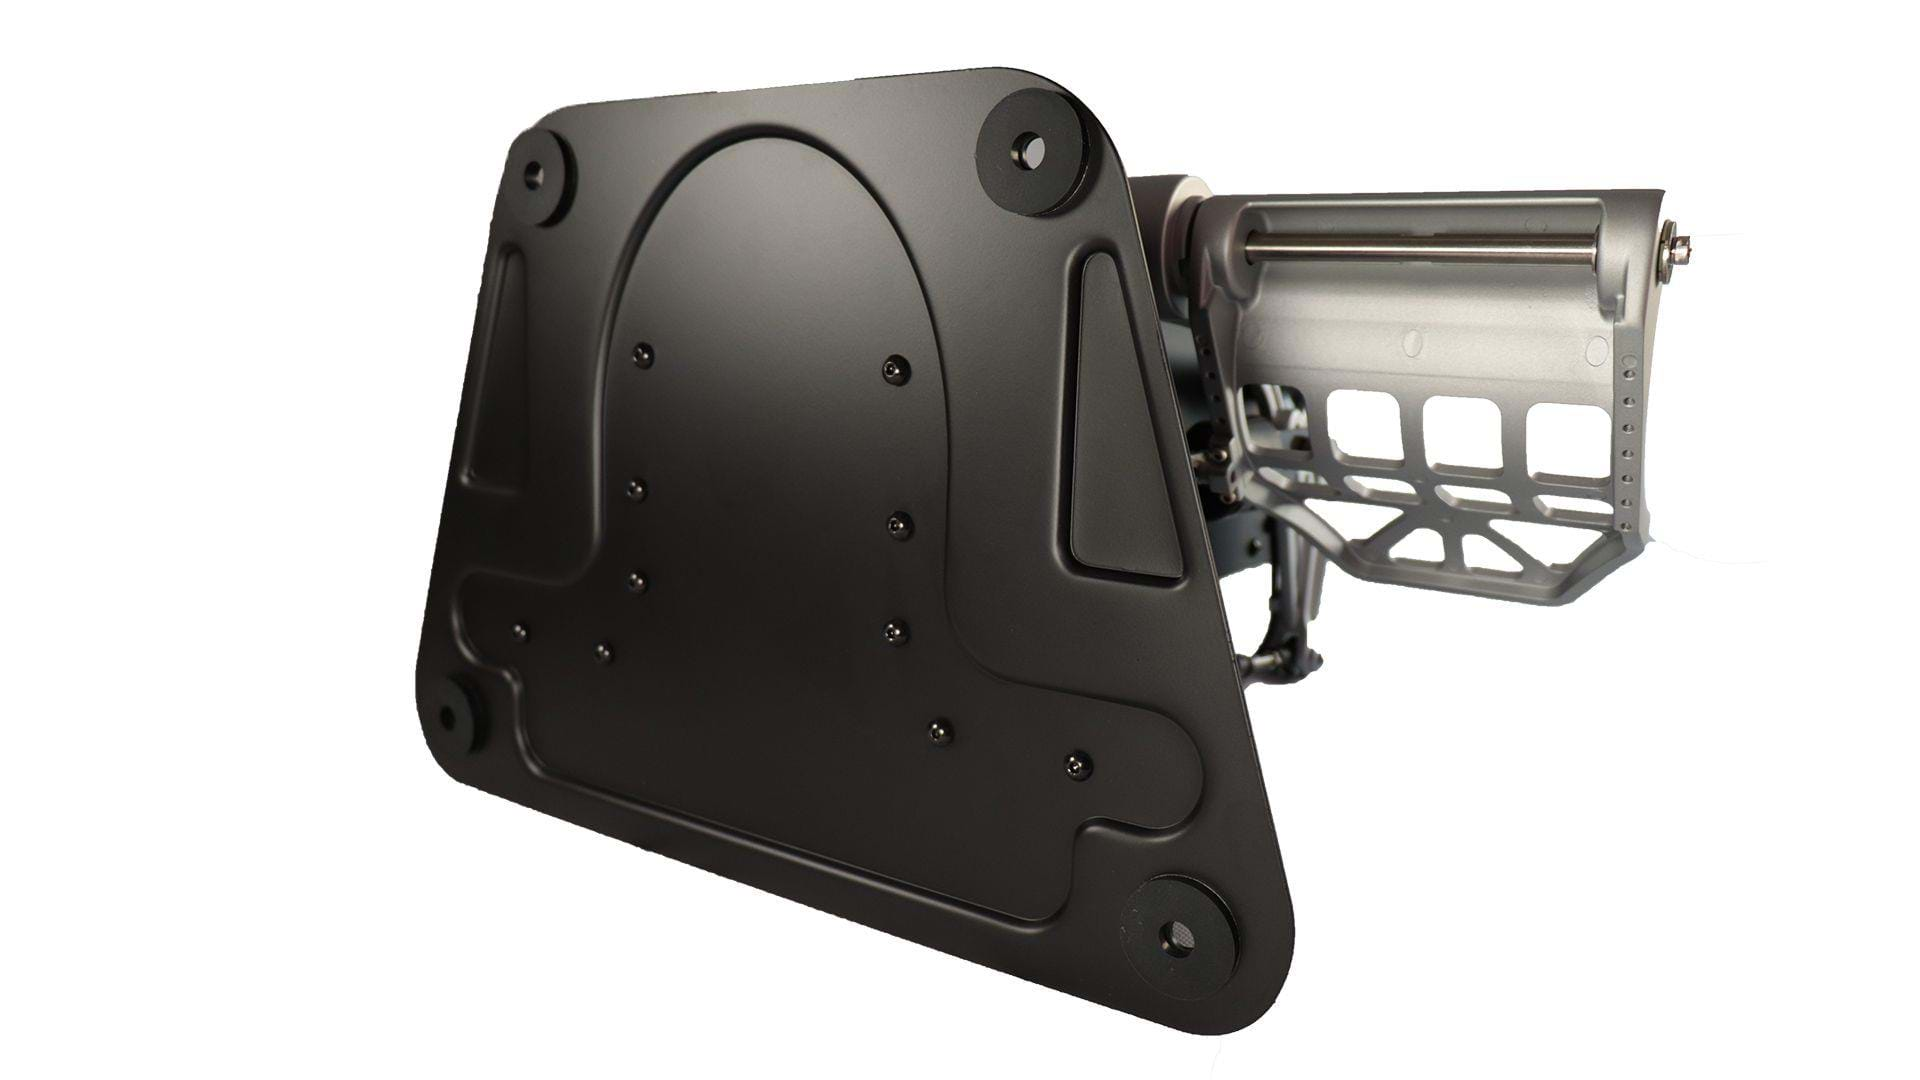
Let me tell you this: the Thrustmaser TPR feels massive.
Mostly because it IS massive.
But this is not a negative aspect. This thing feels like a big chunk of very sturdy metal. Get it out of the box and you feel the weight and might of the set. And it’s not as if it’s made of plastic with some internal iron bars to give it weight. This thing is heavy metal. In more than one sense.
You feel like you can rock on all night with this beauty. The black finish combined with the brushed metal parts give it an amazing look and feel.
I didn’t want to put this on the floor and stomp it with my dirty feet. I wanted to put it on display over my fireplace. Or replace my TV with it. It’s such a beautiful piece of simming hardware.
Assembling the unit
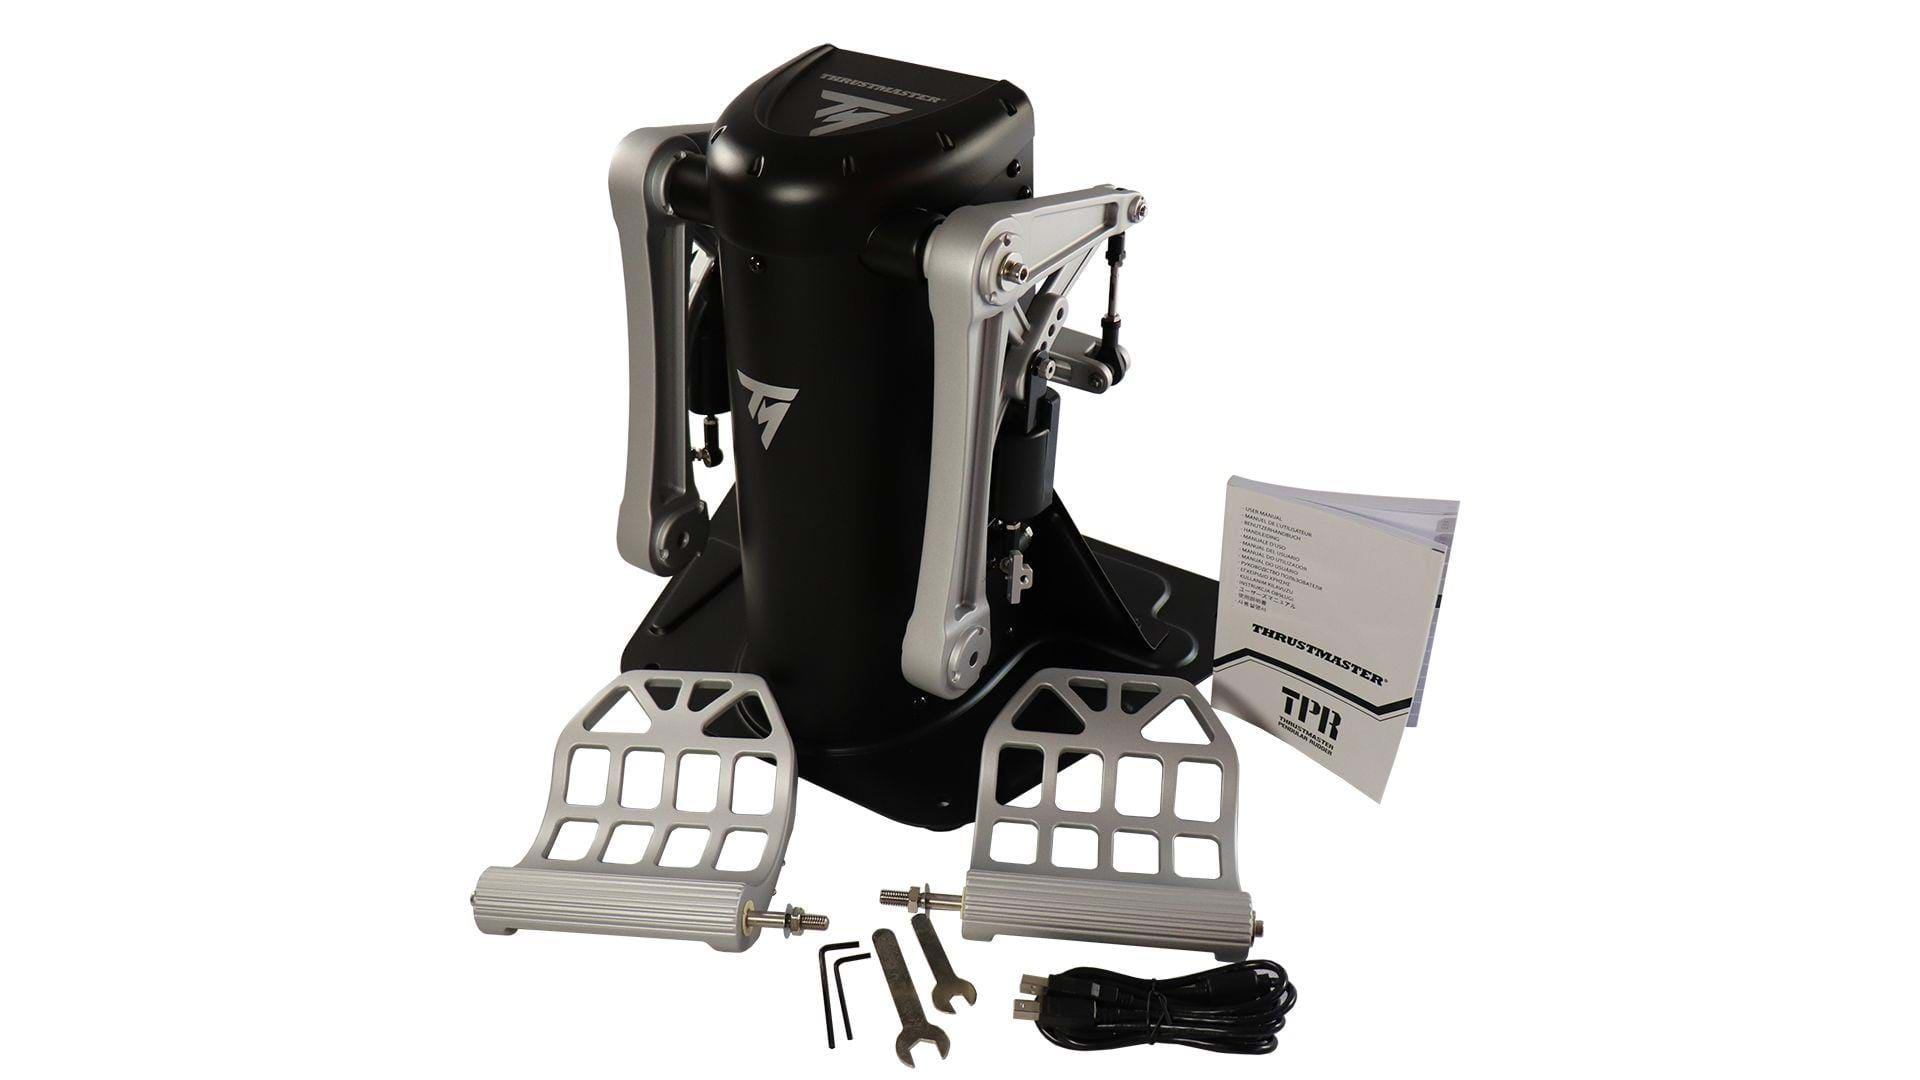
Get everything out of the box and you’ll have the central unit (the pedestal), the 2 metal pedals, the manual, the USB cable and the 4 wrenches you’ll need to assemble and tweak the pedals.
Assembling it it’s a matter of placing the pedals in place, attaching the toe brake sensors to them and screwing the nuts that will hold the pedal into place.

The toe brake sensors can be placed in several positions on the pedal and the actual sensor can be moved as well, allowing you to place the pedal in a position between 35 and 75 degrees. So, you can have the toe brakes as close or as far from your feet as you want them to be. Up to a point where you can even pretend you don’t have toe-brakes at all since they will be so far away.
The photo below doesn't show the full extent of the possible pedal positions as I only moved one of the parts that allow you to change it.
It took me about 20 to 30 minutes to assemble the set and that was because I was trying the pedal in several positions and took some photos as I went.
It’s rather easy to fully assemble it and have it ready for your simming sessions. Just make sure you don’t store the wrenches away as you might want to tweak it to your liking.
The details
The TPR is not only a small piece of hardware art, it also comes with some interesting cool details.
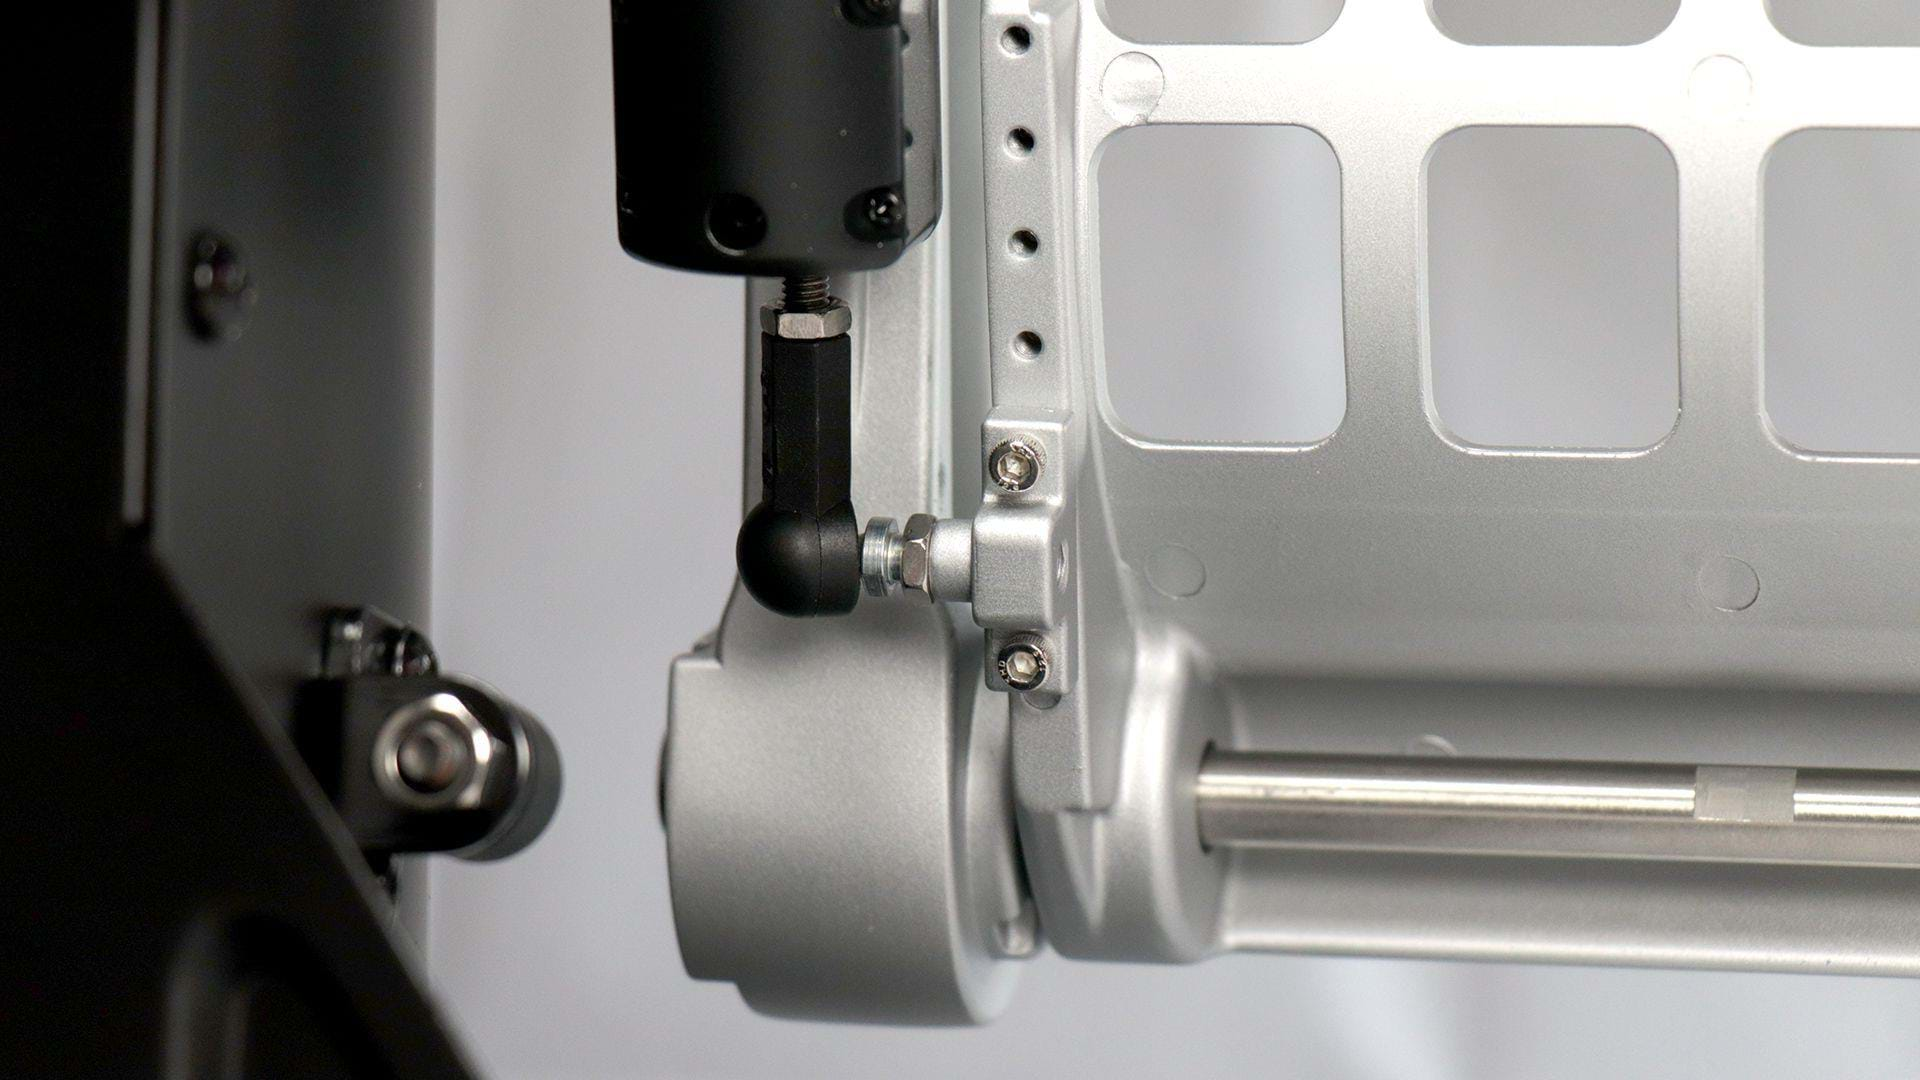
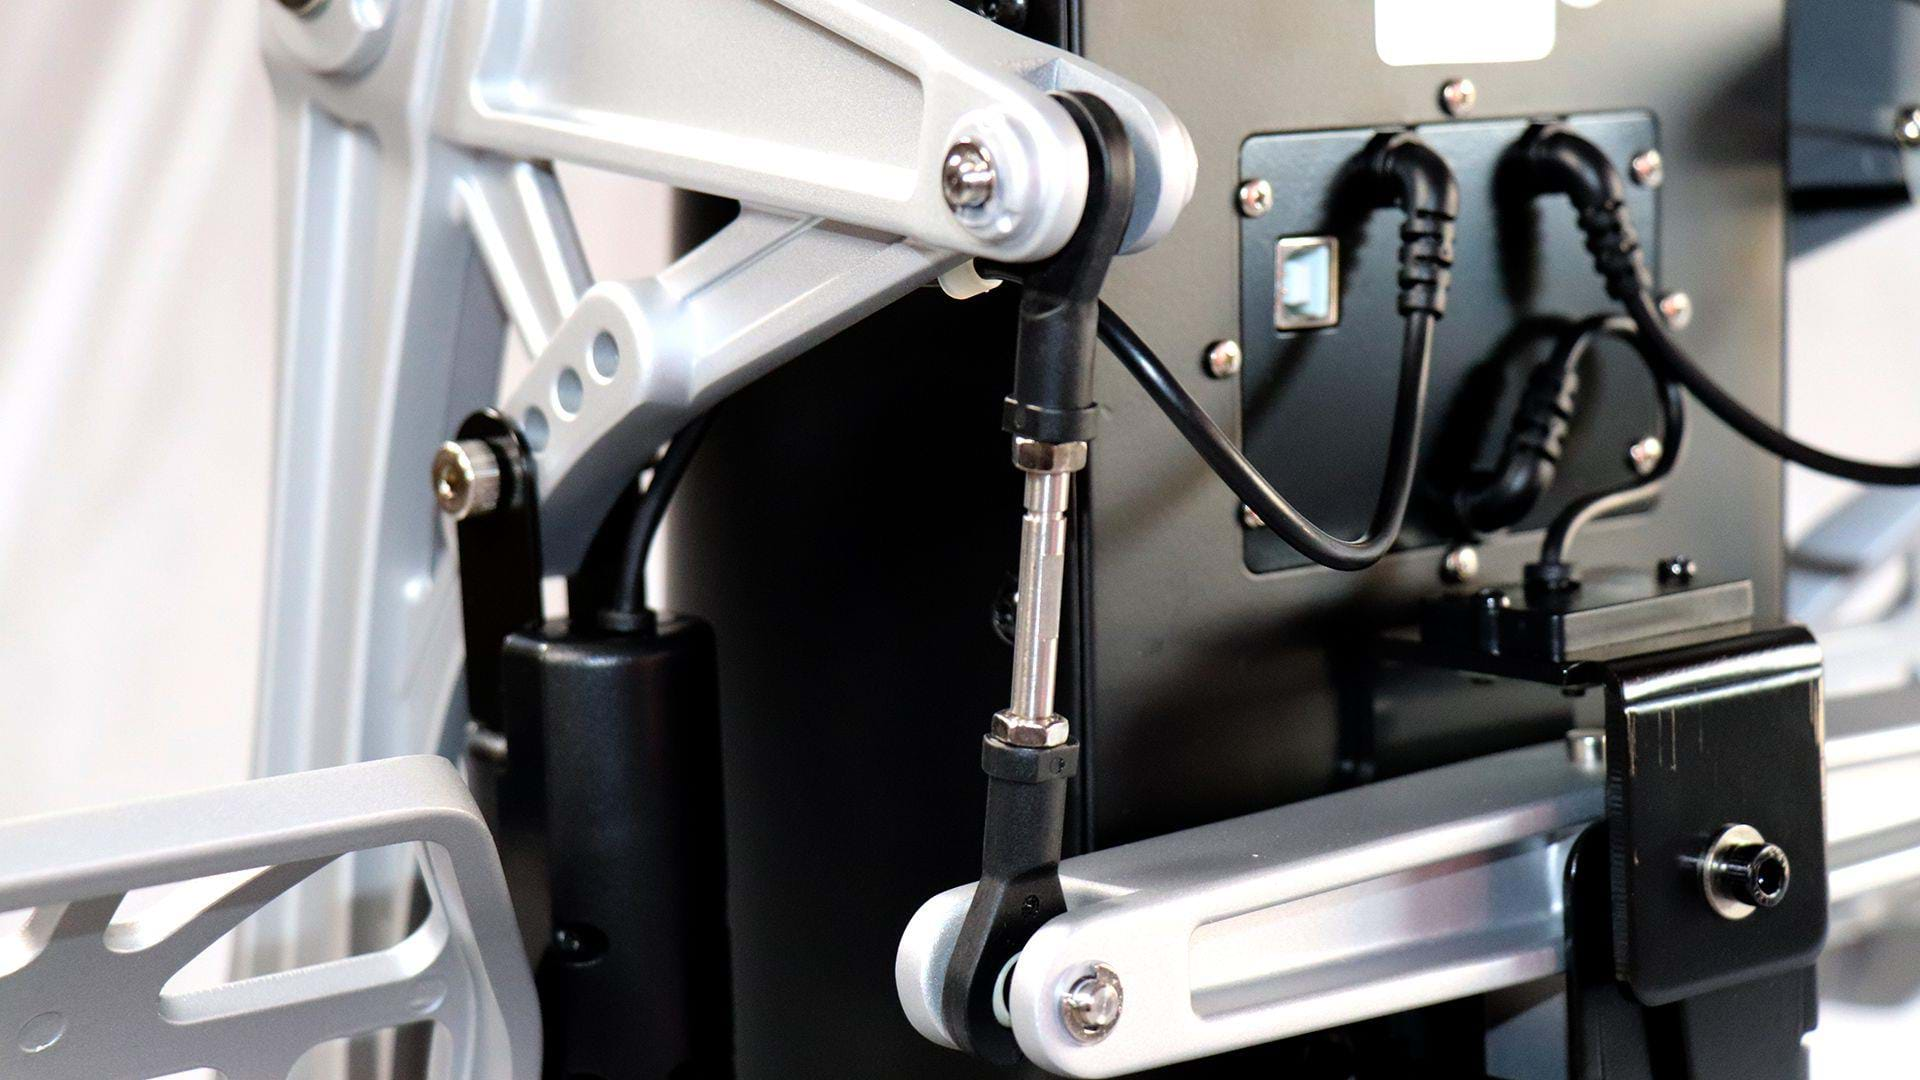
The way it’s build allows you to easily adjust the pedals – not only the position but also the strength of the spring. I love how Thrustmaster allows for very easy access to the springs (yes, plural), allowing you to adjust it in more than one way.
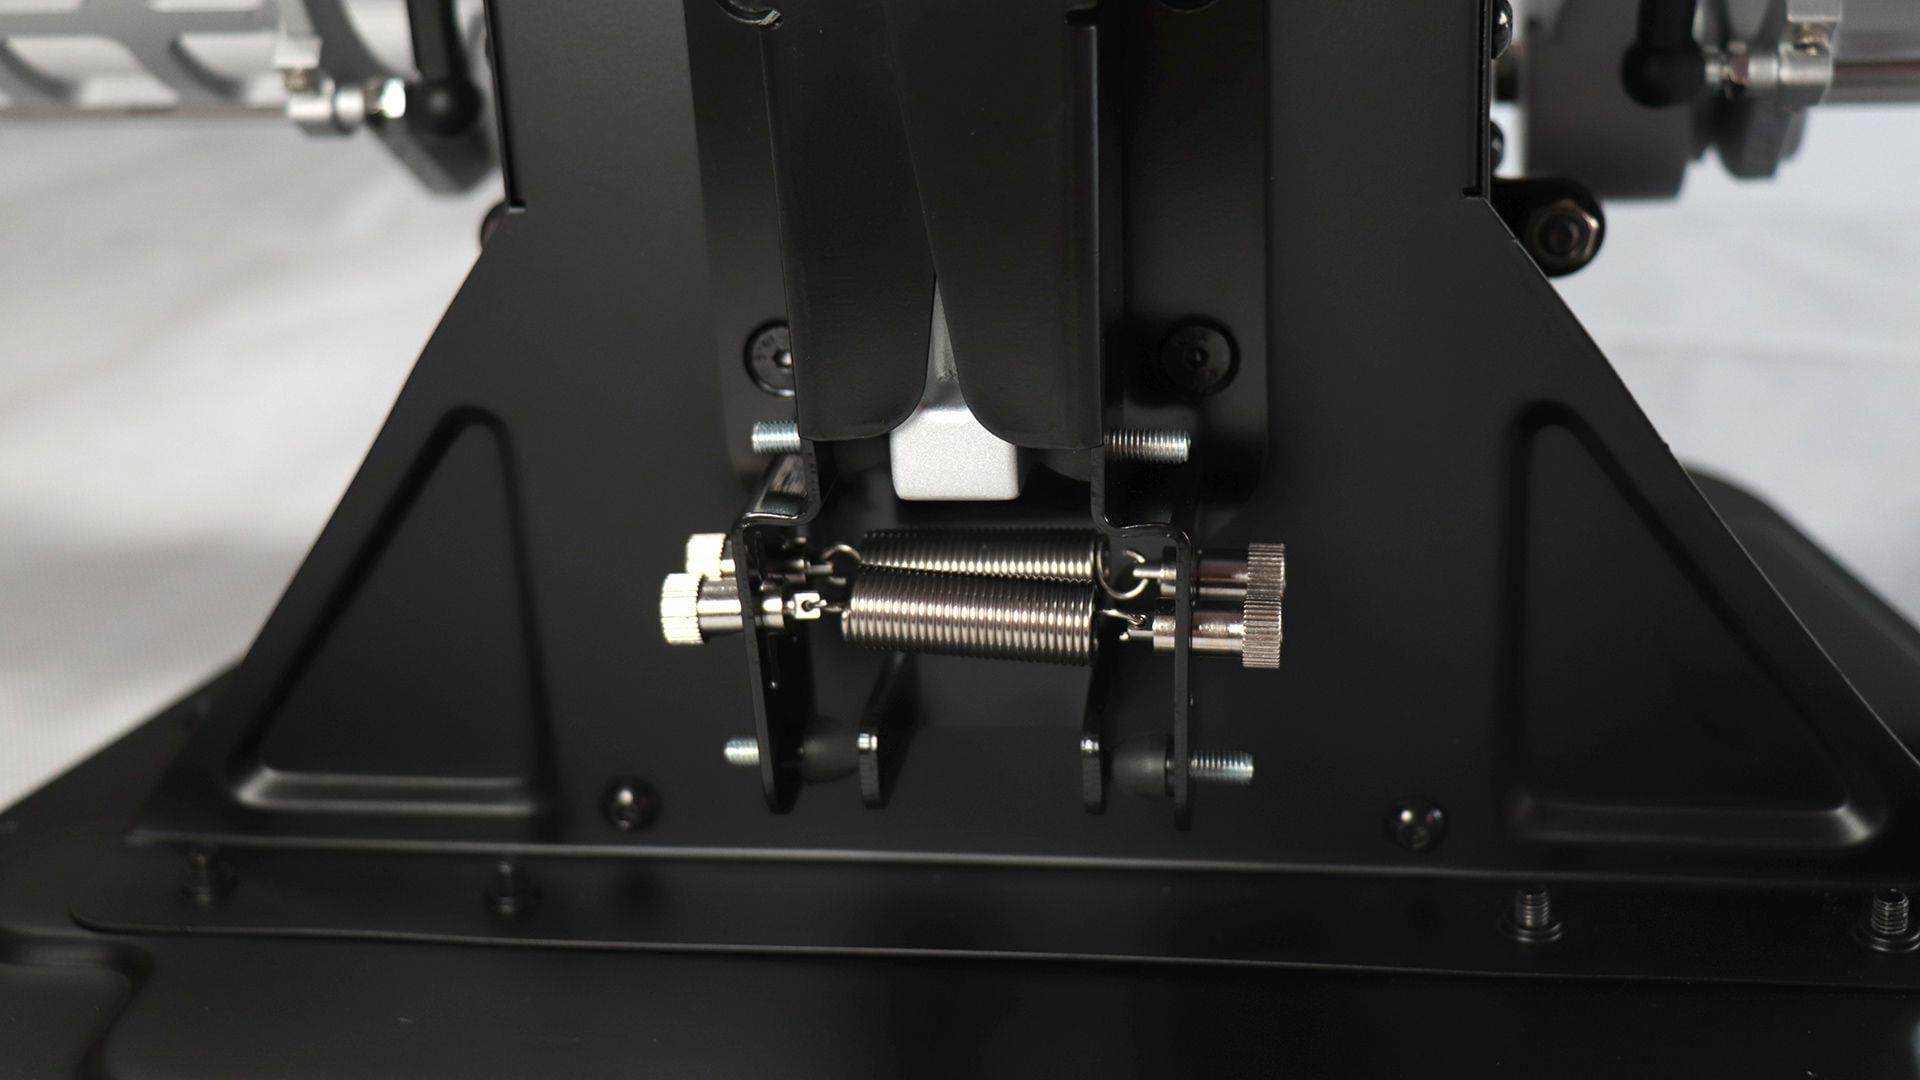
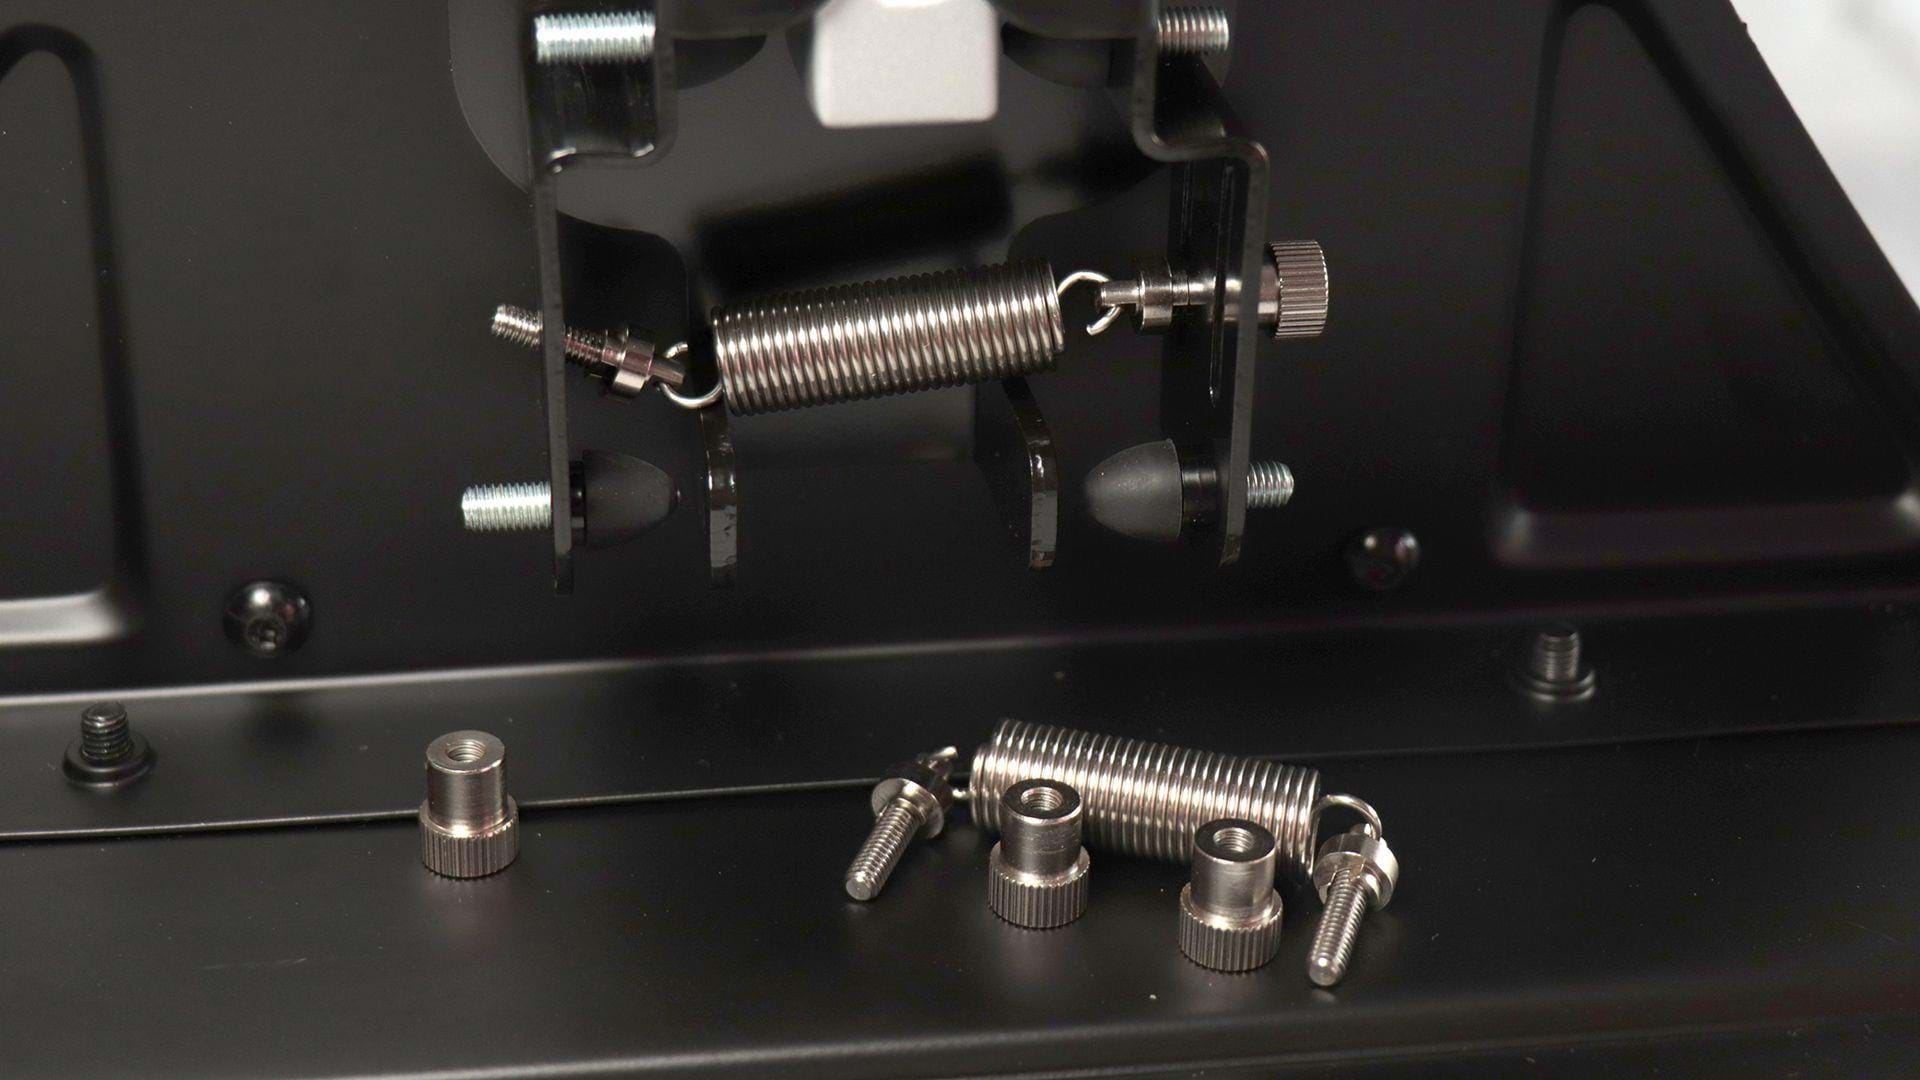
You can not only adjust the force of the spring (by stretch or contracting them) but you can also position them vertically. Putting the springs on a top position will reduce the force as the travel of the spring will be smaller. Push it down and the travel is longer, making it so that the pedal will resist more as the pedal moves away from the center.
Here’s the best thing in my opinion: you can also easily remove the springs!

That’s right! You can simply take them out. Now, while the pedals will perhaps become a bit too light, they are not so light that they are impractical. They actually work nicely and after I removed them, it took me some time to adjust but it’s doable.
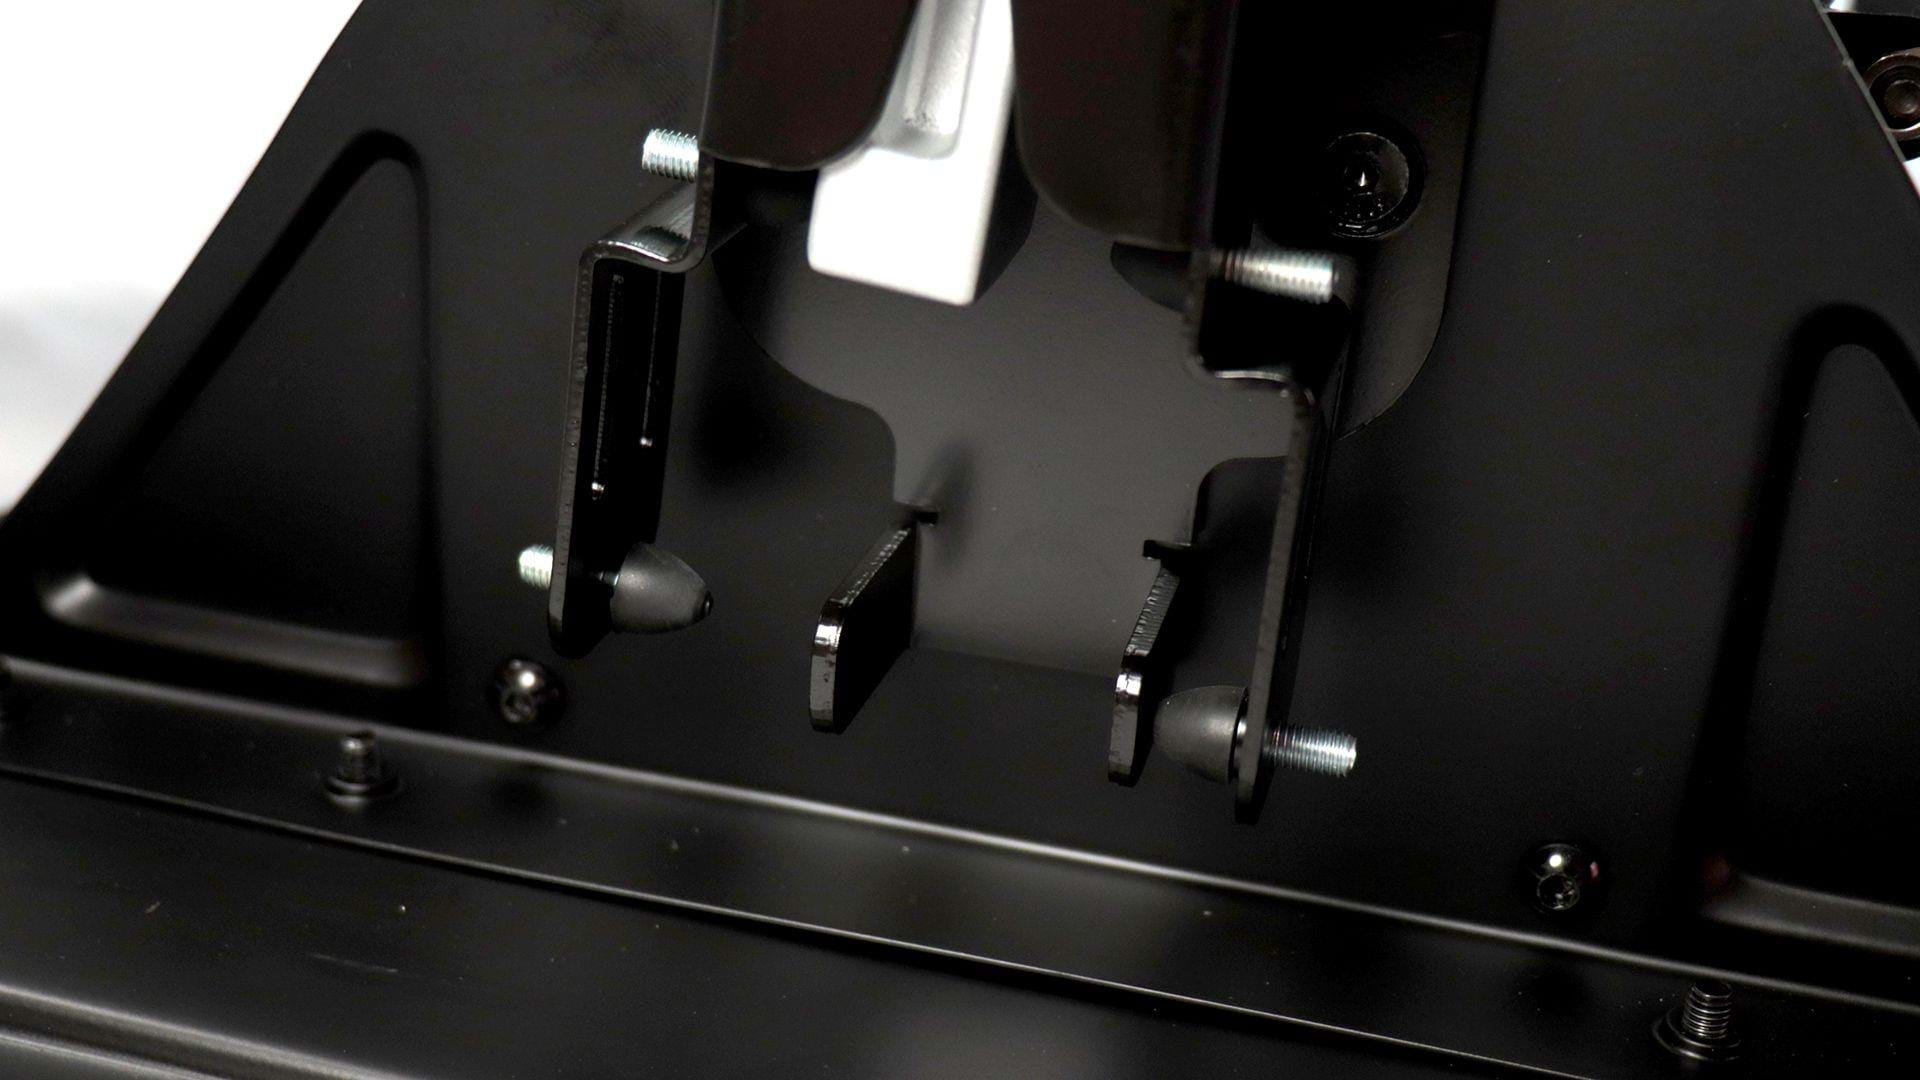
Another nice detail is the detent that stops the pedals (see photo below). These are also easily available and while you may think it’s not a big deal, this can be very handy. I’ll say more about this later.
Testing it out
I tried the TPR with 3 sims: X-Plane, DCS and P3D.
The pedals worked flawless on all sims, but I expected nothing different. There’s not a lot to say except the pedals are very accurate and they feel solid and sturdy under your feet. I could control everything smoothly and the toe-brakes did their job perfectly.
You could place your heels on the floor and use the pedals as regular anti-torque pedals but it’s not very comfortable. If Thrustmaster allowed the pedals to also be adjusted vertically, that would be a great feature for the rotorhead community as would allow for a proper pedal positioning.
But this would require yet another adjustment and the source of my only complaint: the travel distance is too big.
One of the reasons I found the “heel-on-the-floor” foot position uncomfortable was the fact that the pedal travels a huge distance. It’s just not practical to keep the heels on the floor and push the pedal with the ball of the foot because, well, you’ll run out of foot!
This could perhaps be solved by adding something on that prevents the detents to travel all the way to the center of the pedal and calibrate the pedals using only a portion of the travel.
I tried it in X-Plane (I added a couple of small erasers – sorry I forgot to take some photos of it) and it worked very well.
Oh and, unless you like to kick your pedals around, you’ll probably won’t have any problems with the pedals moving. The sheer weight keeps the set in place. I suspect the pendulum system also plays a role here, distributing the forces better than a regular system. It’s not like you are pushing the whole set; just the pedals.
Time to the springs off and go full-rotary!
Going rotary
OK, I lied.
I didn’t start the test with the springs on and took them off. I actually started with the springs off. I had to. I couldn’t resist trying to make it helicopter-able right out of the bat.
One would feel the pedals could feel to light with no springs, but the fact is that the material the pedals are made of is very solid and has some weight, meaning the pedals will always try to re-center themselves. But it’s not like the pedals will be doing a lot of pressure on your feet. It’s enough for the pedal to follow your foot as you return it to center (you wouldn’t need to push the other pedal) so it does create a bit of pressure and, after you get used to it, it works nicely.
Of course, considering we have 2 springs and more than one way to set them up, there’s always the possibility of using just one spring and place it in a way that the pressure is a bit higher but not so that you’ll need to fight the pedals (a huge reason why people struggle flying helicopters is the fact that controls are made to self-center and very often they are highly aggressive as they do so).
The Thrustmaster TPR allows you to fine tune the spring and you can set the pedals so that it feels comfortable. It’s still not a real anti-torque pedal set but it’s pretty damn good.
In fact, these pedals are the ones with the most and best adjustment in a varied amount of levels: from the pedal position to the pedal travel (which you’ll need to do yourself but it’s perfectly possible) to the spring strength, you can tweak it all.
Absolutely brilliant. It doesn't make the set perfect for helicopters but it's much more comfortable than other sets I've used. Not only because of the pendulum system (instead of the regular "slide" system) but also because of the weight, sturdiness and another great detail, which I think it's possible because of the pendulum design: the distance between pedals.
Final thoughts
Is the Thrustmaster TPR a set of rudder pedals you should consider as an anti-torque pedal?
If you asked me this question a couple of weeks ago, I wouldn’t know how to answer you and I would probably not advise you to get it as I couldn’t get any details (or my hands on a set) that would allow me to proper evaluate it for helicopter flying.
Now, of course it’s not the perfect anti-torque pedal set. It’s not. It’s made for fixed wing aircraft and it obviously shows.
Nonetheless it can be easily adapted. By removing one or both springs and perhaps adding something to reduce the travel of the detents on the back (in order to reduce the travel of the pedals), you can end up with a remarkably good set of anti-torque pedals, very precise and sturdy, that you can change back into an aircraft rudder pedal easily.
If Thrustmaster allows us to change the travel of the pedals and even adjust it vertically (I think these would be a couple of “easy” features to add), I would say these pedals could be pretty perfect and a very strong contender to be the pedals of choice for those that don’t want to buy a full helicopter set or need pedals that cater both world.
In fact, they could be the perfect kit to do just that.
The Thrustmaster TPR is one of those products that we can easily ignore. Not because it looks like a bad product or doesn’t demonstrate the quality Thrustmaster has got us used to but because it may seem like something we wouldn’t want to use on our helicopter flying.
We shouldn't ignore it. At all.
I was wrong to dismiss it in the first place and I am glad I had the opportunity to try it. I can tell you, very honestly, that with the obvious exception of helicopter-replica controls, the Thrustmaster TPR is, easily, one of the pieces of hardware I will be recommending to any simmer that asks me for advice on a pedal set.
Well done, Thrustmaster. You won me over with the TPR.