This is not your ordinary review as Joe got personally involved in testing this kit, but that makes it more interesting since we get to know the product from the perspective of someone that has seen it evolve.
Introduction
Helicopter flight simulator enthusiasts are a rare breed among rare breeds. Most home flight simmers who try helicopters get frustrated very quickly with the experience and don’t allow their mouse to get anywhere near the helicopter selection of their chosen simulator as a result. The ones who do accept the challenge of simulated rotorcraft flight often have to do their best to fly a simulated helicopter with a set of controls designed for a fixed wing aircraft. Using a common set of airplane based simulator flight controls is kind of like eating a delicious dinner at a 5-star restaurant out in the parking lot from a Styrofoam container with a plastic spork. It doesn’t change the taste of the food, but it’s not really the same experience.
Flight controls specifically for helicopters are rare, and like that fancy 5-star restaurant dinner, they are usually very expensive. Because there are so few helicopter flight sim enthusiasts, and so few dedicated helicopter flight sims, all of the major flight sim control makers have completely ignored the helicopter market. The lack of mass production drives up the cost of helicopter specific systems. Only a few small companies and high end specialty companies have taken up the challenge of developing and marketing helicopter specific flight controls for flight simulators. Among them is the great team at Pro Flight Trainer.
Unboxing
You have two options to buy the Puma: pre-assembled, or the RTF (Ready to fly). It’s the same exact unit, only with the pre-assembled option you have to combine all of the pre-assembled components yourself. The RTF option shows up completely assembled and ready to fly.
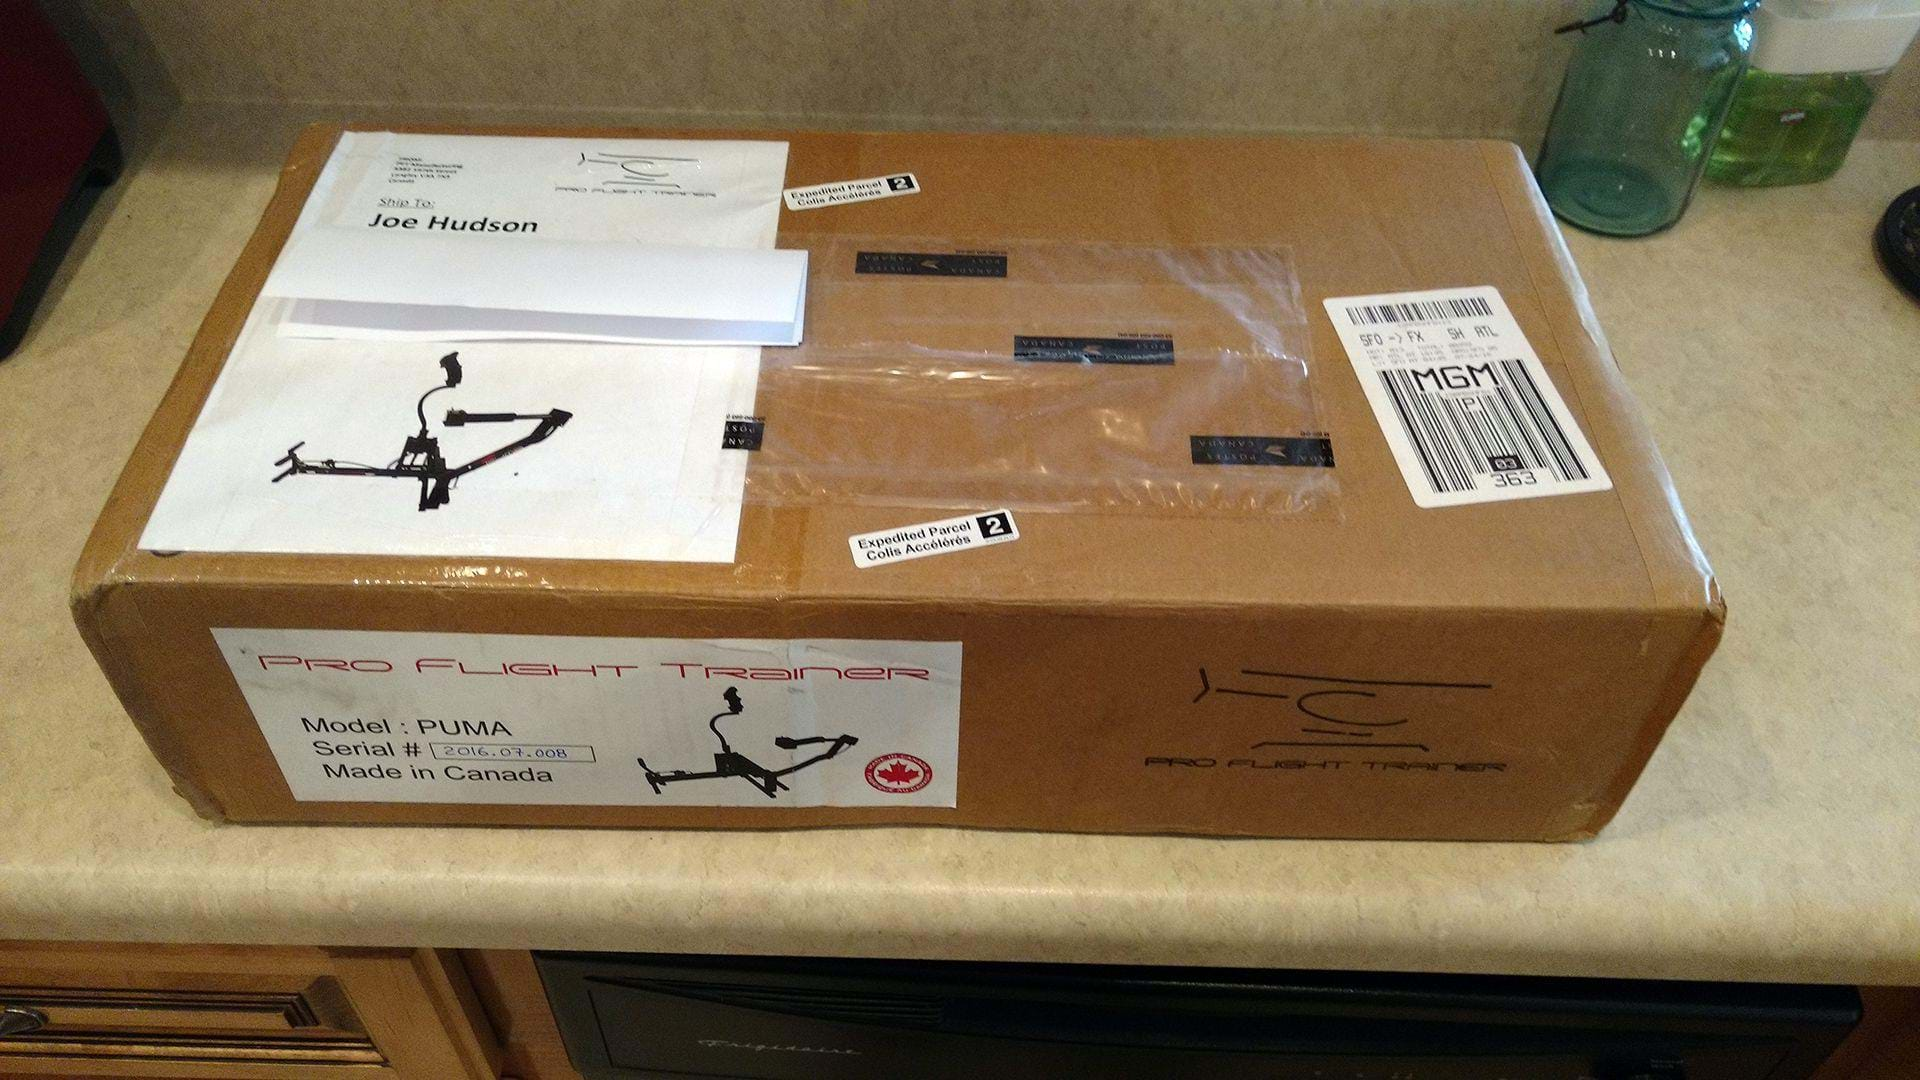
If you get the pre-assembled unit it shows up on your door step in a box that is deceptively small. But when you open it up, you’ll see that the all of the pre-assembled main components are wrapped in bubble wrap, and neatly arranged and secured inside the box with zip-ties. It also comes with all the tools you need for assembly, Velcro cable wraps, a printed manual and a CD with a digital version of the manual.
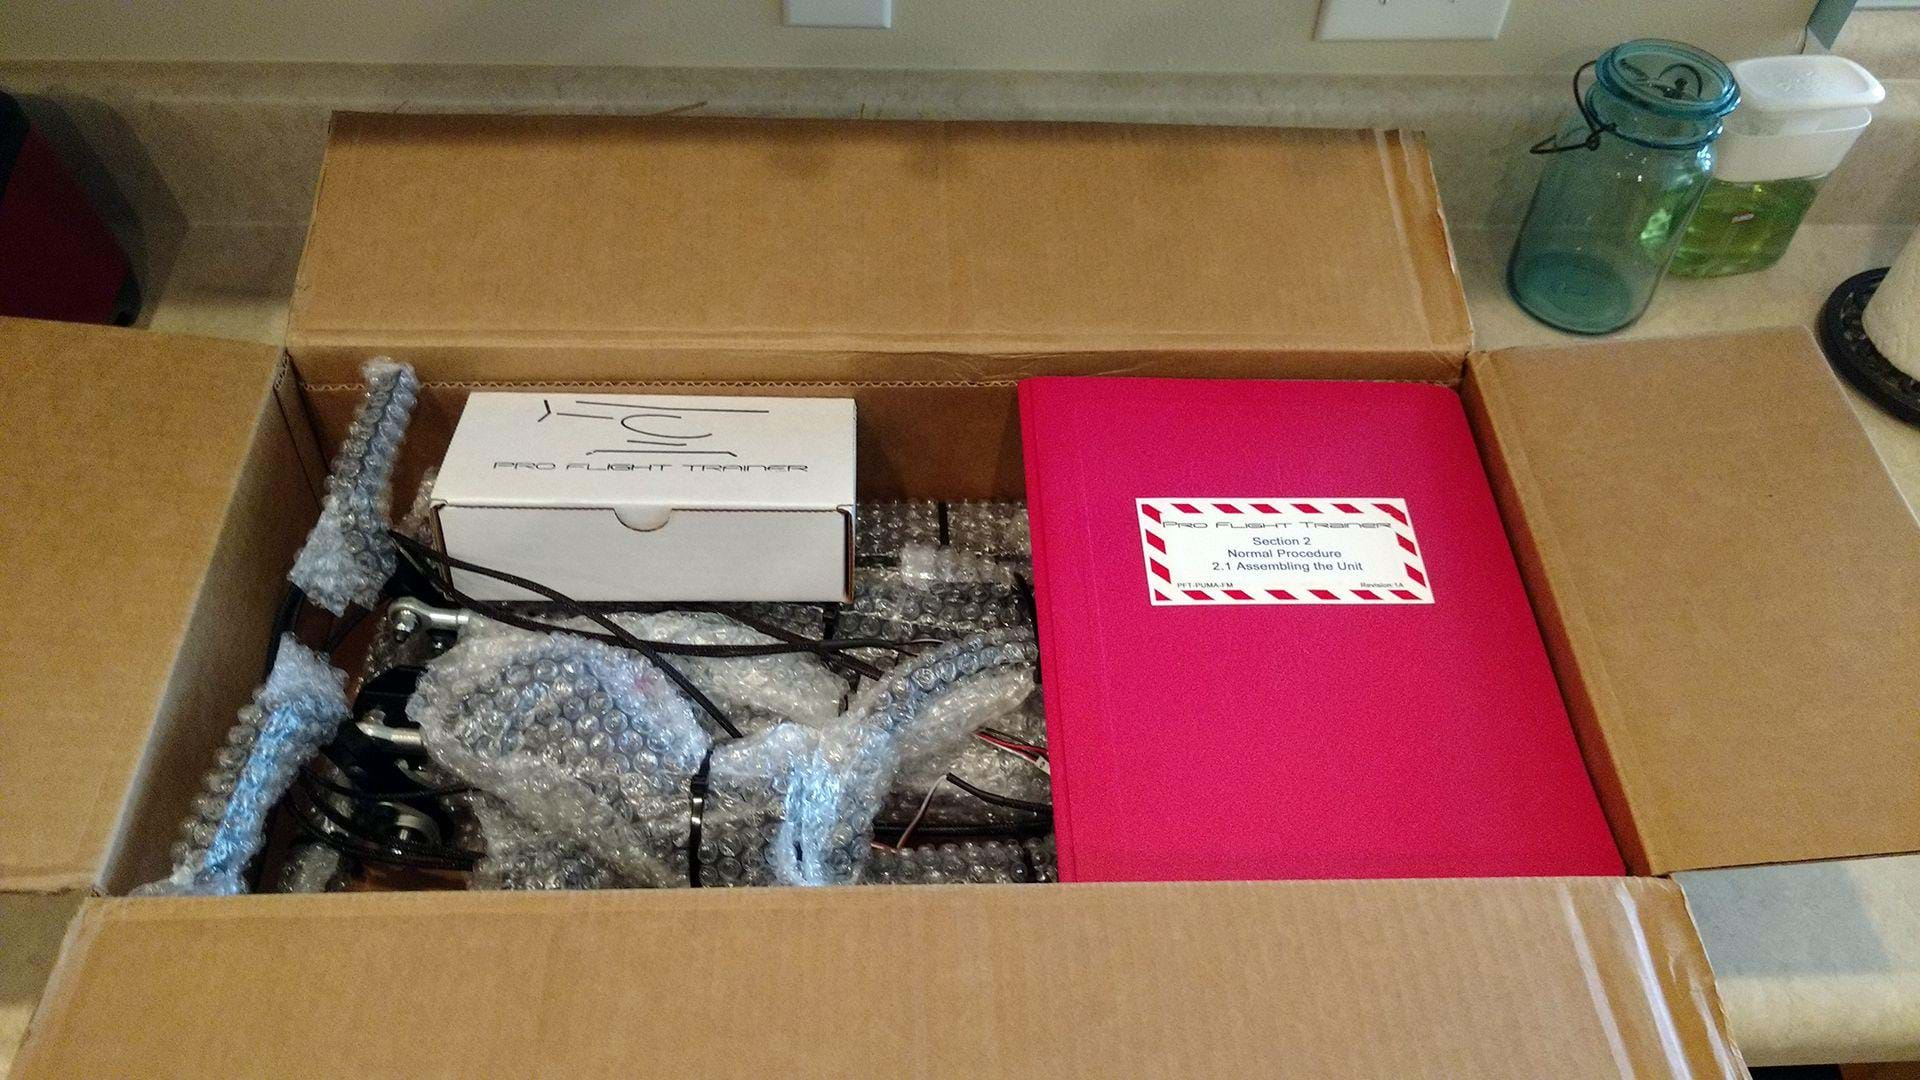
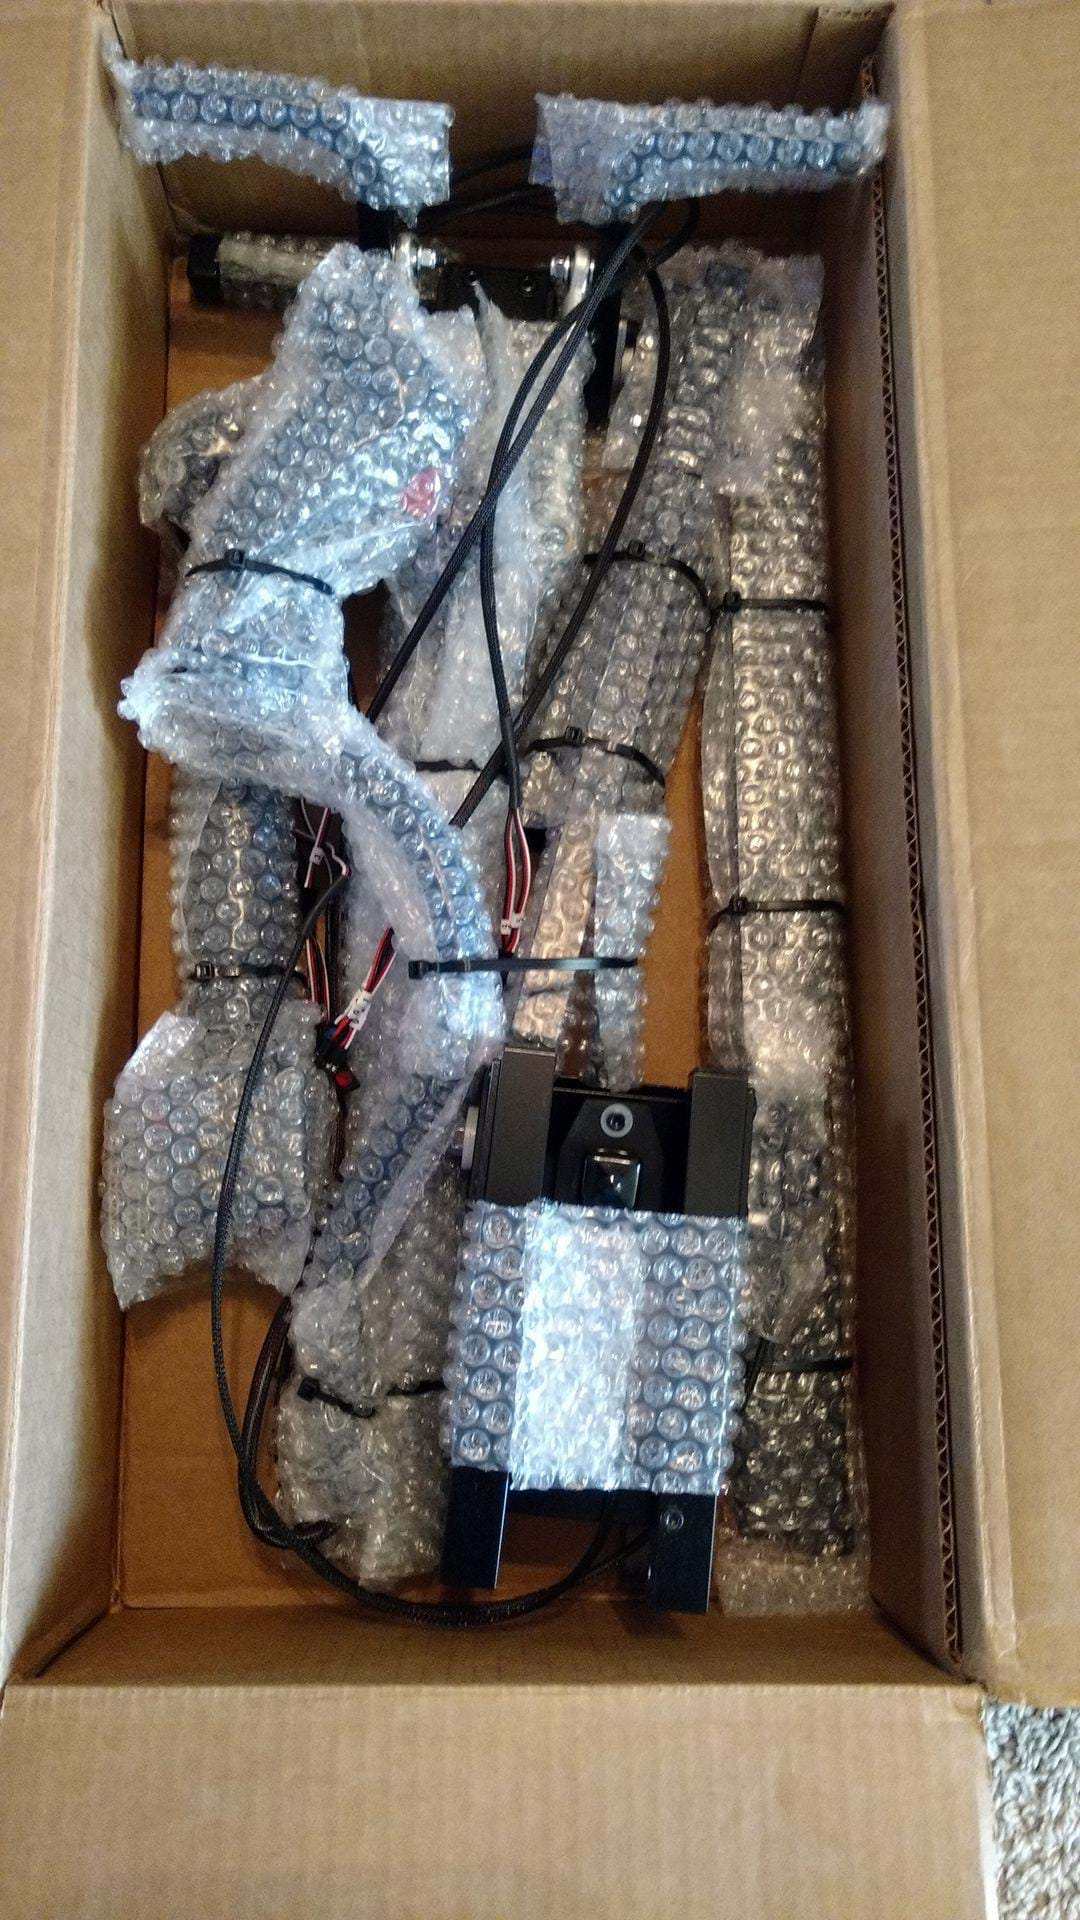
After you get it out of the box and unwrapped, you’ll find all of the components ready to be put together.
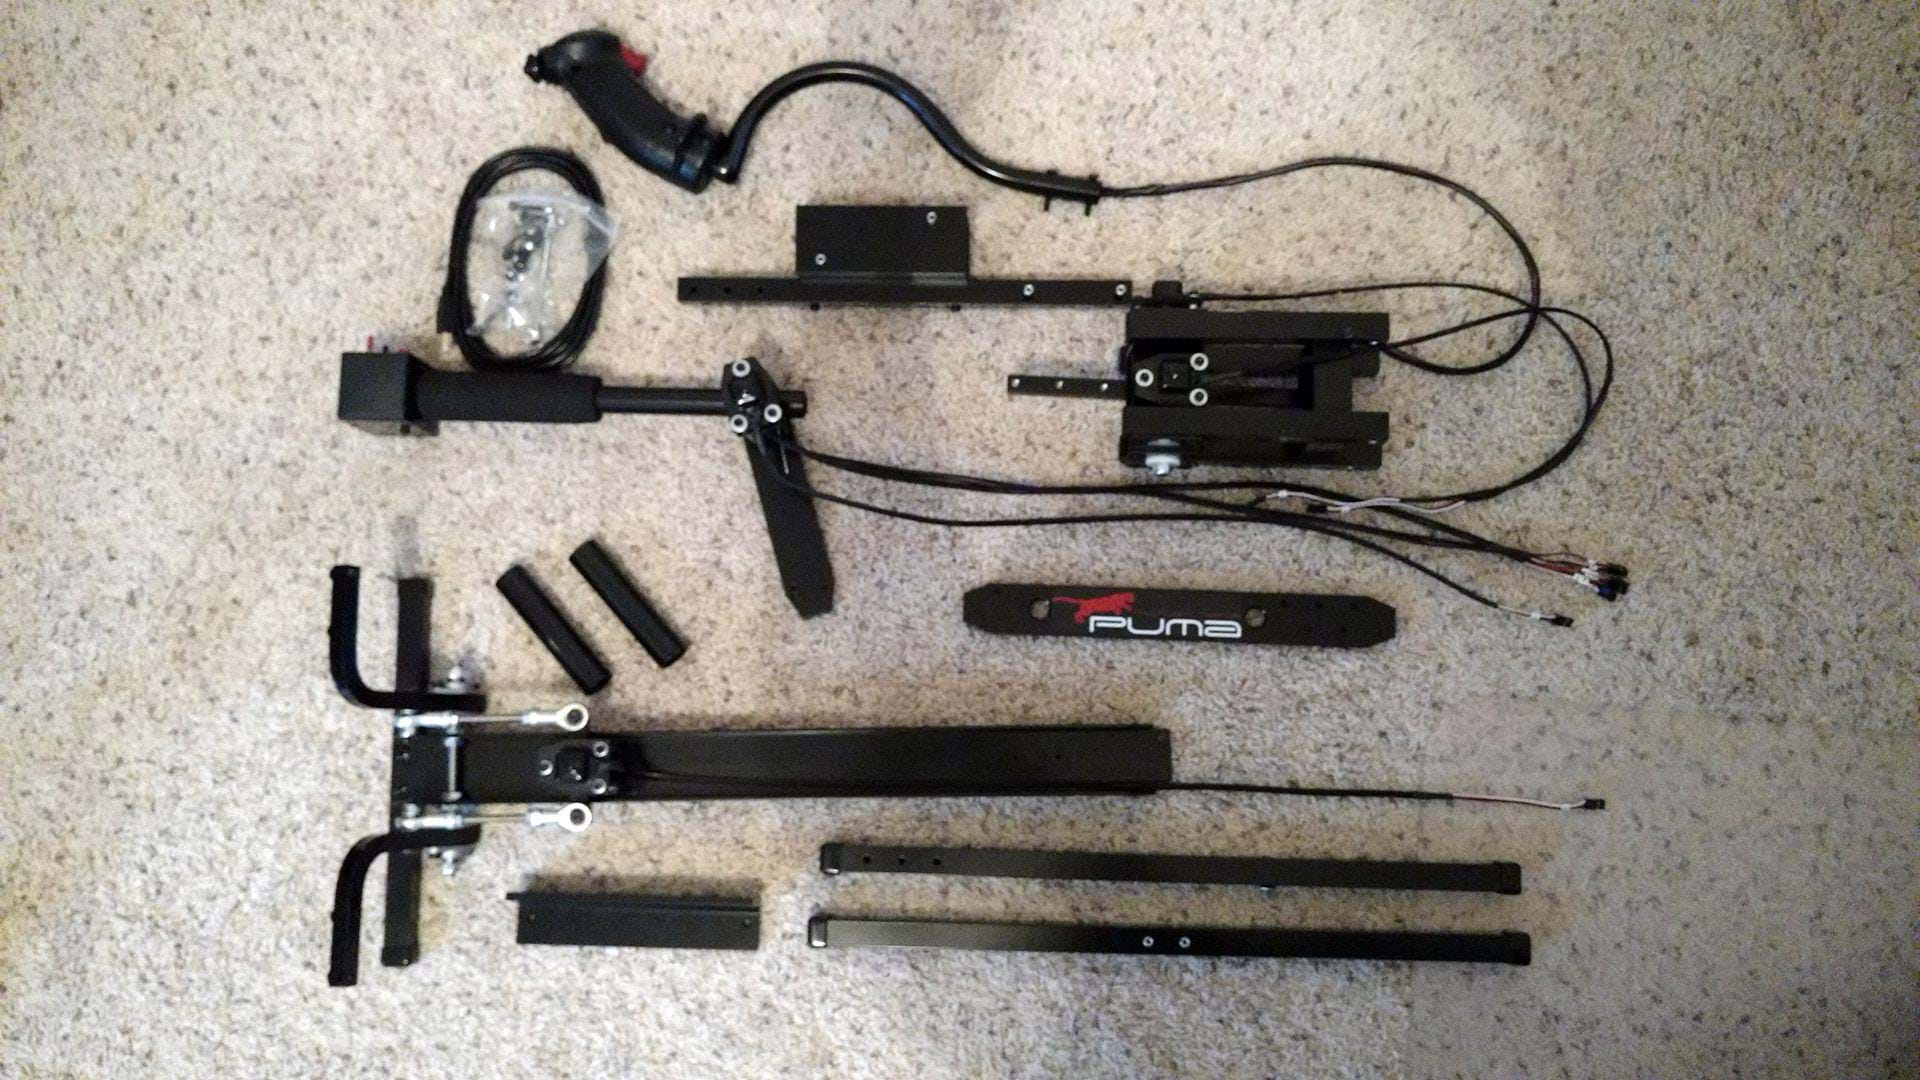
Assembly takes anywhere from 45 minutes to an hour. The pictures in the printed manual are very dark and hard to make out, but the digital version is very clear, and easy to use.
Setup
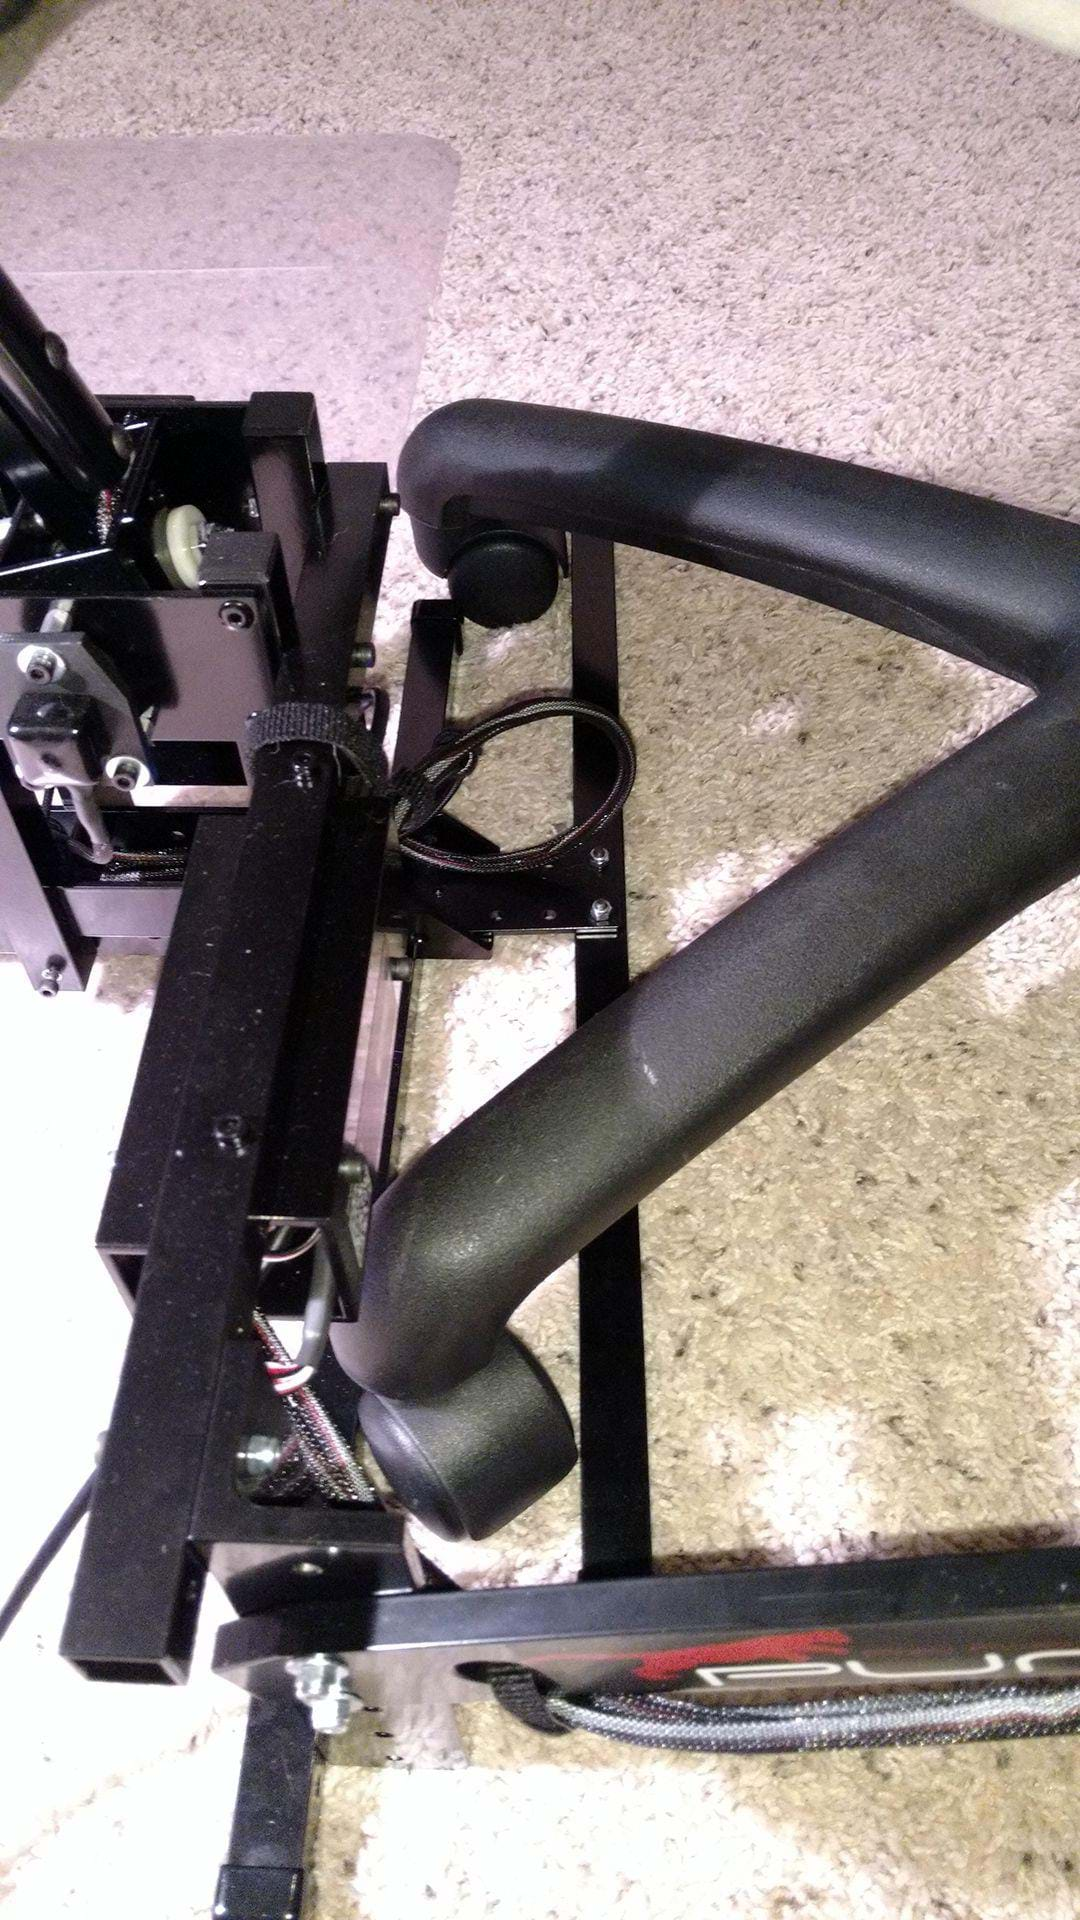
One of the best things about the Puma that most other helicopter flight controls on the market don’t have is its adjustments options. The pedal base, the Cyclic, and the collective all come pre-drilled with multiple mounting options that allow you to adjust the system to the user’s preference. This is actually a lot more useful than it sounds. When I say user’s preference, I don’t just mean what’s ergonomically comfortable for the user, although that can certainly be considered. To me this is a really important feature for two reasons.
- If the user is a real world pilot, he or she can adjust the cyclic, and collective position to be closer to what they would be in the aircraft they fly in the real world.This is important because when training, muscle memory is a big part of aircraft proficiency. This allows the user to perform simulated real world tasks in the simulator while simultaneously re-enforcing, or building muscle memory.
- The adjustment options allow for the user to adapt the system to virtually any type of chair.If you’re not a real world pilot, these adjustment options are still going to be very beneficial to you. I flew my original Black Lynx while sitting on a generic folding chair. It got the job done, but it wasn’t comfortable for long training sessions. After that I built my own custom chair out of wood and foam that was a lot more comfortable. Now most guys probably just want to use the chair that they already have. The PFT team thought of that. These adjustments allow the user to adjust the height of the cyclic and the collective for taller chairs, as well as a horizontal adjustment of the collective for wider chairs.
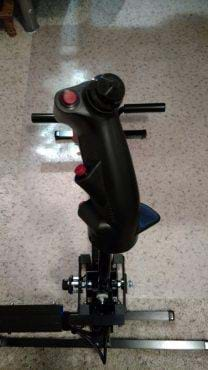
It took me about an hour of tinkering and adjusting to get the flight controls in a position that I liked. Here in the first picture you can see the system as it was right after I finished assembly.

And this is what I ended up with after an hour or so of flying and adjustments
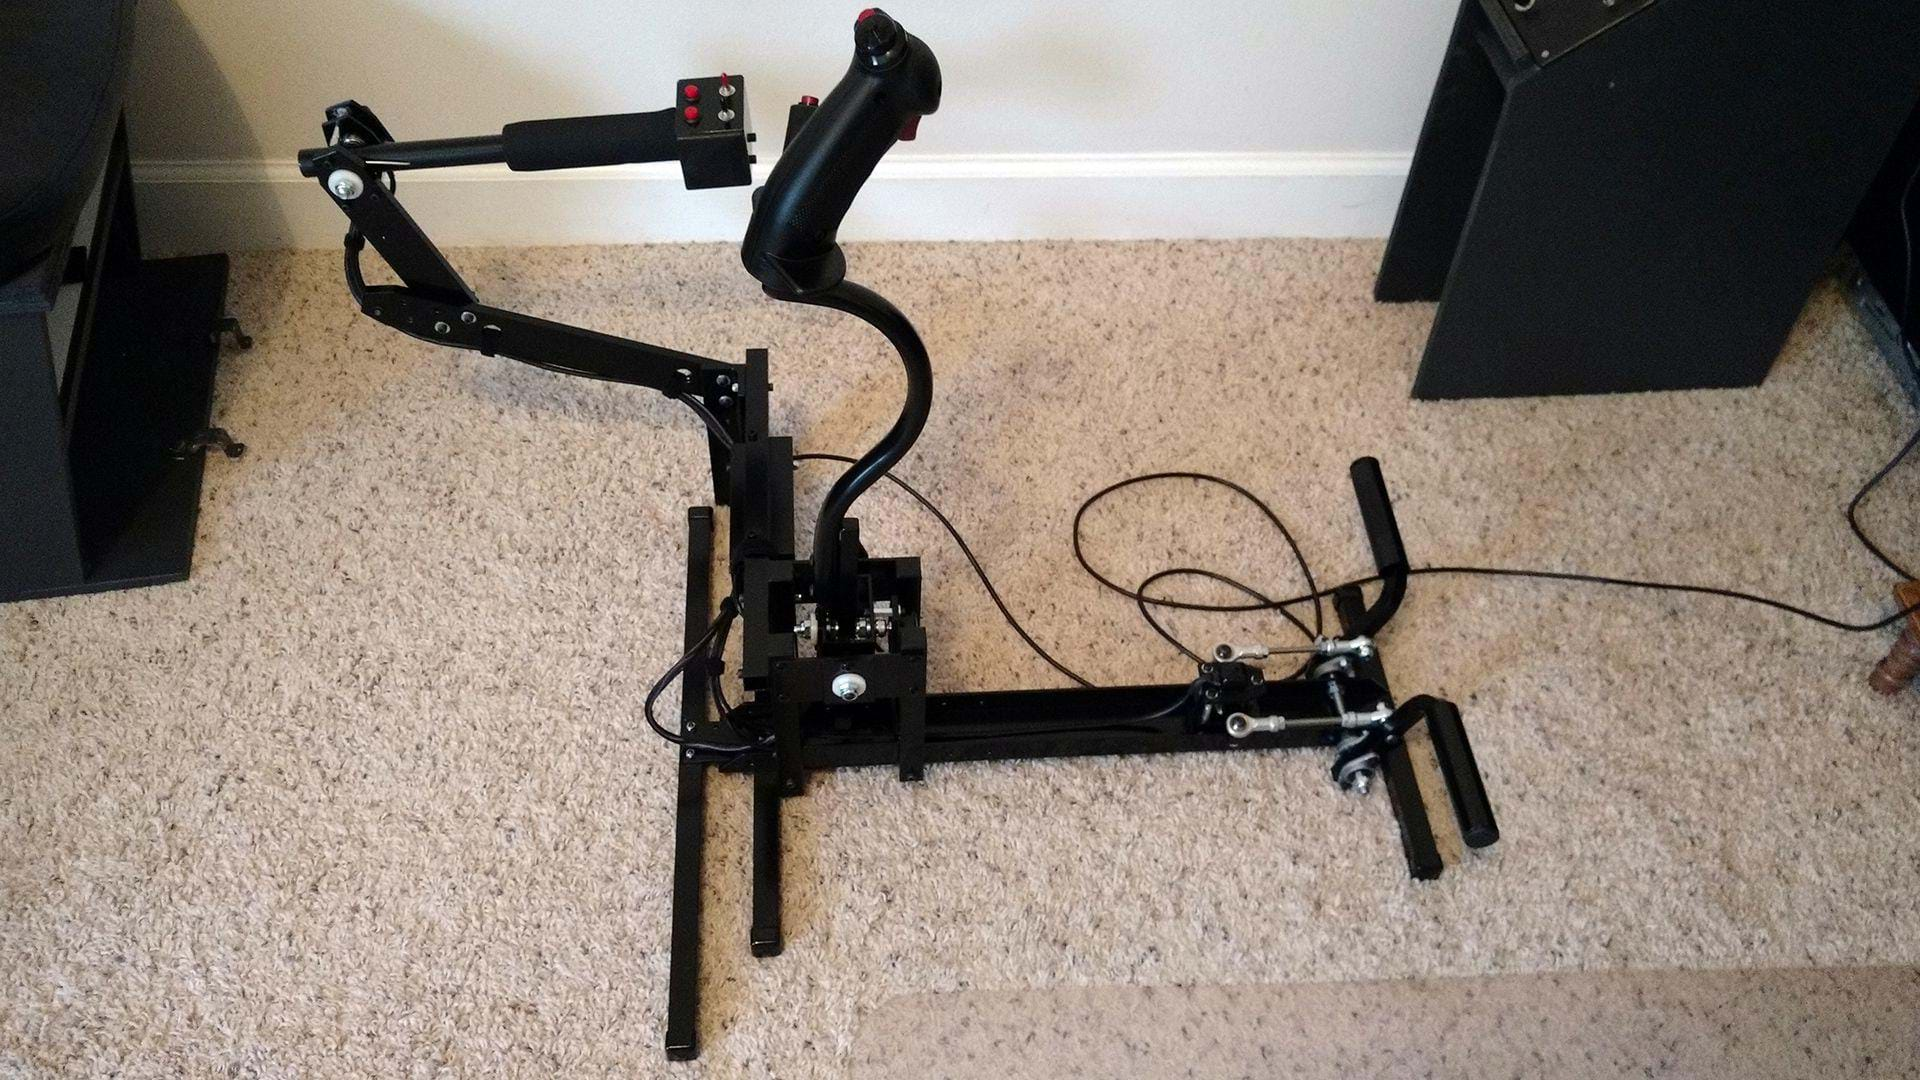
I moved the collective down and forward, the pedals forward and the cyclic back. This made the flight controls feel closer to what I’m used to in the aircraft that I normally fly. Normally the cyclic column is mounted to the front of the mounting post like in the before picture. I chose to mount it to the back to bring the cyclic closer to my seat, to more closely resemble the aircraft I fly in real life. Nothing in the Puma manual says to do this, and it’s something I did on my own.
Flight Controls
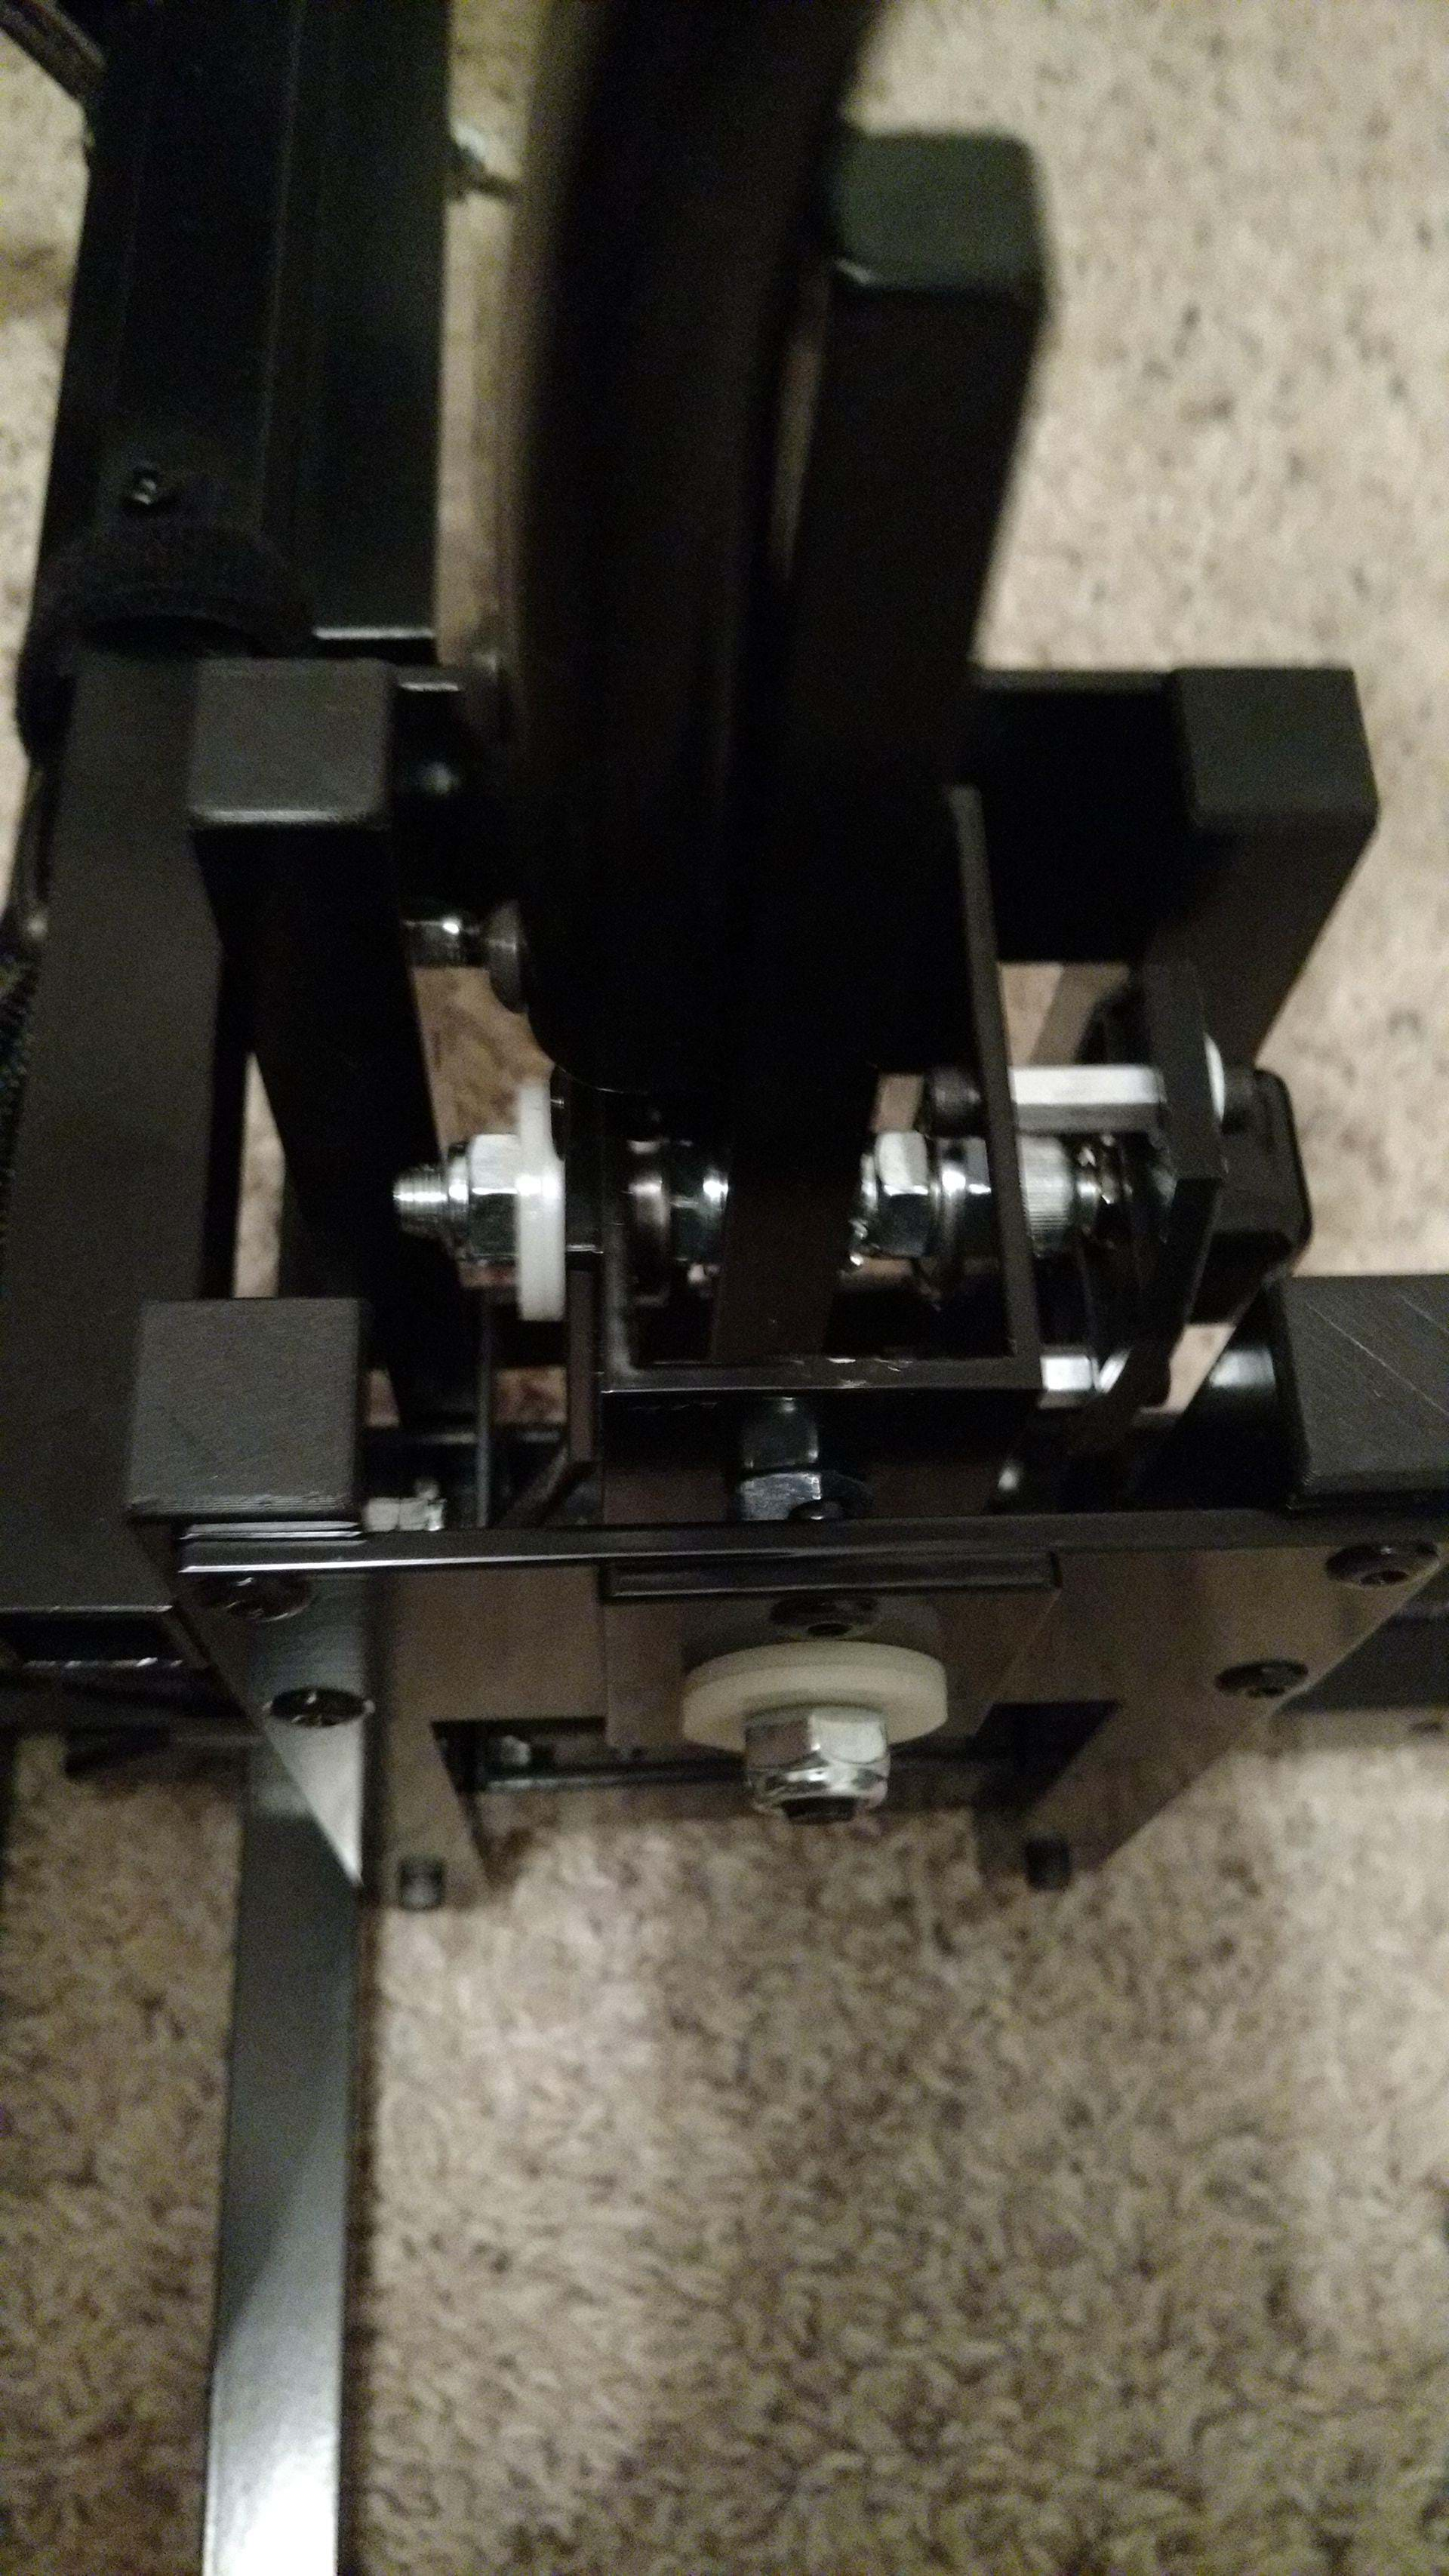
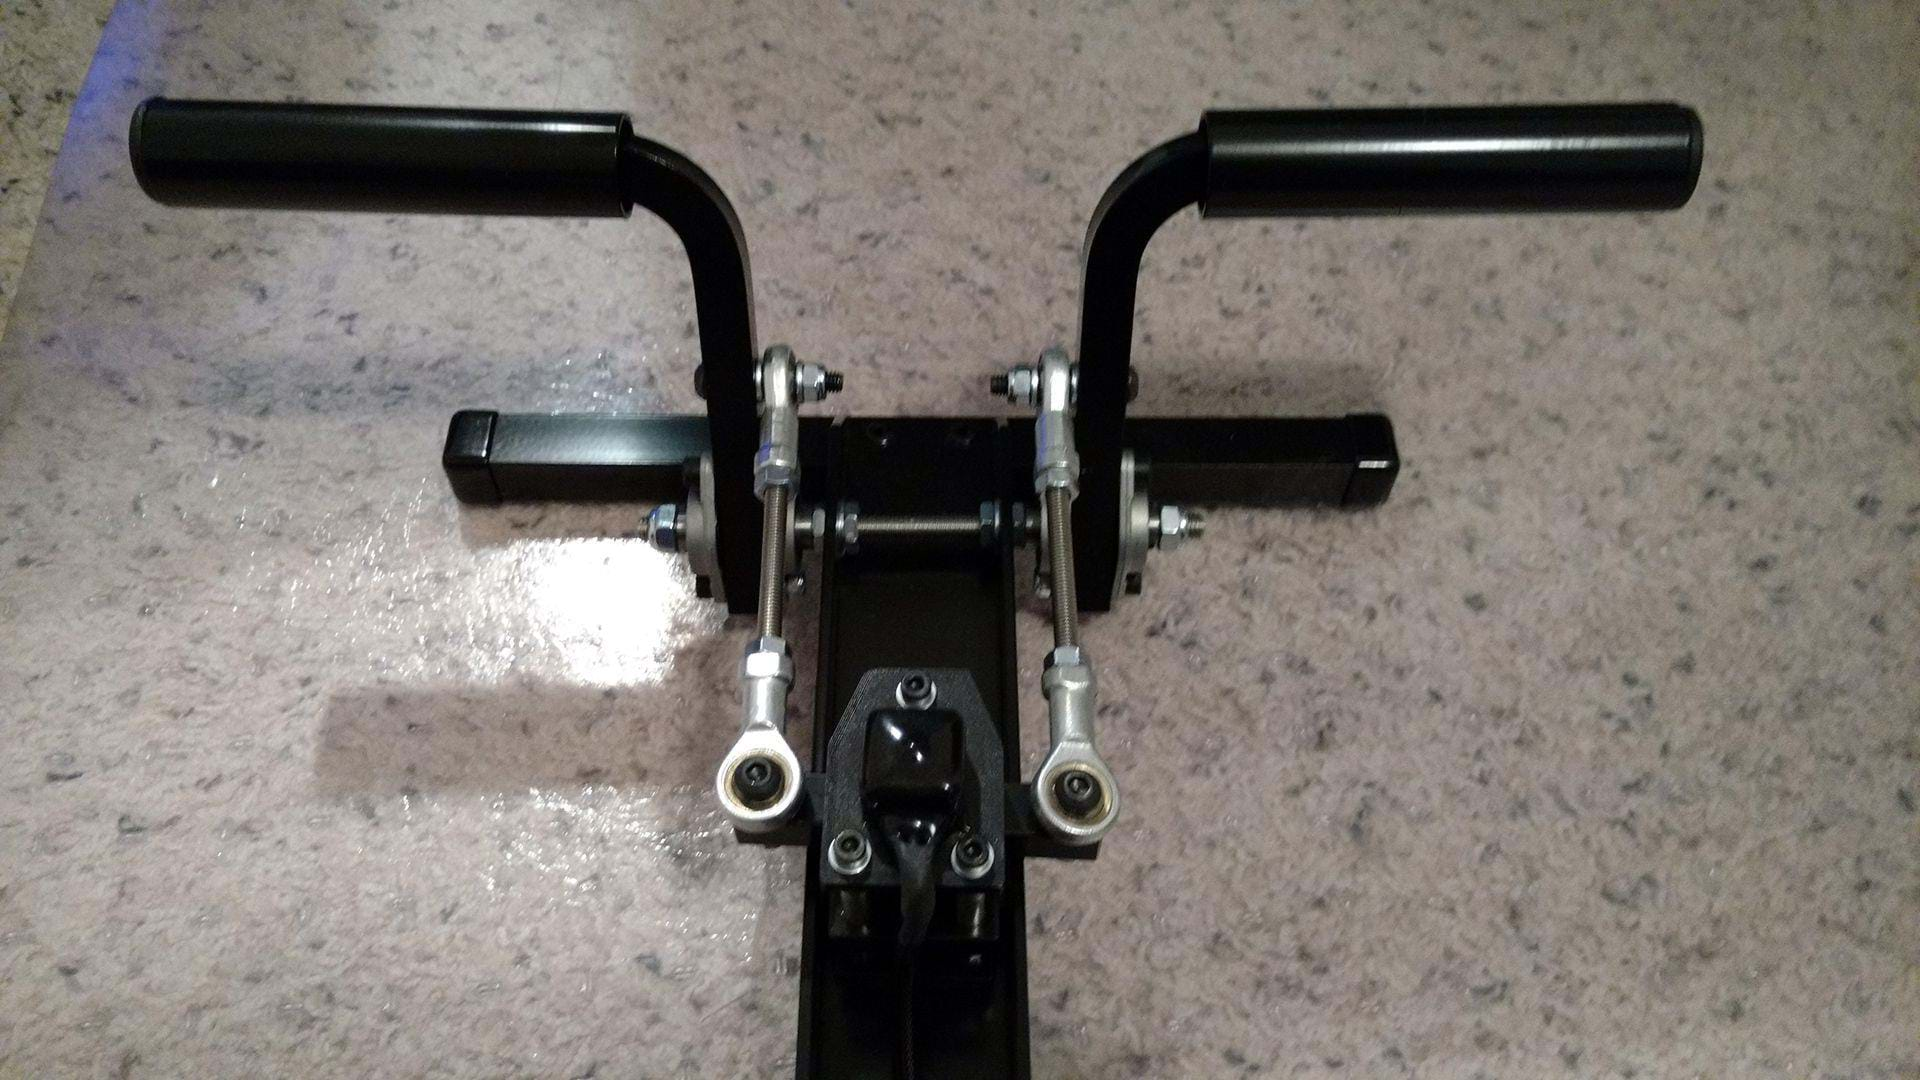
All of the flight controls come with an adjustable friction setting that the user can adjust to their taste. Be sure to read the instructions when it comes to the friction settings because it’s really easy to overdo it. With the right amount of friction, these flight controls feel similar to a hydraulically boosted set of flight controls. It’s not perfect, but it’s pretty close, and after a little while flying this system, you won’t even notice. The gimbals that the flight controls are mounted on are made of metal, they’re solid, and they’re very smooth.
Cyclic
The Cyclic grip on the Puma is a 1:1 scale replica of the B-8 flight grip that has been a common sight in American made helicopters since the 1960’s. I’m very fond of this flight grip, and it was one of the reasons I purchased the original Black Lynx. The B-8 is almost as Iconic as the aircraft you find them in. It’s not as ergonomic and high-tech looking as some of the modern cyclic grips like what you’d find on an AS350 or EC145, but it’s very comfortable in the hand, and provides easy access to all of the buttons. PFT even offset the cyclic just as it is in most helicopters to provide a more realistic, and comfortable feel.
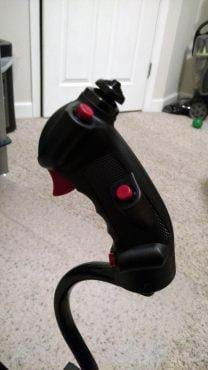
The cyclic column is all metal, and curved in the “goose neck” style commonly seen in helicopters. I think this was originally intended just for looks by PTF team, but it does have a practical purpose, just like in the real helicopters. For the people who user larger chairs, this will allow full aft cyclic without the cyclic column hitting the seat cushion.
Collective
The collective on the Puma is very generic looking. Unlike some other flight simulator collectives on the market, there’s no effort here to visually replicate any specific type of collective. It has a dense foam covered twist grip for the throttle, as well as a 2 buttons and 2 switches on the collective head. Even though there are only 2 buttons and 2 switches, there’s actually a lot more to it than that. 3x’s more to it to be exact.
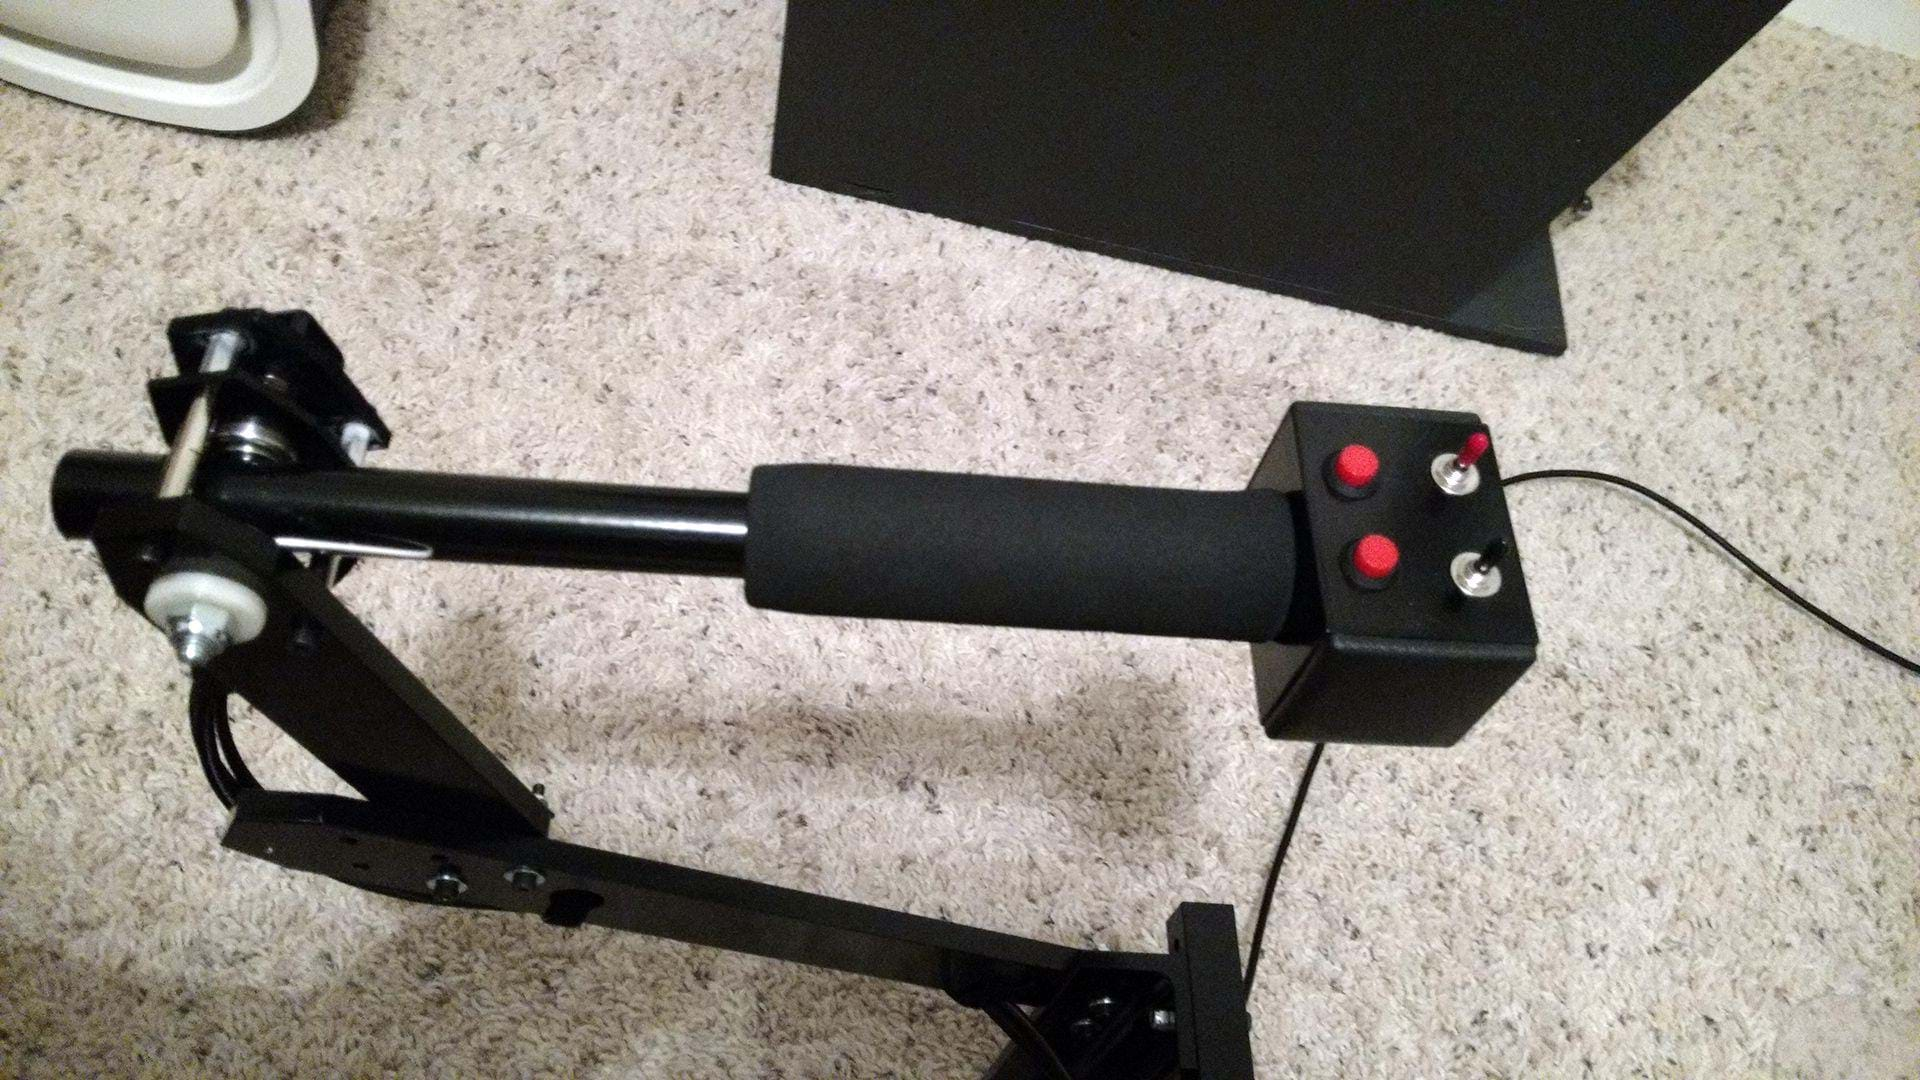
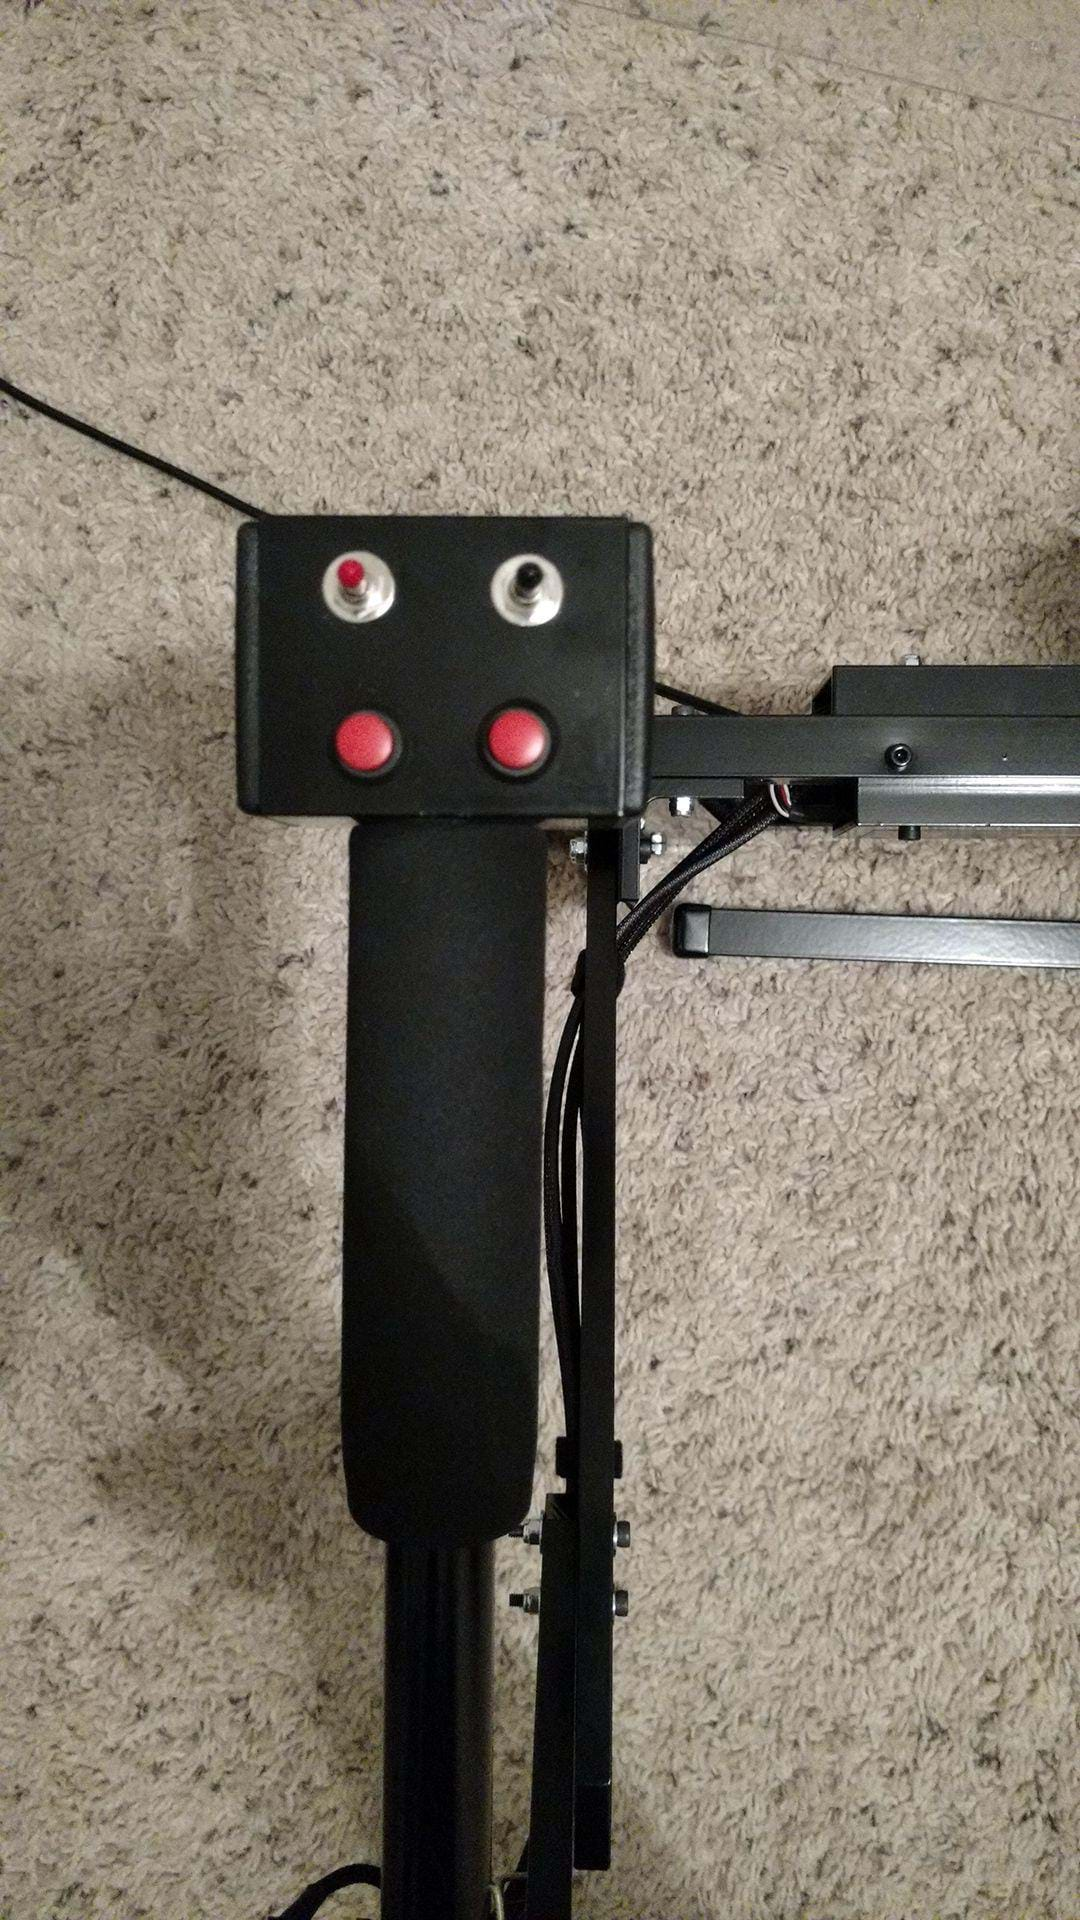
The black switch doesn’t really work as a switch in the simulator, so you can’t use it to turn your landing light on and off. But what it does do is act as a selector switch which in my opinion is far more useful. The black switch has three positions, forward, center and aft. Each position gives each of the 4 buttons on the cyclic, the hat switch, the two buttons on the collective, and the red switch a new button number. For example, when the black switch is in the center position, you computer will recognize the trigger on the cyclic as button 1. With the black switch in the aft position, it becomes button 11, and in the forward position it becomes button 21. In short, the black switch gives the user 18 buttons, 4 switches and 3 hat switches.
Pedals
The anti-torque pedals on the Puma are the biggest improvement over every Pro flight trainer that came before it.

These pedals are FANTASTIC! They’re all metal, and mounted on bearings that make them ultra smooth and durable. No matter how you place your feet on the pedals, you’re unlikely to get any sort of binding.
The pedals are another area where the difference between a helicopter set up and a fixed wing set up can change your experience. Sure, any set of CH, Thrustmaster or Saitek pedals will get the job done and enhance your experience, but you’re not really using your feet in the same way you would if you were flying a real helicopter. Virtually all the home use rudder pedals on the market are airplane based and use what I call full foot positioning. CH, Saitek, and Thrustmaster all have pedals that utilize full foot positioning that cause you to use a fore and aft sliding motion to move the pedals with the majority of your leg movement starting at the knee. However, in most helicopters, especially the smaller helicopters the Puma is meant to emulate, this type of movement is unrealistic. Helicopter pedals, for the most part, don’t work with a sliding motion. The precision required to maintain a hover would make those constant fine movements very difficult, especially for extended hovering in gusty wind conditions. Helicopter pedals generally pivot at one point at the bottom, and pedal input is made with the ball of the foot only. So instead of moving your entire foot with leg movement at the knee, the pilot’s heels rest on the cockpit floor, and the majority of the movement is made at the ankle with the heel as the pivot point.

The Pumas pedals are set up just like the majority of the light single engine helicopters flying today. This is a much more realistic positioning of the feet for helicopter flight. In my opinion it really adds to the experience, especially if you use home simulator training to supplement your real world flying.
The only drawback to the pedals is that there isn’t much resistance to them. Resistance in this sense is different than binding I want to be clear on that. When I say resistance, I mean the feeling that the pedals are connected to a helicopters push pull tubes and or hydraulic servos, which obviously these pedals aren’t. I imagine that to put any sort of hydraulic dampening to give resistance feedback on these pedals would increase its cost well above the price point the PFT team was shooting for. But even with the light feeling on the pedals this system is the best one I’ve tried so far.
Installation
The Puma is plug n’ play, it’s very simple. The Puma connects to your computer using a single USB cable which is nice because that leaves USB ports open for other things like radio stacks, and switch panels.
Just like any other home use flight control system you’ll still need to calibrate it, and this is probably the most difficult part of using this system. The cyclic of the Puma is not self centering, which is a good thing, but that makes it somewhat difficult to calibrate because it’s hard to find where the center is. So there is some guess work involved to find the center position.
How well does it work?
The Puma works very well in FSX, X-plane 10, and DCS. However I think you’ll get the most out of it in DCS and X-plane 10 due to their higher fidelity helicopter flight modeling. It still enhances the simulator flying experience is FSX, but FSX doesn’t allow these flight controls to live up to their full potential.
When I switched to X-plane 10, I was blown away by the Pumas capabilities. When matched with the DreamFoil Helicopters, the Puma really shines. I can tell you that the cyclic is sensitive enough for me to transfer my real world flying habits to the Puma with little to no adjustment in X-plane and DCS. Flying the new DreamFoil S-300CBi with manual throttle is an absolute blast with the Puma. Engine starts with the DreamFoil Bell 206 are really fun too. It’s very easy to map the starter button and idle release latch to the two buttons on the collective for a realistic engine start experience.
Another great thing about the Puma is that it has a relatively small foot print. You get all of the functionality of a larger more expensive flight control system, in a light weight compact package, so if you don’t have a lot of space, the Puma tucks neatly in a corner when not in use.