Performing an autorotation is not too hard if you keep your cool and keep your helicopter within the required parameters. If you play your cards right, you’ll be able to settle down safely on a spot chosen by you.
Some believe an engine failure in a helicopter is safer than an engine failure in a fixed-wing aircraft (considering both aircraft will have only one engine, of course), and they might be right.
Let’s start from the top and understand what an autorotation is and how you should react in case you lose your engine(s).
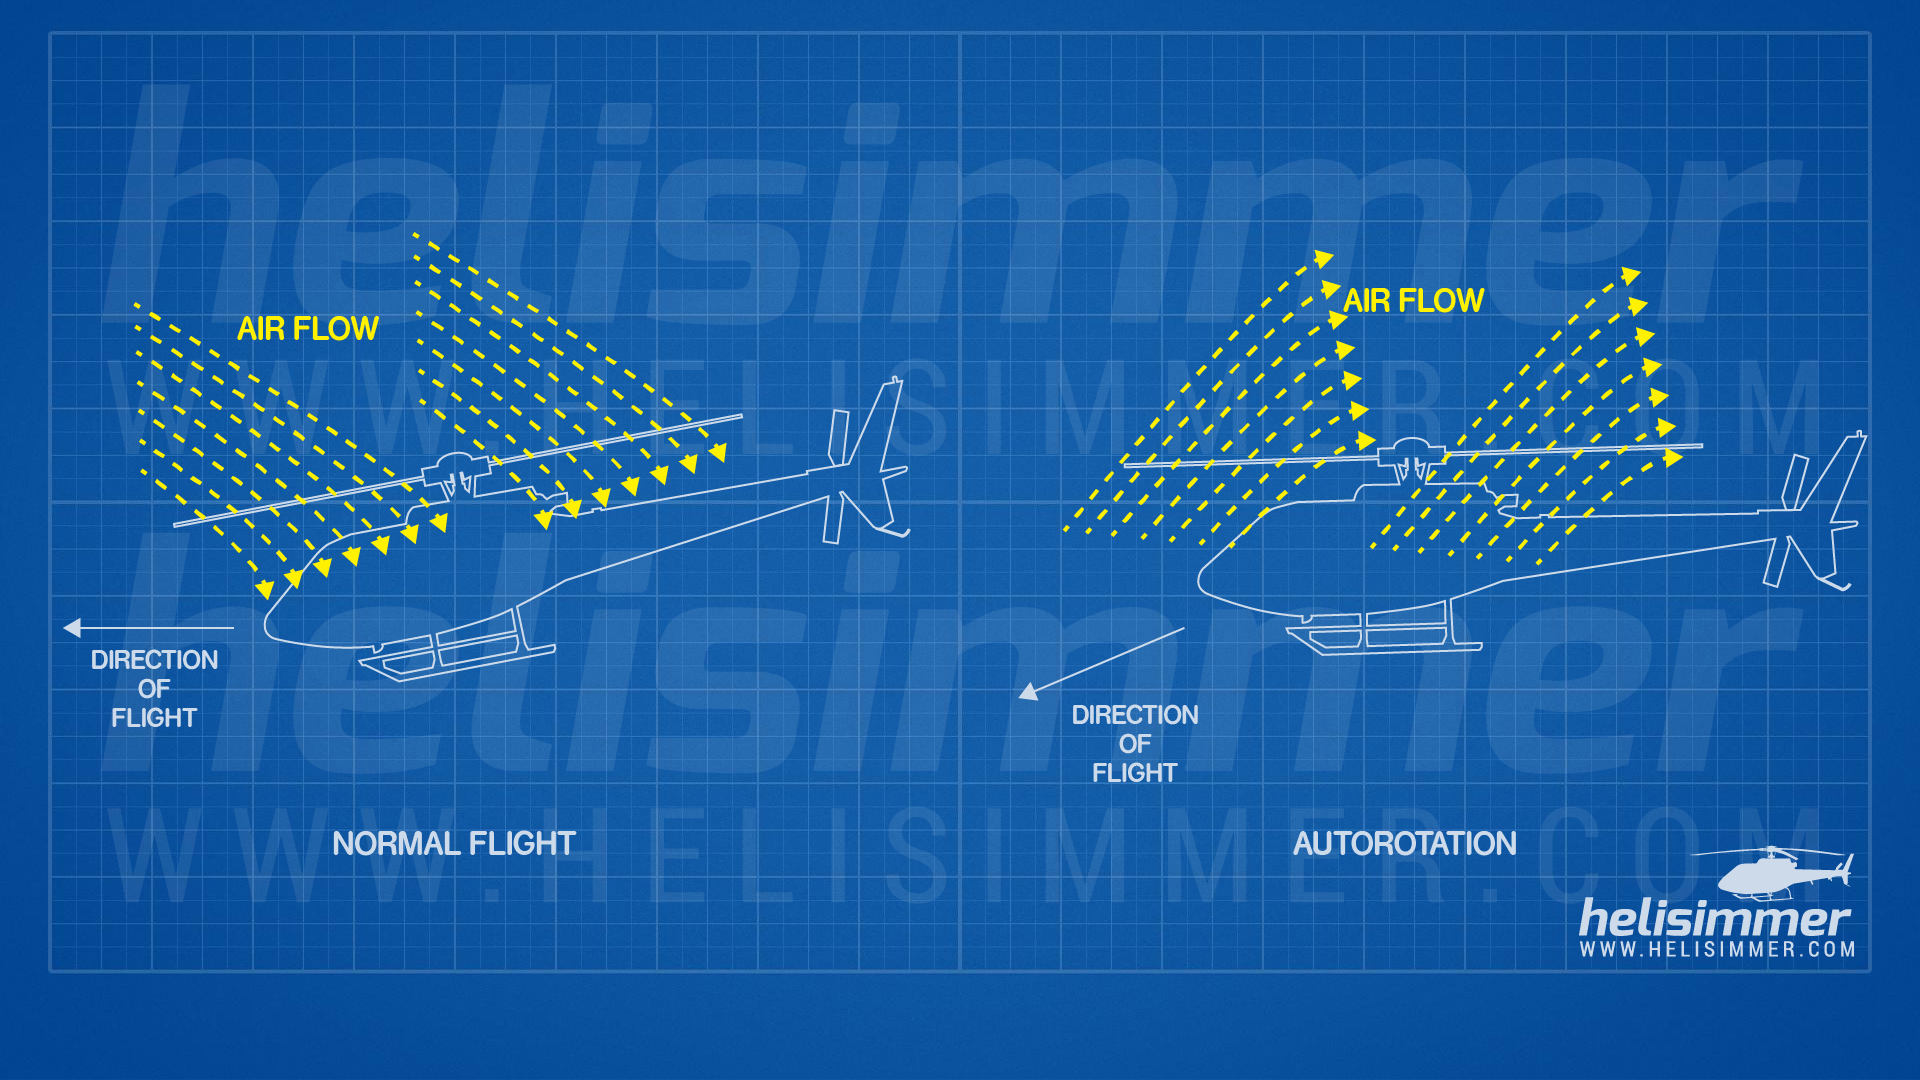
When the engine’s running, it makes the rotor spin and air is pushed downwards. The rotor provides lift this way and the helicopter stays in the air.
When the engine stops, the rotor rotation tends to drop but as well. If the rotor was not disconnected from the engine, it would eventually stop. For that reason, there’s a piece of hardware called a freewheeling unit. The freewheeling unit disconnects the rotor from the engine once it detects the engine is running at a lower RPM than the rotor. This allows the rotor to enter an autorotative state.
Think of it as if you were riding a bicycle. The back wheel would be your rotor and your pedals and feet would be the motor. If your stop pedaling the back wheel keeps on turning. That’s what happens in a helicopter with the engine and the rotor.
The rotor will then keep spinning (up to a point) and still generate lift – enough for you not to drop too fast and plunge into the ground. But you will need to keep your rotor spinning. You’ll be asking yourself right now: how can I do this if the engine stopped?
Enter physics.
To keep the rotor spinning, you’ll need to keep the air flowing between the rotor blades, meaning you need to reduce drag on the rotor blades and keep moving forward.
Your first move after losing your engine (or engines on a multi-engine helicopter) is then to floor the collective. Drop it. Fast. Yes, you will lose altitude and, as such, you’ll need to control your speed. But you will keep the rotor spinning in a way that will provide you lift. And that’s your top priority right now.
The ideal autorotation speed will depend from helicopter to helicopter. For the AS350, for example, the recommended speed is 65 knots. It's not as if the rotor will stop if you reduce your speed but you will eventually lose lift and you'll start a steep descent, which can lead into trouble if you don't control it.
Since we have our speed (and lift) under control, it’s time to look for a place to land. Hopefully, some place with no obstacles leveled and where we can land facing the wind (remember, helicopters like to be facing the wind – and it will make your life easier).
Keep an eye on your speed and control the descend rate using your cyclic. You will also need to keep an eye on your rotor RPM as, during an autorotation, it will tend to overspeed. So, you'll need to keep things within normal parameters using your collective.
The final part of the maneuver may happen really fast so make sure you understand all the following steps and are ready to reproduce them.
At around 60 feet above the ground, start flaring to reduce your speed. In real life training (where the engine does not stop but is, instead, put into idle), this is where the engine’s spooled up again, collective is added and off you go again. Very rarely, if ever, you will experience a full down autorotation while practicing the maneuver. Not only it’s a risky move but it also tends to damage your skids. Some flight schools do perform them, but it's not a regular procedure on a lot of schools out there.
On a full auto, though, you’ll get your helicopter on the ground. So, by now, you are reducing your speed and, at around 20-25 feet above the ground, it’s time to start adding collective to reduce your vertical speed and touch down as gently as possible by using the remaining RPM you have stored in your rotor.
This is a tricky situation. Too much collective and you’ll lose your rotor RPM very fast and may lose lift and/or the control of the aircraft. Too little collective and you can see yourself on a very rough landing.
Keep the helicopter movement forward and land and do not attempt to hover. You’ll be touching down with forward speed.
As soon as you touch down, fully lower the collective again. If you did everything right (and had some luck as well) you and your helicopter should have survived an autorotation. Good job!
Step by step
Let’s review the process, step-by-step:
- Immediately fully lower the collective
- Adjust your speed to the one recommended for your helicopter (~65kts for the AS350)
- Find a good location for landing
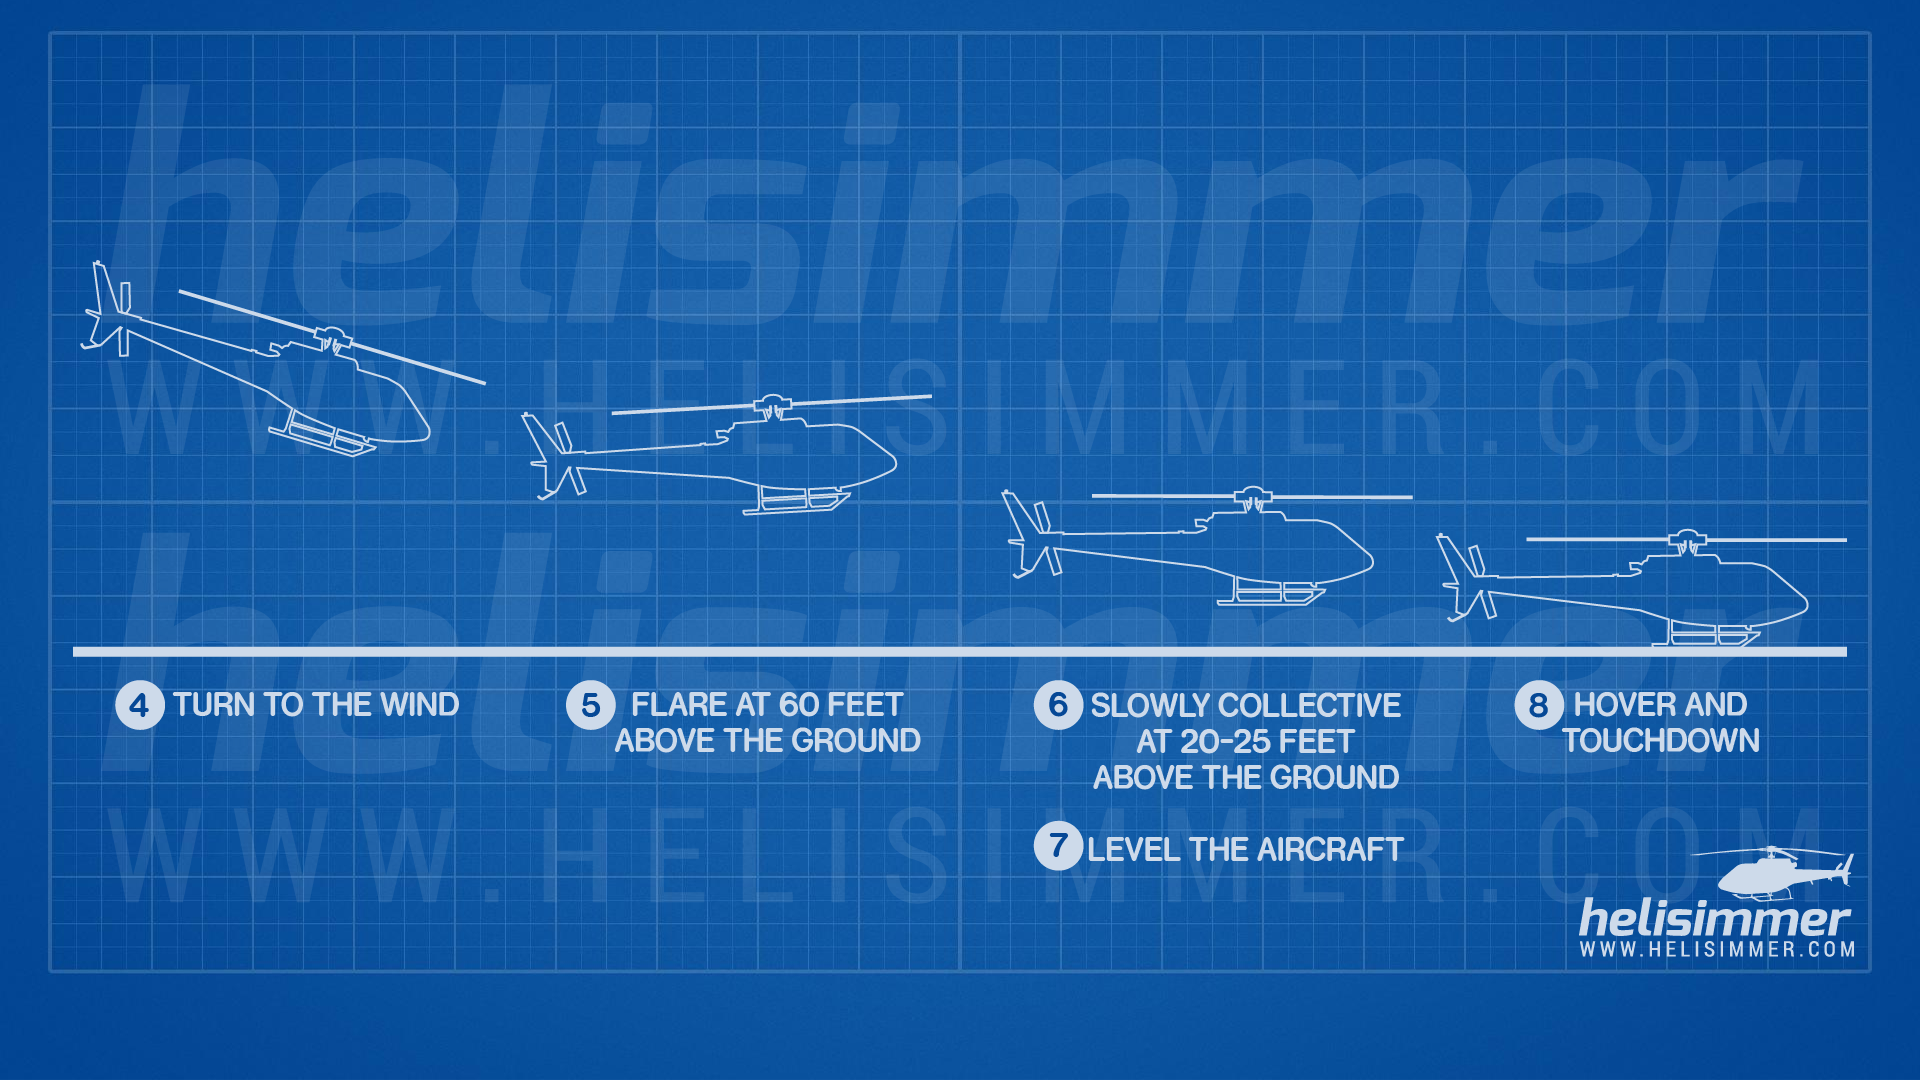
- If possible, turn to the wind
- At around 60 feet above the ground, flare to reduce speed
- At around 20-25 feet above the ground, gradually apply collective to cushion your descent
- Level the helicopter prior to touching down
- Fully lower the collective once you touch down
Autorotation in sims
Autorotation depends a lot on the physics that the simulators manage to, well, simulate. Some sims do it better than others. Some developers have managed to break some boundaries and today most of the aircraft in the market – regardless of the sim – allow you to perform autorotations.
Nonetheless, until some time ago, autorotations were a very good indication of how bad or how good a sim was.
FSX and P3D
FSX and P3D are not the best sims for autos but some developers managed to surpass that. The default aircraft in FSX are not capable of performing autorotations very well – or at all. On these aircraft, you will need to raise the collective to keep your rotor spinning at around 80% or it will simply stop, no matter the speed at which your helicopter will be flying.
Some newer addons allow you to perform autos way better but, still, they are not perfect.
X-Plane, DCS, FlightGear
As usual, these are the sims that will offer you the best physics for autorotations. Any of them depicts this very well and you can simulate them pretty well.
You can actually compare them to the real thing just like our friend Joshua Hamby has shown on his video below. In his video, Joshua compares a real-life auto with one performed in X-Plane. Of course, in sim videos are only as realistic as how you perform your maneuvers. Joshua could be all over the place since his life was not at stake. But, when following procedures, you will have a very realistic experience and reaction from your sims.
Conclusion
Autorotations are a life-saver but they can also be very complex. I tried to keep everything simple but, at a later time, we may revisit them for some of the most twisted and hard stuff that you may find.
Fortunately, we don’t need to worry about an engine loss in the sim that much as it won’t kill us. But if you are into flying realistically and you want to be ready for whatever comes your way, this is a maneuver you’ll want to practice and master.
If you’re not into all that realistic stuff, it’s still a very fun maneuver to practice and a real challenge. Do give it a try.
Credits
I’d like to thank Joe Hudson for all the help and support while writing this article as well as the video.
How to fly helicopters series
Check out the other articles on this series. Click here to see all the available material we have.